Vision Phoenix 1212 S5 User Manual
32
© 2018 Vision Engraving & Routing Systems
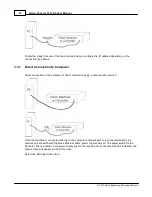
Follow the steps from one of the two sections below to configure the IP address depending on the
connection type above.
3.3.1 Direct Connection to Computer
Direct connection to the computer or direct connection using a network hub or switch.
Once the machine is connected directly to the computer's network port or is connected directly to a
network hub or switch with the black Ethernet cable, power the machine on. The power switch for the
Phoenix 1212 is located on the power supply box for the machine. Once the machine has initialized, the
home screen will appear on the LCD screen.
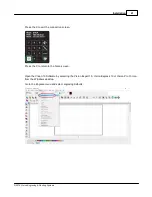
Select the Settings Screen icon.
Содержание Phoenix 1212 S5
Страница 1: ... 2018 Vision Engraving Routing Systems Vision Phoenix 1212 S5 User Manual Revised 12 7 2018 ...
Страница 16: ...Vision Phoenix 1212 S5 User Manual 16 2018 Vision Engraving Routing Systems ...
Страница 24: ...Vision Phoenix 1212 S5 User Manual 24 2018 Vision Engraving Routing Systems The installation will continue ...
Страница 44: ...Vision Phoenix 1212 S5 User Manual 44 2018 Vision Engraving Routing Systems ...
Страница 113: ...Step by Step Operation 113 2018 Vision Engraving Routing Systems ...
Страница 121: ...Step by Step Operation 121 2018 Vision Engraving Routing Systems ...
Страница 123: ...Step by Step Operation 123 2018 Vision Engraving Routing Systems ...
Страница 147: ...Optional Accessories 147 2018 Vision Engraving Routing Systems ...
Страница 148: ......

