3 – 6
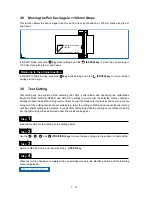
To preserve the pen life, set the FORCE to the lowest setting, and set the SPEED after checking to confirm
that there are no faint lines or other problems during plotting.
■
Selecting Cutter-Pen-Condition Setting Areas
To set the cutter-pen conditions, first select the setting area (condition number). Switching between these
setting areas enables any of up to eight predefined media types to be selected easily.
Press the
(COND.) key in READY mode to display the cutter-pen conditions.
To select condition settings that have previously been stored, use the
or
key to select the desired
condition number stored on the cutter-pen-condition settings display (the number at the left of the display),
and then press the
(ENTER) key. To cancel the selection, press the
(NEXT),
(PREV.), or
(COND.) key.
■
Storing Cutter-Pen-Condition Setting Areas
The cutter-pen conditions can be stored in nine setting areas numbered “1” to “9.”
To display the cutter-pen conditions, either press the
(COND.) key when the cutting plotter is in READY
mode, or when the media set lever is lowered and the buffer is in the empty (cleared) status.
The current settings are displayed (from the left): condition number, PEN TYPE (cutter blade), CUTTER
OFFSET, FORCE, SPEED, and QUALITY.
The item to be changed is indicated by the symbol. Press the
key to change the symbol to , and
press again to move it to the right. Press the
key to move it to the left. Use the
or
key to select
the parameter to be changed, and use the
or
key to select the setting details. Press the
(ENTER) key to confirm. To cancel the selection, press the
(NEXT),
(PREV.), or
(COND.) key.
• If the SPEED and QUALITY settings are set to high values, the cut/plotted
results will have a coarser finish, but the overall cutting/plotting time will be
reduced.
• If the SPEED and QUALITY settings are set to low values, the cut/plotted results
will have a finer finish, but the overall cutting/plotting time will be longer.
Selection method
Data from the controller is used for condition number 9.
Storage method
When using the optional registration mark scanner, condition settings 1 and 2 are
used for the pen settings when performing “Adjusting the Registration-mark Read-
ing Sensor (2)” (refer to page 4-17). It is therefore more convenient if the cutter pen
settings are assigned to 3 to 8 first.
CHECKPOINT
2
0 9 U + 1 2 3 3 0 2
CHECKPOINT
2
0 9 U + 1 2 3 3 0 2
CHECKPOINT
Содержание Qe60
Страница 1: ...Vinyl Express Qe60 USER S MANUAL MANUAL NO VEXQe06 UM 151 CUTTING PLOTTER Signwarehouse com ...
Страница 2: ......
Страница 6: ...iv ...
Страница 28: ...2 14 ...
Страница 42: ...3 14 ...
Страница 94: ...4 52 ...
Страница 100: ...5 6 ...
Страница 110: ...A 4 Appendix C External Dimensions Units mm Dimensional accuracy 5 mm 851 585 1004 ...
Страница 112: ...A 6 ...


