background image

PTAM Manual ©Vidicode 2002 

18  

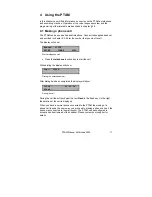
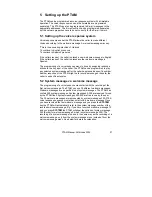
4.2  Turn the answering machine on 

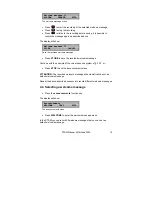
When the answering machine is turned off the display will show: 

Monday   22-04-02  11:03 
Audio Recorder  

Answering machine Off 

Use the

 home/away

 function key to turn the answering machine On. When 

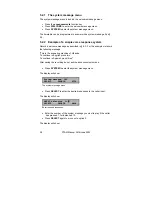
the answering machine is On the display will show: 

Monday   22-04-02  11:03 
Answering Machine  

Answering machine On 

Use the

 home/away

 function key to turn the answering machine Off again. 

4.3  Record a welcome message 

 Press the 

announcements 

function key. 

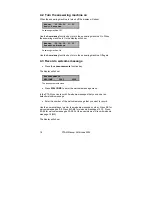
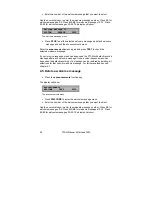
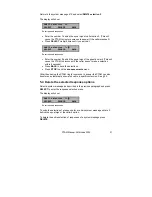
The display will show: 

Announcements 
WELCOME     TEST      STOP 

The announcements menu 

 Press 

WELCOME

 to enter the welcome message menu. 

In the PTAM you can record 30 welcome messages that you can set as 
default welcome message. 

  Enter the number of the welcome message that you want to record. 

Use the numerical keys to enter the welcome message number. Press 0-9 for 
welcome messages 0-9. Press 

À

0-

À

9 for welcome messages 10-19. Press 

#0-#9 for welcome messages 20-29. For the example we will record welcome 
message 15 (

À

5).  

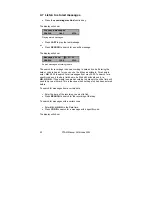
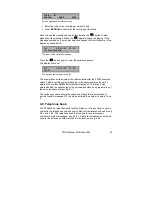
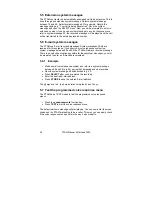
The display will show: 

Содержание PTAM

Страница 1: ...nicatie BV Blauwroodlaan 140 2718 SK Zoetermeer The Netherlands Tel 31 79 3617181 Fax 31 79 3618092 vidicode vidicode nl www vidicode nl USA VIDICODE Datacommunications P O Box 3288 Wilmington N C 28406 Tel 910 452 5600 Fax 910 254 3525 sales vidicode com www vidicode com ...

Страница 2: ...PTAM Manual Vidicode 2002 2 ...

Страница 3: ... Turn the answering machine on 18 4 3 Record a welcome message 18 4 4 Selecting a welcome message 19 4 5 Delete a welcome message 20 4 6 Listen to new messages 21 4 7 Listen to stored messages 22 4 8 Telephone book 23 4 8 1 Save a number in the telephone book 24 4 8 2 dial from the telephone book 24 4 8 3 Coupling extension numbers to system messages 25 4 8 4 E mail function of the Telephone book ...

Страница 4: ... 1 Network configuration 37 6 1 1 Network active 37 6 1 2 FTP active 38 6 1 3 FTP user 38 6 1 4 FTP password 38 6 1 5 FTP server port 39 6 1 6 DHCP server 40 6 1 7 IP address 40 6 1 8 IP subnet mask 41 6 1 9 Gateway 41 6 1 10 IP name 42 6 2 Setting up the E mail function 42 6 2 1 E mail address 42 6 2 2 Reply address 43 6 2 3 SMTP server IP address 43 6 2 4 SMTP server port 44 6 2 5 Domain name 45...

Страница 5: ...Silence threshold 52 7 2 4 Silence period 53 7 2 5 REC vs REC PLAY 53 7 2 6 Recording quality 53 7 2 7 Microphone amplification 54 7 2 8 Use start switch 54 7 2 9 Playback volume 55 7 2 10 Use foot switch 55 8 Remote operation of the PTAM 57 8 1 Enter the Remote Control menu 57 9 Use the PTAM as a recorder 59 9 1 PTAM as call recorder 59 9 2 PTAM as microphone memo recorder 59 10 Acknowledgements ...

Страница 6: ...PTAM Manual Vidicode 2002 6 ...

Страница 7: ...es to any local or external E mail address The PTAM has a standard E mail address to mail but the PTAM can also be programmed with different E mail addresses for different extension numbers See the phone book functions for this option A programmable voice response system with timetable The programmable voice response system allows for the programming of different voice response scenarios The progr...

Страница 8: ...tuguese Dutch French German and Italian The compression c q recording quality can be set as well A higher compression reflects a reduced audio quality The standard Digitalk compression resembles general audio quality of mobile telephones The PTAM has full network and E mail capabilities It is possible to program the PTAM to E mail messages to particular E mail addresses according to extension numb...

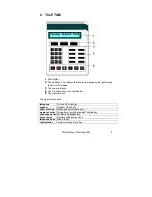
Страница 9: ...The 8 function keys See table below 5 The recorder keys The eight function keys telephone On and Off Hook key speaker Speaker On Off key answ machine Message search function key memo recorder Microphone recordings search function key announcements Welcome messages key home away Network settings menu key telephone book Disk info key configuration System settings menu key ...

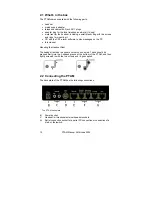
Страница 10: ... player software to play messages on the PC this manual Mounting the Headset Rest The headset rest has two square corners on one side These should be pressed firmly into the L shaped groove at the bottom of the PTAM and then tightly screwed in with the two screws and rings supplied 2 2 Connecting the PTAM The back plate of the PTAM has the following connections The PTAM back plate B Power socket C...

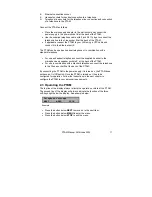
Страница 11: ...t telephone connect the supplied headset to the microphone and speaker sockets C at the back of the PTAM For use in combination with a standard telephone connect the telephone to the Phone socket G at the back of the PTAM By connecting the PTAM to the power supply it is turned on the PTAM does not have an On Off switch Once the PTAM is turned on it has to be configured for operation Follow the ins...

Страница 12: ...PTAM Manual Vidicode 2002 12 ...

Страница 13: ...the Clock Press the configuration button Press NEXT four times The display will show Clock Mo 22 04 02 11 03 NEXT CHANGE STOP The Clock Press CHANGE to change the setting of the clock Clock o 22 04 02 11 03 STORE CANCEL Setting the clock Press key s 1 7 to set the day of the week The default date and time format is DD MM YY andMM HH when American has been set as language the format is changed to M...

Страница 14: ... Password active No NEXT CHANGE STOP Setting the Password Press CHANGE to enter a password Password 000 STORE CANCEL Enter a password Press STORE to enable the entered password Press STOP to exit the menu From this point on you will be prompted for the password before entering the menus 3 1 3 Remove Password protection Press the configuration button Press NEXT once Enter the password and press CON...

Страница 15: ...exit the menu 3 1 5 Reset all values Use Reset all values to reset all system values LAN settings are not affected by the Reset all values operation Press the configuration button Press NEXT seven times The display will show Reset all values No CHANGE STOP Reset all values Press CHANGE to enable the Reset all values operation Reset all values Yes CHANGE STOP Reset all values enabled Press STOP to ...

Страница 16: ...PTAM Manual Vidicode 2002 16 ...

Страница 17: ...AR STOP Start a telephone call Press the telephone function key to start the call While dialing the display will show Dial 01234 Dialing the entered number After dialing has been completed the display will show 01234 00 00 06 Flash During the call During the call the softkey below the text Flash is the flash key On the right the duration of the call is displayed When you have a normal phone connec...

Страница 18: ...ering machine Off again 4 3 Record a welcome message Press the announcements function key The display will show Announcements WELCOME TEST STOP The announcements menu Press WELCOME to enter the welcome message menu In the PTAM you can record 30 welcome messages that you can set as default welcome message Enter the number of the welcome message that you want to record Use the numerical keys to ente...

Страница 19: ... save the recorded welcome message Continue with the example of the voice response system of 5 2 2 or Press STOP to exit the announcements menu ATTENTION The recorded welcome message will automatically be set as default welcome message Repeat the above described sequence to record different welcome messages 4 4 Selecting a welcome message Press the announcements function key The display will show ...

Страница 20: ...o prior voice response menu has been used the PTAM will default record a message after each welcome message Once a voice response menu has been used the default recording of a message can be restored by deleting all selections for that specific welcome message For further explanation see chapter 5 1 4 5 Delete a welcome message Press the announcements function key The display will show Announcemen...

Страница 21: ...playing the messages The display will show 1 3 _ _ _ _ _ 00 00 24 05 12 02 13 05 00 00 04 Playing back message 1 After all the new messages have been played the PTAM will automatically ask to store or delete the messages 3 3 05 12 01 13 05 STORE 59 DELETE Store or delete new messages In case no choice is made the messages are automatically stored after 60 seconds The PTAM can assign a code to ever...

Страница 22: ...ch for you can use the À key as wildcard For example enter ÀÀ 05 02 to search for all messages from may 2002 To search for a specific code only the date field has to be filled with wildcards only i e ÀÀ ÀÀ ÀÀ If one wants to search according to date only the code field will need to have a wildcard This is the case when nothing else has been entered before To search for messages from a certain date...

Страница 23: ...caller The examples show the number the caller entered after the PTAM executed option 3 after a certain system message In the example above the caller entered the number 5650498 after system message 315 Option 3 was entered behind the equals sign of the exclamation mark see programming of the voice response system in 5 1 The options sequence shows the sequence of keys the caller pressed to arrive ...

Страница 24: ...ave a number in the phone book Press STORE to store the contact in the telephone book 4 8 2 dial from the telephone book Press the telephone book function key The display will show Telephone book Press A Z STOP The telephone book Now press the first character of the name you are looking for and the PTAM will open the telephone book with the nearest entry Use the and keys to scroll up and down the ...

Страница 25: ... support the use of extension numbers for this function to work 4 8 4 E mail function of the Telephone book The telephone book can also be used to E mail saved messages to different E mail addresses according to extension numbers Enter an extension number as number in the telephone book and enter an E mail address as a name belonging to the extension number The sign and the dot are entered using t...

Страница 26: ...PTAM Manual Vidicode 2002 26 ...

Страница 27: ... the caller has pressed a specific number Another response of the PTAM might be to record a message or transfer the caller to a specific extension 5 2 System message vs welcome message The programming of a voice response menu starts with the recording of the first welcome message The PTAM can use 30 different welcome messages Welcome messages are a specific kind of system messages The PTAM can con...

Страница 28: ...rd the following message This is the answering machine of Vidicode To continue in English press two To continue in Spanish press three After saving the recording do not exit the announcements menu Press SYSTEM to enter the system message menu The display will show System message 365 SELECT DELETE STOP The system message menu Press SELECT to enter the desired responses to the caller input The displ...

Страница 29: ...stem message after 30 seconds After that the PTAM will disconnect The exclamationmark The selection entered behind the exclamation mark will be executed irrespective of the caller s input The exclamationmark is predominantly used for the selections 2 3 and 4 These options are only allowed behind the exclamationmark See following paragraph for a more detailed explanation IMPORTANT Remember to selec...

Страница 30: ...s 1 The display will show SM410 selection 1 SELECT DELETE BACK Enter required responses Enter the number of a next system message e g 500 This will cause the PTAM to play that particular system message if the caller presses one Record the system message 500 with the text Please record you message after the beep After saving the recording press SELECT multiple times until you arrive at the exclamat...

Страница 31: ...nect if the caller doesn t make a selection within 6 seconds Press BACK to save the selections Press STOP to exit the announcements menu Other then having the PTAM ring for someone to answer the PTAM can also transfer an automatically answered call to a specific extension See 5 5 5 4 Delete the selected response options Select a system message as described in the previous paragraph and press SELEC...

Страница 32: ...stem message between 50 and 99 the PTAM will always record a message There is no selection of options possible for these system messages you will be prompted to enter an E mail address instead 5 6 1 Example Make a small voice response system and refer to a system message between 50 and 99 e g 06 saying that a message can be recorded Record system message 60 as described in 5 2 Press SELECT after y...

Страница 33: ... exclamation mark This is useful to announce the caller that he can record a message or enter his account number When the associated operation is executed the PTAM continues with the selected option behind the question mark If the question mark doesn t have a selection the PTAM will continue with the selection This way you can thank the caller for his input or let him continue in the menu This way...

Страница 34: ...EK DATE STOP Entering the Timetable menu Now follow instructions in one of the examples below to program the timetable 5 9 1 Example of a weekly timetable Enter the timetable menu as described in 5 9 Press WEEK to program the timetable according to the days of the week The display will show Monday 00 00 DAY CLEAR BACK Entering the Timetable menu In the PTAM the days run from 00 00 hours to 00 00 h...

Страница 35: ...f a timetable according to date Enter the timetable menu as described in 5 9 Press DATE to program the timetable according to a specific date The display will show 00 00 DATE CLEAR BACK Entering the Timetable menu Enter the date you want to program Enter the system message number Press to go to the next time to change the system message Now you can enter the time that you want the next system mess...

Страница 36: ...PTAM Manual Vidicode 2002 36 ...

Страница 37: ...ings Press NEXT three times The display will show Network Settings NEXT MENU STOP Entering the Network settings Press MENU to enter the Network settings menu The network settings are divided in several items Press NEXT to move on to the next menu item Press CHANGE to enter or change the value or property of the menu item Press BACK to exit the menu Press NEXT repeatedly to scroll through the menu ...

Страница 38: ...er name of the PTAM It is used by the Archive software to log on to the PTAM FTP user 0000 NEXT CHANGE BACK Set the Ftp user name Press CHANGE to change the Ftp user name FTP user CANCEL Enter the Ftp user name Use the numerical keys to enter the Ftp user name Use the to switch between upper case and lower case characters Press STORE to save the Ftp user name Press NEXT to save and move on to the ...

Страница 39: ...ich the Archive software can log on to the PTAM The Ftp server port is default set to 21 as is the setting of the port number in the Archive software If there is no direct reason to change the Ftp server port it is best left unchanged FTP server port 21 NEXT CHANGE BACK Set the Ftp server port number Press CHANGE to change the Ftp server port number FTP server port CANCEL Enter the Ftp server port...

Страница 40: ...menu item 6 1 7 IP address As part of the network the PTAM needs an IP address In case a DHCP server is used see previous item the DHCP server will assign the PTAM an IP address In case a DHCP server is not used a static IP address must be given to the PTAM IP addr 0 0 0 0 NEXT CHANGE BACK Set the IP address of the PTAM Press CHANGE to enter the IP address of the PTAM IP addr 00 000 000 000 STORE ...

Страница 41: ...net mask of the PTAM Use the numerical keys to enter the IP subnet mask of the PTAM Press STORE to save the IP subnet mask of the PTAM Press NEXT to save and move on to the next menu item 6 1 9 Gateway The Gateway is used by the PTAM if access from outside the network is required If so the Gateway and the IP subnet mask will need to be entered For instance if the used SMTP server is not on the loc...

Страница 42: ...done to one main E mail address If your PBX supports this feature you can direct multiple extension numbers to the PTAM The PTAM can disriminate between the extension numbers and E mail messages to different E mail addresses according to the extension number see 4 8 4 for a detailed explanation Even more versatile is the capability of the PTAM to E mail messages according to system messages see 5 ...

Страница 43: ...ecause the PTAM cannot receive E mail the E mails sent by the PTAM require another reply address Reply NEXT CHANGE BACK Set the E mail reply address Press CHANGE to enter the E mail reply address Reply STORE CANCEL Enter the E mail reply address Use the numerical keys to enter the E mail reply address Press STORE to save the E mail reply address Press NEXT to save and move on to the next menu item...

Страница 44: ...ess STORE to save the IP address of the SMTP server Press NEXT to save and move on to the next menu item 6 2 4 SMTP server port SMTP server port is the port number through which the PTAM connection is to be made with the SMTP server The SMTP server port of the PTAM is default set to 25 Do not change the SMTP server port number when this value is not explicitly changed in the SMTP server SMTP serve...

Страница 45: ...in STORE CANCEL Enter the domain of the SMTP server Use the numerical keys to enter the domain of the SMTP server Press STORE to save the domain of the SMTP server Press NEXT to save and move on to the next menu item 6 2 6 DNS server In case an IP name has been configured for your SMTP server you need to configure the IP number of the Domain Name Server server DNS srv 0 0 0 0 NEXT CHANGE BACK Set ...

Страница 46: ...over the network Monitor active No NEXT CHANGE BACK Enabling Monitor Press CHANGE to enable the Monitor Press NEXT to move on to the setting of the Monitor password The monitor password is a special password that is used to log on to the PTAM This password is also set in the RTR Call Monitor software Monitor pwd 0000 CHANGE BACK Enabling Monitor Press CHANGE to enter a password Press BACK to exit ...

Страница 47: ...e Telephone settings Press MENU to enter the Telephone settings menu The Telephone settings are divided in several items Press NEXT to move on to the next menu item Press CHANGE to enter or change the value or property of the menu item Press BACK to exit the menu Press NEXT repeatedly to scroll through the menu items The following sequence of menu items will appear 7 1 1 Put on hold The display wi...

Страница 48: ...ck with your PBX or service provider for information Press NEXT to save and move on to the next menu item 7 1 3 Caller ID The display will show Caller ID DTMF pola NEXT CHANGE BACK Set Caller ID type Press CHANGE to set the type of Caller ID Choose between DTMF ring DTMF pola FSK ring and FSK pola You can also turn the Caller ID Off Press NEXT to save and move on to the next menu item 7 1 4 Hang u...

Страница 49: ...the next menu item 7 1 6 Rings always answer The display will show Rings always answer Off NEXT CHANGE BACK Set Rings always answer Press CHANGE to alter the number of rings to always answer on Set the amount of rings before the PTAM answers the phone when the answering machine is Off After picking up the phone the answering machine is automatically turned on If you don t want the PTAM to answer t...

Страница 50: ...g volume 3 NEXT CHANGE BACK Set the Ring volume property Press CHANGE to change the Ring volume property The Ring volume determines the volume of the ringer Select a value between 0 and 12 Press NEXT to save and move on to the next menu item 7 1 9 Ring frequency The display will show Ring frequency 2x5 NEXT CHANGE BACK Set the Ring frequency property Press CHANGE to change the Ring frequency prope...

Страница 51: ...order Settings Press the configuration function key to enter the settings Press NEXT twice The display will show Recorder Settings NEXT MENU STOP Entering the Recorder settings Press MENU to enter the Recorder settings menu The Recorder settings are divided in several items Press NEXT to move on to the next menu item Press CHANGE to enter or change the value or property of the menu item Press BACK...

Страница 52: ...Maximum message time Select a value between 30 and 7650 seconds or select Off Press NEXT to save and move on to the next menu item 7 2 3 Silence threshold The display will show Silence threshold 6 NEXT CHANGE BACK Set the Silence threshold Press CHANGE to change the Silence threshold The Silence threshold determines the threshold below which the PTAM will assume the caller has disconnected if the ...

Страница 53: ...EXT to save and move on to the next menu item 7 2 5 REC vs REC PLAY The display will show REC vs REC PLAY No NEXT CHANGE BACK Set the REC vs REC PLAY property Press CHANGE to select the REC or REC PLAY This property determines whether the REC button or both the REC and the PLAY button need to be pressed to start a recording Press NEXT to save and move on to the next menu item 7 2 6 Recording quali...

Страница 54: ...e messages To have messages recorded in a format that can be played on any regular PC set the Recording quality to G 711A Remember though that the size of a G 711A file is up to 8 times larger than your standard Digitalk file 7 2 7 Microphone amplification The display will show Mic amplification 4 NEXT CHANGE BACK Set the Microphone amplification Press CHANGE to change the Microphone amplification...

Страница 55: ...connector at the back of the PTAM Therefore these two properties cannot be used at the same time 7 2 9 Playback volume The display will show Playback volume 3 NEXT CHANGE BACK Set the Playback volume Press CHANGE to change the Playback volume The Playback volume determines the volume of the Playback Select a value between 1 and 8 Press NEXT to save and move on to the next menu item 7 2 10 Use foot...

Страница 56: ...otswitch is connected to the serial port of the PTAM Please contact your supplier for details The Foot switch and Start switch use the same connector at the back of the PTAM Therefore these two properties cannot be used at the same time ...

Страница 57: ...1 for more details 8 1 Enter the Remote Control menu Enable the Password protection as described in 3 1 2 Use a telephone with tone dial to call the PTAM Press 1 when the welcome message is playing Enter the Password followed by You will now enter the Remote Control menu This menu offers the following choices 1 Ä Listen to new messages 3 Ä Select an other welcome message 5 Ä Change the password 6 ...

Страница 58: ...PTAM Manual Vidicode 2002 58 ...

Страница 59: ...n to stop the recording Your PTAM can be configured to record every phone call automatically Please contact your supplier for more details 9 2 PTAM as microphone memo recorder The PTAM can also be used as microphone or memo recorder Connect a microphone to the microphone connector at the back of the PTAM See 2 2 for more details It is possible to use a foot switch for a more comfortable use while ...

Страница 60: ...PTAM Manual Vidicode 2002 60 ...

Страница 61: ...ort to and from the supplier or the manufacturer are for the buyer s account Guarantee is for parts only and does not cover any costs resulting from the breakdown of the PTAM The PTAM has various extra features that have not been described in this manual Additional information about this is given in a technical information bulletin Subjects discussed in this technical documentation are further con...

Страница 62: ...PTAM Manual Vidicode 2002 62 ...

Страница 63: ... 29 extension couple to E mail 25 couple to system message 25 system message 32 extention 23 F flash key 17 flash time 48 foot switch 55 FTP 38 function keys 9 G Gateway 41 Guarantee 61 H handset 17 Hang up detection 48 hard drive 7 I Index 63 input sequence 23 Introduction 7 IP address 40 IP name 42 L Language 15 last message 22 Liability 61 M memo recorder 59 message time maximum 52 minimum 51 m...

Страница 64: ...on 10 server port 39 settings General 13 Network 37 Recorder 51 Telephone 47 Silence period 53 SMTP server 43 45 SMTP server port 44 softkeys 9 start switch 54 subnet mask 41 system message 27 E mail 32 extension 32 system message menu 28 T Telephone book 23 coupling extension numbers 25 dial from 24 E mail function 25 save a number 24 timetable 33 timetable intervals 33 U user name 38 V Voice res...

Отзывы: