Operator
’s Manual Victory WC-8H
- Page 23 of 64 -
Version 2.0
4.1
Assembly Info:
◼
The machine comes from the factory in a shipping configuration.
◼
If the chip deflector or any guards are removed for shipping, replace them properly before
operation.
◼
The PTO shaft is packed in the bottom of the package.
◼
IMPORTANT
- Make sure that the size of the PTO shaft is correct. When mounting, keep the
woodchipper as close to the tractor as possible.
◼
Always keep the PTO shaft as straight as possible. Your PTO shaft will be more efficient and
have a longer life if you use it straightforwardly. An angle smaller than 25 degrees is
acceptable.
◼
Before starting, clear the area of bystanders, especially children, and animals.
◼
Ensure sufficient clearance to access the machine from all sides during assembling.
◼
Cut the tie-down straps.
◼
Lay-out components next to the machine.
◼
Use a forklift to raise and lift the frame. Alternatively, attach a lifting device to the lifting
bracket on top of the frame. Remove the pallet and place the machine frame on level ground.
◼
You can adjust the four legs to level the frame.
◼
Check the PTO drive shaft. Check that the shaft telescopes easily and that the shield rotates
freely.
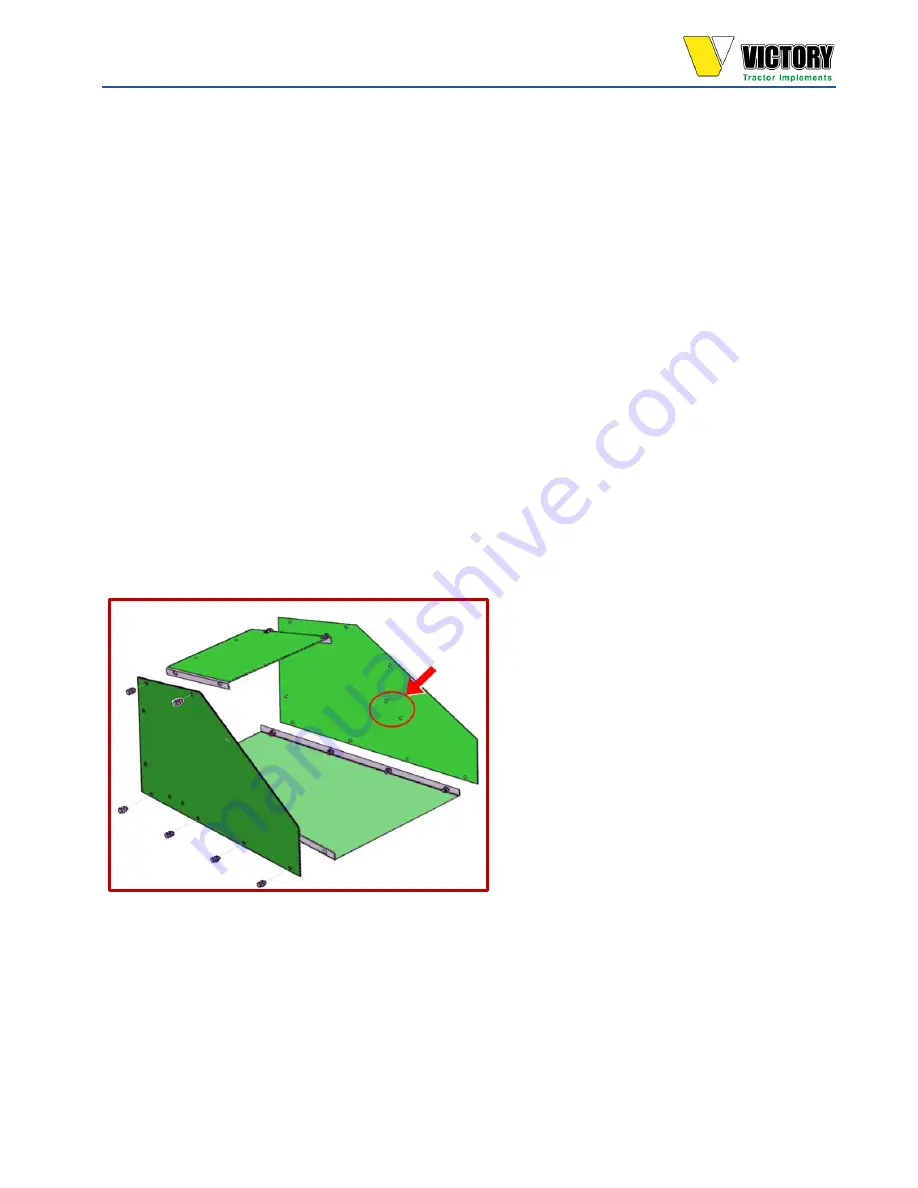
STEP 1: Assemble the Woodchipper Chute extension
◼
Screw the four plates of the chipper
chute extension together, as shown in
the figure. Mount and tighten twelve
M10 bolts, washers, spring washers,
and nuts.
Note:
◼
Take note of the mounting holes for
the hydraulic valve later.


