Chapter 2
Xgig1000 System Setup
Setup Instructions
Page 88
Xgig1000 Hardware Guide
March 2017
2
Use the supplied RJ-45 Ethernet straight-through cable to attach the Xgig1000
chassis to the network.
The Ethernet connection is required for management of the Xgig1000 chassis
through application software and for configuration through the Xgig Web Utility.
3
Plug in the Xgig1000 chassis. Attach the female end of the power cord to the
Xgig1000 system power receptacle and the male end into an appropriate power
source.
4
Turn the chassis on using the power switch on the back of the chassis. If the chassis
does not have a power switch on the back, skip this step.
5
Press the
Front Panel Reset
button to initiate the power on sequence.
6
If you are using a PC, start a terminal emulation software program on the PC, such
as HyperTerminal.
7
Configure the terminal or terminal emulation software to communicate with Xgig1000
chassis. The terminal device must be connected to the Xgig console serial port with
the following settings:
–
57600 Baud, 8 Data Bits, 1 Stop Bit, No Parity
–
Flow control = none
8
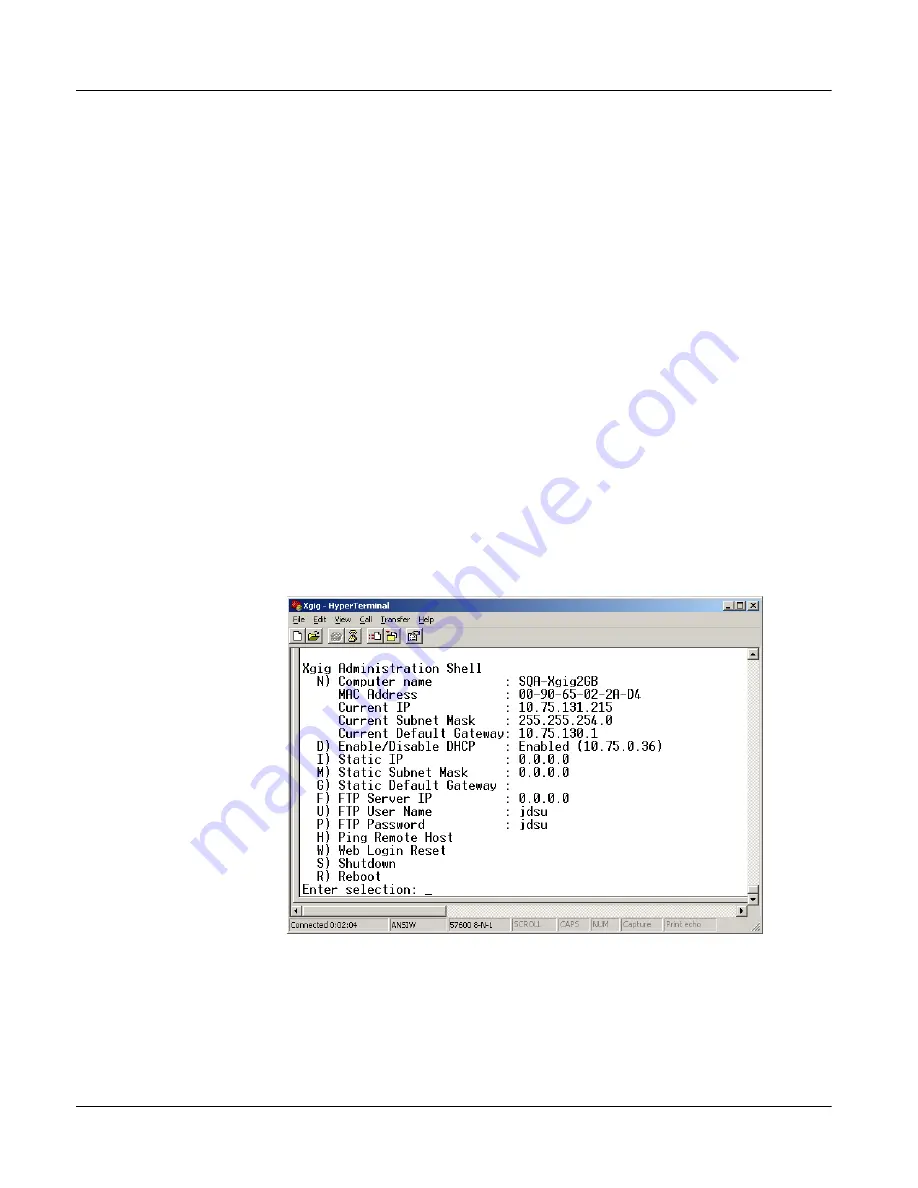
When you launch the terminal emulation program, a screen such as the following will
appear.
Figure 16
Xgig1000 Command Line Options
9
Determine if DHCP is enabled or disabled. If it is currently enabled, type
D
to disable
DHCP. The addresses in the Static IP, Static Subnet Mask, and Static Default
Gateway are not used if DHCP is enabled.
Содержание Xgig1000
Страница 1: ...Xgig1000 Hardware Guide ...
Страница 2: ......
Страница 3: ...Viavi Solutions 1 844 GO VIAVI www viavisolutions com Xgig1000 Hardware Guide ...
Страница 6: ...Page iv Xgig1000 Hardware Guide March 2017 ...
Страница 158: ...Appendix A Accessories for the Xgig1000 System Analog Passthrough Adapters Page 142 Xgig1000 Hardware Guide March 2017 ...
Страница 170: ...Index Page 154 Xgig1000 Hardware Guide March 2017 ...
Страница 171: ......


