


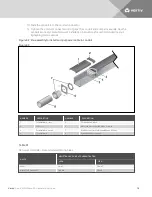
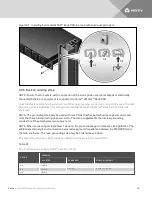
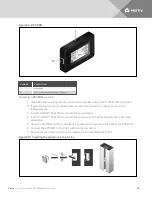

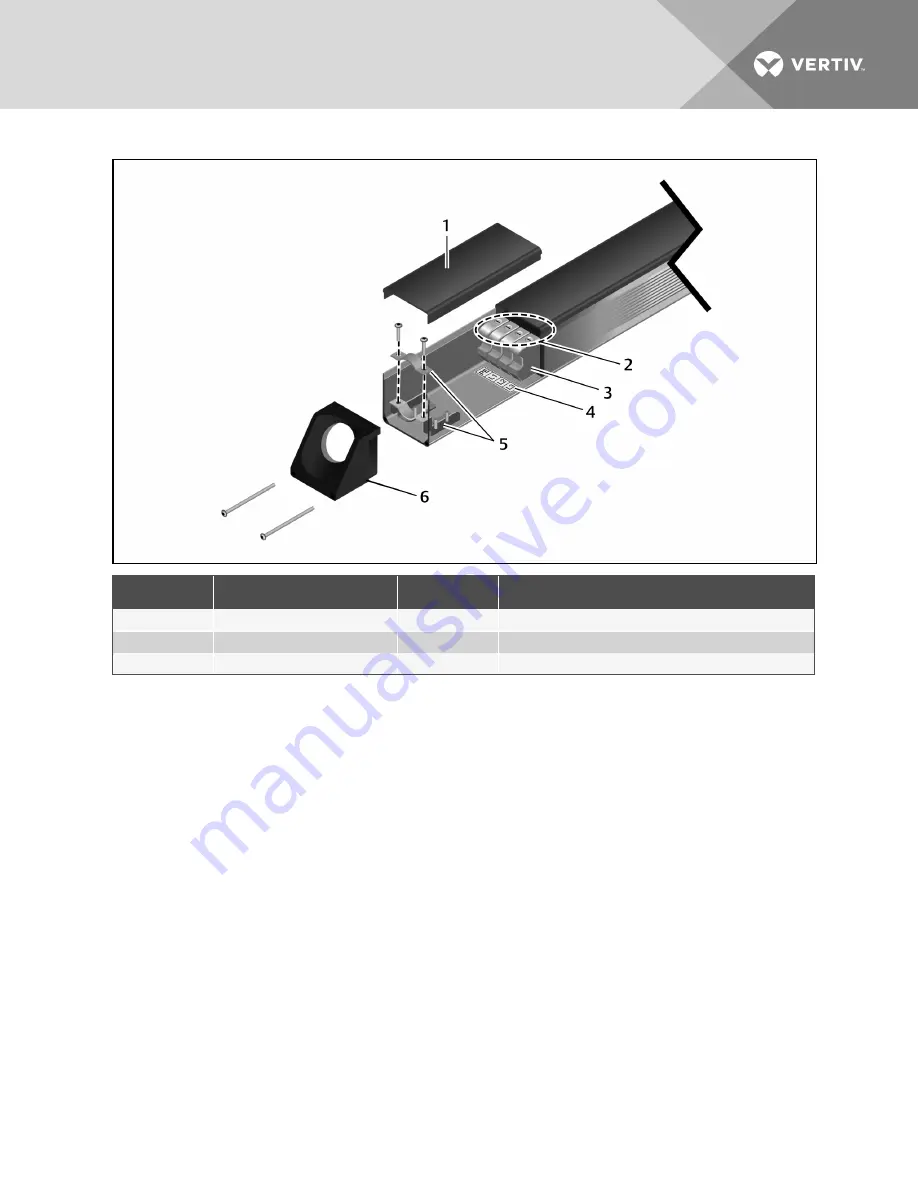
Figure 3.1 Disassembly to install an input-power cable
NUMBER
DESCRIPTION
NUMBER
DESCRIPTION
1
Terminal block cover
4
Terminal-block labels
2
Terminal-block screws
5
Strain-relief collar w/Phillips-head screws
3
Terminal block
6
End cap (attached with 2 screws)
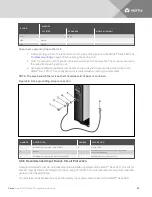
3.1.2 Attaching Input-power Cords with Conduit
1. Remove the end cap. It is held in place with two T10 Torx screws.
2. Remove the terminal block cover.
3. Loosen the strain-relief collar. It is held in place with four nuts (see
Disassembly to install an
input-power cable
on page 14).
4. Remove a section of the outer jacket and strip the insulation from the individual wires as
required to fit into the terminal block.
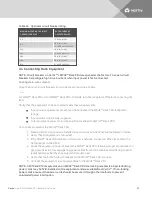
Recommended stripping length for MPH2™ Rack PDU units rated less than 32 A is 9 mm; for
MPH2™ Rack PDUs rated at 40 A or higher, a strip length of 11 mm is recommended.
5. Slip the stripped wire through the conduit connector, through the metal end plate, through
the locknut and into the terminal block cavity.
6. Loosen the terminal block screws.
7. Insert the wires into the terminal block according to the labeling inside the MPH2™ Rack PDU;
tighten each terminal block screw after inserting a wire. Refer to
Terminal tightening torque
on
page 16 for tightening torque.
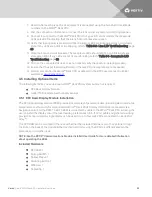
8. Install the terminal block cover, by either sliding it on or snapping it into place and sliding it
firmly against the main body of the MPH2™ Rack PDU.
9. Attach the metal end plate to the MPH2™ Rack PDU with four screws provided in the kit.
Vertiv
| Vertiv™ MPH2 Rack PDU Installer/User Guide
14
Содержание MPH2
Страница 1: ...Vertiv MPH2 Rack PDU Installer User Guide ...
Страница 16: ...Vertiv Vertiv MPH2 Rack PDU Installer User Guide 12 This page intentionally left blank ...
Страница 42: ...Vertiv Vertiv MPH2 Rack PDU Installer User Guide 38 This page intentionally left blank ...
Страница 48: ...Vertiv Vertiv MPH2 Rack PDU Installer User Guide 44 This page intentionally left blank ...
Страница 49: ......