


CAMSET24
05/05/2010
© 2008
Velleman Components nv
29
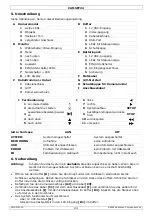
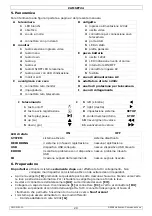
5.
Panoramica
Fare riferimento alla figura riportata a pagina 2 del presente manuale.
A telecamera
D valigetta
1
LED bianchi
1
ingresso alimentazione 12Vdc
2
obiettivo
2
uscita video
3
snodo a molla
3
connettore per connessione cavo
telecamera
4
connettore con pin dorati
4
porta USB
B monitor
5
LED di stato
1
tasto selezione ingresso video
6
alette parasole
2
tasto menu
E pacco
batteria
3
tasto down
1
uscita 12Vdc
4
tasto up
2
LED indicazione livello di carica
5
tasto sel
3
interruttore ON/OFF
6
tasto ON/OFF LED telecamera
4
connettore ingesso AC
7
tasto power con LED d’indicazione
5
fusibile
8
monitor LCD
F cavo di alimentazione AC
C avvolgicavo con cavo
G adattatore di rete 12Vdc
1
connettore lato monitor
H anello di protezione per telecamera
2
impugnatura
I cavo di collegamento
3
connettore lato telecamera
J telecomando
J
6
left (sinistra)
1
tasto on/off
7
right (destra)
2
tasto avvio registrazione
8
impostazione sistema
SETUP
3
tasto play/pause
9
conferma/stop/ritorno
STOP
4
up (su)
10
riavvolgimento veloce
5
down (giù)
11
avanzamento veloce
LED di stato
ON OFF
SYSTEM
sistema attivato
sistema disattivato
RECORDING
il sistema è in fase di registrazione
nessuna registrazione
USB
dispositivo USB collegato
nessun dispositivo USB rilevato
ERROR
riscontrato problema con il dispositivo
USB
nessun problema rilevato
IR
ricezione segnali dal telecomando
nessun segnale ricevuto
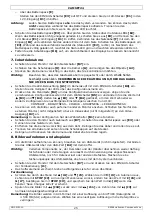
6.
Preparazione
Importante:
attivare il sistema
solamente dopo
aver effettuato tutti i collegamenti
.
Non
collegare mai dispositivi con sistema attivo onde evitare danni irreparabili.
•
Aprire la valigetta
[D]
premendo sul pulsante posto sotto ciascuna chiusura e tirando verso l’alto
le leve a estrazione automatica. Per richiudere la valigetta premere a fondo le leve.
•
Avvitare il connettore della telecamera
[A4]
sul terminale del cavo
[C3]
.
•
Collegare un capo del cavo di connessione
[I]
al connettore
[C1]
e l’altro al connettore
[D3]
presente sul pannello di controllo della valigetta.
Tutti i connettori dispongono di tacca di
riferimento che permette l’inserimento in un unico verso.
Non forzare!
•
Il sistema può essere alimentato in due modi differenti:
o
tramite adattatore di rete 12Vdc
[G]


