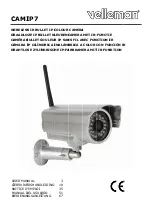


CAMIP7
13.01.2011
©
Velleman nv
9
•
Set the preferred colour for the On Screen Display (OSD): disabled (no OSD), black, yellow, red,
white or blue. The OSD shows the name of the camera in the top right corner of the camera
display and a date and time stamp at the bottom.
•
When the ‘Add timestamp on record’ checkbox is checked, date and time are shown on the
recorded file.
Note:
set the time via the
For Administrator
screen (see further).
•
Press the snapshot button
to take a snapshot of the camera display. In multiple screen
layouts, select the desired camera display first by left clicking on it. A new window with the
picture is opened. Press the
Save
button and select the desired location to save the picture.
•
Press the view button
to start viewing the camera images, press the stop button
to stop
viewing.
•
At the bottom of the left pane, 9 possible cameras are shown. Unavailable cameras are greyed
out.
•
Press on the
icon to start recording the selected cameras’ images.
Notes:
•
When an icon is pressed, it changes to the stop icon
. Press this icon to stop the underlying
function.
•
The recorded file name is
cameraname_timestamp.avi
e.g. Counter_20081211134442.avi
•
The path where the movies will be stored can be set by the administrator in the
For
Administrator
screen (see further).
For Operator
layout
•
When entering an administrator password, the user can open the
For Operator
layout.
•
Check the
Flip
checkbox in case the image is shown upside down.
•
Check the
Mirror
checkbox to mirror the image.
•
Set the resolution to 320*240, 640*480 or Max.
•
Set the mode to 50Hz, 60Hz or outdoor.
Note:
the camera is not suitable for outdoor use! The outdoor setting could be used in case the
camera is pointed towards a bright natural light source.
•
Set the brightness and contrast of the image with the “+” and “-” buttons.
Содержание CAMIP7
Страница 2: ...CAMIP7 13 01 2011 Velleman nv 2 Figure...