manualshive.com logo in svg
background image

WDR DAY/NIGHT COLOUR CAMERA

SCC-B2315(P)/SCC-B2015P

User Manual

ENG

GER

FRE

SP

A

IT

A

SCC-B2315_Euro_D.indd   1

2007-06-07   ソタネト 1:49:24

Содержание SCC-B2015P

Страница 1: ...WDR DAY NIGHT COLOUR CAMERA SCC B2315 P SCC B2015P User Manual ENG GER FRE SPA ITA CC B2315_Euro_D indd 1 2007 06 07 ソタネト 1 49 2 ...

Страница 2: ...alling camera may cause personal injury 6 Do not place conductive objects e g screwdrivers coins metal things etc or containers filled with water on top of the camera Doing so may cause personal injury due to fire electric shock or falling objects 7 Do not install the unit in humid dusty or sooty locations Doing so may cause fire or electric shock 8 If any unusual smells or smoke come from the unit s...

Страница 3: ...device and shall stay readily operable at any time FCC Statement This device complies with part 15 of the FCC Rules Operation is subject to the following two conditions 1 This device may not cause harmful interference and 2 This device must accept any interference received including interference that may cause undesired operation Note This equipment has been tested and found to comply with the lim...

Страница 4: ... not fit into your outlet consult an electrician for replacement of the obsolete outlet 10 Protect the power cord from being walked on or pinched particularly at plugs convenience receptacles and the point where they exit from the apparatus 11 Only use attachments accessories specified by the manufacturer 12 Use only with cart stand tripod bracket or table specified by the manufacturer or sold wit...

Страница 5: ...Connector 14 Installing the Camera 15 Mounting the lens 15 Setting the ALC lens selection switch 16 Adjusting the back focus 16 Connecting cables and checking operation 17 Camera Setup 19 CAMERA ID 20 IRIS 20 WDR 20 ALC 21 ELC 22 SHUTTER 22 AGC 23 MOTION 24 MOTION DET 24 DAY NIGHT 26 DAY 27 NIGHT 28 AUTO 28 EXT 29 WHITE BAL 29 PRIVACY 30 SPECIAL 31 LANGUAGE 31 V SYNC 31 DIGITAL ZOOM 32 VIDEO SET 3...

Страница 6: ... the sensitivity for identifying objects even in a dark area It also incorporated the low speed shutter and Sens Up Uses the field accumulation method functions to enhance the low illumination feature This camera can be mainly used in the dark places such as basement parking lots under comparatively low illumination In daytime it displays the colour screen with a horizontal resolution of 540 lines...

Страница 7: ...unctions that make your camera identify objects even in the worst environment Superior Backlight Adjustment When an object has a bright illumination or sunlight behind it this camera automatically improves the shaded object picture quality Digital Power Synchronization The full digital Line Lock function directly adjusts the vertical camera synchronization to enhance the operationability and relia...

Страница 8: ...nected to the bracket when installing the camera on it 3 Back Focus Control Bar You can adjust the back focus by moving it up and down 4 Automatic Shutter Lens Control Cable This cable transmits the power and signals from the camera for controlling the lens shutter 4 Automatic Shutter Lens Control Cable 5 ALC Lens Selection Switch 1 Auto Iris Lens Connector 2 Mount Adapter Fixing Grooves 3 Back Fo...

Страница 9: ... of IRIS DC When the Auto Iris lens is installed for DC control signals set the switch to DC VIDEO When the Auto Iris lens is installed for Video control signals set the switch to VIDEO Auto Iris Lens Optional This lens is installed on this camera Note When the camera lens becomes dirty softly clean it with a lens tissue or a cloth soaked in pure ethanol CC B2315_Euro_D indd 9 2007 06 07 ソタネト 1 49...

Страница 10: ...10 10 Rear Panel AC24 DC12V SCC B2315 B2315P AC220V 240V SCC B2015P 1 5 2 3 4 1 2 3 4 CC B2315_Euro_D indd 10 2007 06 07 ソタネト 1 49 2 ...

Страница 11: ...ection to RS 485 DATA signal line 2 RS 485 DATA Jack for connection to RS 485 DATA signal line 3 ALARM OUT Alarm out jack for motion detection Open Collector On Gnd 4 GROUND Grounding jack 5 DC 5V Power supply jack for RS 485 JIG Use within typical DC 5V 100mA 6 EXTERNAL SENSOR Input jack for Day Night conversion High DC 3V 5V Day mode Low 0V Night mode CC B2315_Euro_D indd 11 2007 06 07 ソタネト 1 49...

Страница 12: ... Up Down movement By pressing this switch up or down you can move up or down on the menu Setting When you press this switch in the menu the selected value or function is confirmed To enter a submenu press this button 3 Power Display LED When the power is normally connected the red LED lights 4 Video OUT Jack This is connected to the Video Input jack of the monitor and it outputs the Video signals ...

Страница 13: ...camera by your fists or shake it Please be careful not to be careless when storing and operating it Do not place or operate the camera in any wet environment such as rain or wet surfaces Do not clean the camera with rough sandpaper Please always use a dry cloth when cleaning it Put the camera in a cool area free from direct sunlight Otherwise the camera may be damaged Camera Camera Holder Mount C ...

Страница 14: ...ur camera consists of the following parts Connect each uncovered shutter control cables to the Auto Iris Lens Connector as the following Pin No DC Control Type Video Control Type 1 Damp Power 12V 2 Damp Not applicable 3 Drive Video Signal 4 Drive Ground CC B2315_Euro_D indd 14 2007 06 07 ソタネト 1 49 2 ...

Страница 15: ...ount the CS lens by rotating it clockwise as shown in the picture When using the C lens After mounting the C mount adapter by rotating it clockwise turn the C lens clockwise until it is fixed as shown in the picture CS lens C lens CC B2315_Euro_D indd 15 2007 06 07 ソタネト 1 49 2 ...

Страница 16: ...ing function After exposing the camera to an object with high resolution like a dart patterned image at a distance of more than 10m set the lens focus ring to infinite Adjust the Back Focus Control Bar until the object is of best quality Fix the screw of the Back Focus Control Bar In case of the lens with zooming function After exposing the camera to an object with high resolution like a dart patt...

Страница 17: ...e end of the BNC cable to the VIDEO OUT jack on the rear of the camera 2 Connect another end of the BNC cable to the VIDEO IN jack on the monitor N BNC cable Video Out Terminal Video In Terminal of Monitor Rear Surface CC B2315_Euro_D indd 17 2007 06 07 ソタネト 1 49 3 ...

Страница 18: ...onnect 2 lines of the power adapter to the camera using the Slot Head screwdriver as shown in the picture GND cable with the white stripe line Note Connect any power source of AC 24V and DC 12V irrespective of polarity N CC B2315_Euro_D indd 18 2007 06 07 ソタネト 1 49 3 ...

Страница 19: ...OSD On screen Display map brief is like the following CAMERA ID ON OFF IRIS WDR ALC ELC SHUTTER OFF AUTO X2 to X256 1 100 or 1 120 to 1 10K AGC OFF LOW HIGH MOTION NORM FAST F Fast S SLOW SLOW SETUP MENU MOTION DET ON OFF DAY NIGHT DAY NIGHT AUTO EXT WHITE BAL ATW1 ATW2 AWC MANU PRIVACY OFF ON SPECIAL RS485 EXIT QUIT SAVE PRESET CC B2315_Euro_D indd 19 2007 06 07 ソタネト 1 49 3 ...

Страница 20: ...he Setup switch in RET the screen returns to the upper menu IRIS The IRIS menu is used to set the automatic light control method for this camera After setting the ALC Lens Selection Switch select any of DC LENS and VIDEO LENS in the ALC and WDR submenus WDR If you press the Setup switch when the WDR submenu is se lected the corresponding screen appears CAMERA ID ON IRIS ALC SHUTTER OFF AGC HIGH MO...

Страница 21: ...etting the BLC zone you can select any of BOTTOM TOP LEFT RIGHT and CENTRE The actual location is displayed when you enter each item In case of USER you can set the desired BLC zone by defining the size and location You can set the Video output level in LEVEL Its selectable range is from 9 to 9 CAMERA ID OFF IRIS WDR SHUTTER OFF AGC HIGH MOTION DET OFF DAY NIGHT DAY WHITE BAL ATW2 PRIVACY OFF SPEC...

Страница 22: ...used for imaging fast moving objects NTSC from 1 100 to 1 10K PAL from 1 120 to 1 10K The low speed electronic shutter can be any of 13 speeds from X2 to X256 and it slows the shutter speed to make images clearer in dark illumination If you select an AUTO low speed the shutter speed is automatically lowered depending on the darkness level CAMERA ID OFF IRIS ELC SHUTTER OFF AGC HIGH MOTION DET ON D...

Страница 23: ... to set the AGC level of the camera When the AGC is active the camera automatically increases the sensitivity by amplifying the Video signal when the strength of the signal falls below the normal value Only when OFF or a high speed shutter is selected in the SHUTTER menu you can set the AGC level You can select any of OFF LOW and HIGH Note When the DAY NIGHT is set to AUTO the AGC is displayed wit...

Страница 24: ...select S SLOW MOTION DET The MOTION DET menu is used to configure the motion detection related settings If you press the Setup switch when ON is selected in the MOTION DET menu the corresponding screen appears CAMERA ID OFF IRIS ALC SHUTTER AUTO X2 MOTION SLOW MOTION DET OFF DAY NIGHT DAY WHITE BAL ATW2 PRIVACY OFF SPECIAL RS 485 EXIT QUIT CAMERA ID OFF IRIS ALC SHUTTER OFF AGC HIGH MOTION DET ON ...

Страница 25: ...motion detection area You can use the UP DOWN LEFT RIGHT Setup switch to set the size To move to POSITION press the switch After setting the position using the UP DOWN LEFT RIGHT Setup switch press the Setup switch to move to the upper menu To set the size and position for AREA select any of 0 1 2 and 3 2 Label type The box typed motion detection area is prefixed The detected area is displayed wit...

Страница 26: ...n detection area on your own you have to specify the size and location for the area setting When ON is selected in DISPLAY the detected motion is displayed on the screen and the camera sends the Alarm Out signal You can also assign the sensitivity for motion detection DAY NIGHT The DAY NIGHT menu is used to configure the day and night related settings for this camera This camera can turn the IR In...

Страница 27: ...he depth of the camera It is required to set the focus under the condition that IRIS is open for the maximum in color mode DAY If you press the Setup switch when the DAY submenu is selected the corresponding screen appears You can set the values for C GAIN AGC COLOUR AGC DETAIL and C KNEE in Day mode Colour images are implemented by these settings Note When the value of AGC DETAIL becomes large it...

Страница 28: ...set to ON the burst signals are output with the BW Composite Video signals And no burst signals are output when the BURST is set to OFF AUTO This automatically converts the DAY mode to NIGHT mode and vice versa depending on illumination In low illumination it removes the IR filtering function to raise the sensitivity Otherwise it activates the IR filtering function to lower the sensitivity If you pr...

Страница 29: ...mera To adjust the white balance 4 different modes are provided as follows ATW1 Auto Tracing White Balance mode 1 The camera can automatically adjust the colour temperature in real time according to the ambient temperature change The colour temperature variation range is approximately from 2500 K to 9300 K CAMERA ID OFF IRIS ALC SHUTTER OFF AGC HIGH MOTION DET OFF DAY NIGHT EXT WHITE BAL ATW2 PRIV...

Страница 30: ...CY menu is used to configure the privacy related settings for this camera If you press the Setup switch when ON is selected in the PRIVACY menu the corresponding screen appears You can set 24 privacy zones in total For configuration for 0 to 15 zones you have to set the size location and colour In case of configuration for 15 to 23 zones you have to additionally set the type CAMERA ID OFF IRIS ALC ...

Страница 31: ...can change the OSD language using the LEFT RIGHT Setup switch V SYNC You can select a vertical synchronization mode between INT and LINE In case of INT the camera uses the inside crystal oscillator for synchronization In case of LINE the camera uses the frequency of the external power for synchronization In case of selecting a zone on first page In case selecting a zone on second page PRIVACY 0 SI...

Страница 32: ...an configure the Video output related settings If you press the Setup switch when is selected in VIDEO SET the corresponding screen appears You can set the values for REVERSE DETAIL Y LEVEL C LEVEL and POSI NEGA In case of REVERSE the camera provides 3 different reversion modes horizontal H vertical V and both H V SPECIAL LANGUAGE ENGLISH V SYNC INT DIGITAL ZOOM ON VIDEO SET DNR OFF FLICKERLESS OFF...

Страница 33: ...uration FLICKERLESS When this is set to ON the shutter speed is set to 1 100 sec for NTSC or 1 120 sec for PAL to prevent from flickering by the disac cordance between vertical synchronization frequency and on and off frequency of the light SPECIAL LANGUAGE ENGLISH V SYNC INT DIGITAL ZOOM OFF VIDEO SET DNR ON FLICKERLESS OFF SYSTEM INFO RET DNR LEVEL L I H RET CC B2315_Euro_D indd 33 2007 06 07 ソタネ...

Страница 34: ...drate and serial number RS 485 The RS 485 menu is used to configure the RS 485 communication related settings for this camera You can connect to RS 485 through the rear panel SPECIAL LANGUAGE ENGLISH V SYNC INT DIGITAL ZOOM OFF VIDEO SET DNR OFF FLICKERLESS OFF SYSTEM INFO RET SYSTEM INFO ROM VER 1 000 EEP VER 1 000 PROTOCOL SAMSUNG ADDRESS 0 TYPE RS 485 HALF BAUD RATE 9600 SERIAL NO 0000000000000 ...

Страница 35: ...om the SETUP menu You can select the following options QUIT Ignores the change and returns to the previous settings SAVE Saves the change PRESET Ignores the change and returns to the factory default settings RS 485 PROTOCOL SAMSUNG BAUD RATE 9600 ADDRESS 0 RET CAMERA ID OFF IRIS ALC SHUTTER OFF AGC HIGH MOTION DET OFF DAY NIGHT DAY WHITE BAL ATW2 PRIVACY OFF SPECIAL RS 485 EXIT QUIT CC B2315_Euro_...

Страница 36: ... Scanning mode NTSC 525 Lines 2 1 Interlace PAL 625 Lines 2 1 Interlace Scanning line frequency Horizontal NTSC 15 734Hz INT 15 750Hz LL PAL 15 625Hz INT 15 625Hz LL Vertical NTSC 59 94Hz INT 60Hz LL PAL 50Hz INT 50Hz LL Synchronization mode INT Line Lock Resolution 540 570 TV Lines COLOUR BW S N Ratio Approx 50dB Min Scene Illumination Colour Lux Sens Up Off 0 40 Lux F1 2 50 IRE 0 24 Lux F1 2 30 ...

Страница 37: ...ion ON OFF Day Night DAY NIGHT AUTO EXT White Balance ATW1 ATW2 AWC MANUAL Mode 3200 K 5600 K R B Gain adjustment Privacy ON OFF Signal output Composite Video 1 0 Vp p 75ohm BNC AI lens VIDEO DC Lens mount CS C Mount Adaptor Operation temperature 10 C 50 C Operation humidity 90 Size 65 W x 55 H x 130 5 D mm Weight SCC B2315 P Approx 410g SCC B2015P Approx 600g CC B2315_Euro_D indd 37 2007 06 07 ソタ...

Страница 38: ...38 38 Memo CC B2315_Euro_D indd 38 2007 06 07 ソタネト 1 49 3 ...

Страница 39: ...39 39 ENG Memo CC B2315_Euro_D indd 39 2007 06 07 ソタネト 1 49 3 ...

Страница 40: ...controlled waste disposal please separate this from other types of wastes and recycle it responsibly to promote the sustainable reuse of material resources Household users should contact either the retailer where they purchased this product or their local government office for details of where and how they can take this item for environmentally safe recycling Business users should contact their sup...

Страница 41: ...GER WDR TAG NACHT FARBKAMERA SCC B2315 P SCC B2015P Bedienungsanleitung CC B2315_Ger indd 1 18 05 2007 15 56 27 ...

Страница 42: ...gen Sie sie sicher und fest Eine herunterfallende Kamera kann Körperverletzungen verursachen 6 Stellen Sie keine leitenden Gegenstände z B Schraubendreher Münzen Metallgegenstände usw oder Behälter mit Wasser auf die Kamera Dies kann sonst Körperverletzungen aufgrund von Brand Elektroschock oder herunterfallenden Gegenständen verursachen 7 Installieren Sie das Gerät nicht an feuchten staubigen ode...

Страница 43: ...n gefüllten Behälter wie beispielsweise Vasen darauf abgestellt werden 8 Der Netzstecker sollte jederzeit in Reichweite und zugänglich sein da er aus der Steckdose entfernt werden muss um das Gerät vollständig abzuschalten FCC Angaben Dieses Gerät entspricht Abschnitt 15 der FCC Normen Der Betrieb unterliegt folgenden zwei Bedingungen 1 Von diesem Gerät gehen keine schädlichen Interferenzen aus un...

Страница 44: ...h an einen Elektriker um die veraltete Steckdose austauschen zu lassen 10 Schützen Sie das Netzkabel so dass nicht darauf getreten wird und dass es insbesondere an den Steckern oder passenden Steckdosen bzw der Stelle an der das Kabel das Gerät verlässt nicht abgeklemmt wird 11 Verwenden Sie nur die vom Hersteller angegebenen Zusatzgeräte Zubehörteile 12 Verwenden Sie diese nur mit dem vom Herstel...

Страница 45: ...15 Montage des Objektivs 15 Einstellung des Auswahlschalters für das ALC Objektiv 16 Einstellen des rückseitigen Fokus 16 Anschluss der Kabel und Funktionskontrolle 17 Kamera Einstellung 19 KAMERA ID 20 BLENDE 20 WDR 20 ALC 21 ELC 22 SHUTTER 22 AGC 23 BEWEGUNG 24 BEWEGUNGS ERKENNUNG 24 TAG NACHT 26 TAG 27 NACHT 28 AUTO 28 EXT 29 WEISSABGL 29 PRIVAT 30 SPEZIAL 31 SPRACHE 31 V SYNC 31 DIGITALER ZOOM...

Страница 46: ...Ermittlung von Objekten sogar in einem dunklen Bereich verbessern kann Es umfasst ebenso die Funktionen Langsamer Verschluss und Sense Up setzt die Halbbild Akkumulierungs Methode ein um die niedrige Beleuchtung auszugleichen Diese Kamera kann hauptsächlich an dunklen Orten wie zum Beispiel Tiefgaragen unter vergleichsweise schwacher Beleuchtung verwendet werden Bei Tageslicht zeigt sie den Farbbi...

Страница 47: ...g Nacht Funktionen die Ihre Kamera Objekte selbst in den schlechtesten Umgebungen erkennen lässt Einstellung Superior Hintergrundbeleuchtung Wennein Objekt über eine helle Beleuchtung oder Sonnenlicht im Hintergrund verfügt verbessert diese Kamera automatisch dieBildqualität des beschatteten Objekts Digitale Netzsynchronisation Die volledigitale Linien Lock Funktion stellt die vertikale Kamerasync...

Страница 48: ...n der Kamera befindet 3 Regler für rückseitigen Fokus Sie können den rückseitigen Fokus einstellen indem Sie den Regler nach oben oder unten verschieben 4 Steuerkabel für Objektive mit Automatikverschluss Dieses Kabel überträgt die Stromversorgung und die Signale von der Kamera für die Steuerung des Objektivverschlusses 4 Steuerkabel für Automatikverschluss Objektiv 5 Auswahlschalter für ALC Objek...

Страница 49: ...für DC Steuersignale installiert muss der Schalter auf DC gestellt werden VIDEO Wird das automatische Blendenobjektiv für Video Steuersignale installiert muss der Schalter auf VIDEO gestellt werden Automatisches Blendenobjektiv Optional Dieses Objektiv ist an dieser Kamera installiert Hinweis Sollte das Kameraobjektiv verschmutzt sein reinigen Sie es sanft mit einem Objektiv Papiertuch oder einem ...

Страница 50: ...10 10 Rückseitige Blende AC24 DC12V SCC B2315 B2315P AC220V 240V SCC B2015P 1 5 2 3 4 1 2 3 4 CC B2315_Ger indd 10 18 05 2007 15 56 29 ...

Страница 51: ...uss an RS 485 DATEN Signalleitung 2 RS 485 DATEN Buchse für Anschluss an RS 485 DATEN Signalleitung 3 ALARM AUS Alarm Ausgang für Bewegungserkennung potentialfreiem Ausgang On Gnd 4 ERDUNG Erdungsbuchse 5 DC 5V Netzversorgungsbuchse für RS 485 JIG Verwendung bei DC 5V 100mA 6 EXTERNER SENSOR Eingangsbuchse für Tag und Nachtumschaltung Hoher DC 3V 5V Tagesmodus Niedriger 0V Nachtmodus CC B2315_Ger ...

Страница 52: ...eigten Wert ändern Auf Ab Verschiebung Wird dieser Schalter nach oben oder unten gedrückt können Sie sich am Menü nach oben oder unten bewegen Einstellung Wird dieser Schalter im Menü gedrückt wird der ausgewählte Wert oder die Funktion bestätigt Drücken Sie diese Taste um ein Untermenü einzugeben 3 Netzanzeige LED Bei normalem Netzanschluss leuchtet die rote LED auf 4 Video AUS Buchse Dieseist an...

Страница 53: ...nn Sie die Kamera handhaben Die Kamera darf weder mit den Fäusten gestoßen noch geschüttelt werden Geben Sie Acht wenn Sie die Kamera aufbewahren und bedienen Stellen oder bedienen Sie die Kamera weder in einer nassen Umgebung wie zum Beispiel Regen oder nassen Flächen Reinigen Sie die Kamera nicht mit grobem Sandpapier Verwenden Sie immer einen trockenen Lappen bei der Reinigung Bewahren Sie die ...

Страница 54: ...ten ist besteht aus folgenden Teilen Schließen Sie jedes blanke Shutter Steuerkabel wie folgt an den automatischen Blendenobjektiv Stecker an Steckerstift Nr DC Steuerungstyp Video Steuerungstyp 1 Kondensation Energie 12V 2 Kondensation Nicht zutreffend 3 Ansteuerung Videosignal 4 Ansteuerung Erdung CC B2315_Ger indd 14 18 05 2007 15 56 32 ...

Страница 55: ...v indem Sie es im Uhrzeigersinn drehen wie in der Abbildung dargestellt Bei Verwendung des C Objektivs Drehen Sie nach der Montage des C Montageadapters durch Drehen im Uhrzeigersinn das C Objektiv ebenfalls im Uhrzeigersinn bis es befestigt ist wie in der Abbildung dargestellt C Objektiv CC B2315_Ger indd 15 18 05 2007 15 56 33 ...

Страница 56: ...ven ohne Zoomfunktion Wenn Sie die Kameraauf ein Objekt mit hoher Auflösung wie beispielsweise ein dunkel gemustertes Bild in einem Abstand von mehr als 10 m gerichtet haben stellen Sie den Objektivfokusring auf unendlich ein Einstellen des Reglers des rückseitigen Fokus bis das Objekt die beste Qualität aufweist Befestigen Sie die Schrauben des Reglers desrückseitigen Fokus Im Falle von Objektive...

Страница 57: ... ein Ende des BNC Kabels an die VIDEO AUS Buchse an der Rückseite der Kamera an 2 Schließen Sie das andere Ende des BNC Kabels an die VIDEO EIN Buchse am Monitor an BNC Kabel Video Aus Klemme Video Ein Klemme der Monitor Rückseite CC B2315_Ger indd 17 18 05 2007 15 56 34 ...

Страница 58: ...itungen des Netzadapters mit dem Kreuzschlitzschra ubendreher an die Kamera an wie in der Abbildung dargestellt GND Kabel mit der weiß gestreiften Leitung Hinweis Schließen Sie eine AC 24V und DC 12V Stromquelle unabhängig von der Polarität an CC B2315_Ger indd 18 18 05 2007 15 56 35 ...

Страница 59: ...rzbeschreibung der Einstellung OSD Bildschirmanzeige ist wie folgt KAMERA ID EIN AUS BLENDE WDR ALC ELC SHUTTER AUS AUTO X2 to X256 1 100 oder 1 120 bis 1 10K AGC AUS WENIG HOCH BEWEGUNG NORM SCHN S Schn S LANGS LANGS EINSTELLUNG MEN BEWEGUNG SERKENNUNG EIN AUS TAG NACHT TAG NACHT AUTO EXT WEISSABGL ATW1 ATW2 AWC MANU PRIVAT AUS EIN SPEZIAL RS485 AUSGANG VERL SICHERN PRESET CC B2315_Ger indd 19 18...

Страница 60: ...aben Zahlen und Sonderzeichen mit bis zu 20 Zeichen eingeben Die Eingabe der Kamera ID kann an der gewünschten Position angezeigt werden wenn Sie das Untermenü POSITION verwenden Wenn Sie den Schalter Einstellung unter RUE drücken kehrt der Bildschirm zum oberen Menü zurück BLENDE Das Menü BLENDE dient zur Einstellung der automatischen Belichtungssteuerung für diese Kamera Wählen Sie nach Einstell...

Страница 61: ... ALLE EXTERN und INDOOR unter WEISSABGL auswählen Im Falle von ALLE steuert diese Kamera sowohl INDOOR als auch externe Bilder ALC Durch Drücken desSchalters Einstellung bei Auswahl des Untermenüs ALC wird der entsprechende Bildschirm eingeblendet Wählen Sie zunächst entweder DC OBJEKTIV oder VIDEO OBJEKTIVunter TYPE Sie könnendie BLC Gegenlichtausgleich Funktion aktivieren oder nicht Wählen Sie f...

Страница 62: ...Zone einstellen und die Stufe des Schnellverschlusses zuordnen SHUTTER Das SHUTTER Menü dient zur Einstellung des Schnellverschlusses und des AUTO Niedergeschwindigkeitsverschlusses Der elektronische Schnellverschluss kann in 7 verschiedenen Geschwindigkeiten verwendet werden Gewöhnlich wird er für die Aufnahme schnellbewegender Objekte verwendet NTSC von 1 100 bis 1 10K PAL von 1 120 bis 1 10K De...

Страница 63: ...eis Wenn der BLENDEN Modus ELC oder WDR ist können Sie keinen Schnellverschluss verwenden AGC The Das Menü AGC Automatische Verstärkungsregelung dient zur Einstellung der AGC Stufe der Kamera Ist der AGC aktiviert erhöht die Kamera automatisch die Empfindlichkeit indem Sie das Videosignal verstärkt wenn die Stärke des Signals unter den normalen Wert fällt Sie können den AGC Pegel nur einstellen wen...

Страница 64: ...gen einstellen Diese Funktion steht nur im AUTO Niedergeschwindigkeits Modus zur Verfügung Sie können zwischen S LANGS LANGS NORM SCHN und S SCHN gemäß des AGC Intensitätspegels wählen Wählen Sie S SCHN um Objekte zu überwachen die sich sehr schnell bei dunkler Beleuchtung bewegen Wählen Sie ect S LANGS um stillstehende Objekte bei dunkler Beleuchtung zu überwachen BEWEGUNGSERKENNUNG Das Menü BEWE...

Страница 65: ...wegungserkennungsbereich manuell einstellen Mit dem Schalter Einstellung AUF AB LINKS RECHTS stellen Sie die Größe ein Drücken Sie den Schalter um zu POSITION zu gelangen Drücken Sie nach Einstellung der Position mit dem Schalter Einstellung AUF AB LINKS RECHTS den Einstellungsschalter um zum oberen Menü zu gelangen Wählen Sie zwischen 0 1 2 und 3 um die Größe und die Position für BEREICH festzule...

Страница 66: ...ngserkennungsbereich selbst einzustellen müssen Sie Größe und Position für die Bereichseinstellung festlegen Wenn EIN unter ANZEIGE ausgewählt wird wird die erkannte Bewegung am Bildschirm angezeigt und die Kamera sendet das Alarm Aus Signal Sie können ebenfalls die Empfindlichkeit für die Bewegungserkennung zuweisen TAG NACHT Das Menü TAG NACHT wird verwendet um die Tag und Nacht bezogenen Einstel...

Страница 67: ...nn die Verwendung eines elektronischen Hochgeschwindigkeits Shutters die Tiefe der Kamera senken Der Fokus kann nur unter der Bedingung eingestellt werden dass IRIS im Farbmodus maximum geöffnet ist TAG Wenn Sie den Schalter Einstellung bei Auswahl des Untermenüs TAG drücken wird der entsprechende Bildschirm angezeigt Sie können die Werte für FARBVERSTÄRKUNG AGC FARBE AGC DETAIL und FARBKNIE im Mo...

Страница 68: ...st festlegen Im Falle von SW wenn FARBTRÄGER auf EIN eingestellt ist werden die Farbträger Signale mit den SW Composite Video Signalen ausgegeben Und die Farbträger Signale werden nicht ausgegeben wenn der FARBTRÄGER auf AUS eingestellt ist AUTO Dies konvertiert automatisch den Modus TAG auf den Modus NACHT und umgekehrt je nach Beleuchtung Bei geringer Beleuchtung wird die IR Filterfunktion entfe...

Страница 69: ... damit angezeigt deshalb können Sie die Einstellung nicht ändern EXT Dies wandelt automatisch den Farbmodus auf SW Modus um und umgekehrt durch Kopplung mit einem externen Sensor WEISSABGL Das Menü WEISSABGL wird verwendet um die weißabgleich bezogenen Einstellungen für diese Kamera zu konfigurieren Um den Weißabgleich einzustellen sind 4 verschiedenen Modi wie folgt vorgesehen ATW1 Auto Verfolgen ...

Страница 70: ... dann den Schalter Einstellung Die festgesetzte Farbtemperatur wird angewandt MANU Sie können die aktuelle Farbtemperatur manuell einstellen Sie können ebenfalls die Einstellungen für die roten und blauen Farben selbst festlegen PRIVAT Das Menü PRIVAT wird verwendet um die privat bezogenen Einstellungen für diese Kamera zu konfigurieren Wird der Schalter Einstellung bei Auswahl von EIN im Menü PRIV...

Страница 71: ...lter Einstellung bei Auswahl von EIN im Menü SPEZIAL gedrückt wird der entsprechende Bildschirm eingeblendet SPRACHE Sie können die OSD Sprache mit dem LINKEN RECHTEN Schalter Einstellung ändern V SYNC Sie können einen vertikalenSynchronisationsmodus zwischen INT und LINIE wählen Bei INT verwendet die Kamera den innenliegenden Quarzoszillator für die Synchronisation Bei LINIE verwendet die Kamera ...

Страница 72: ...rstärkung Wenn der Pegel 130 erreicht wird die Verstärkung 2 Nach Auswahl der Zoomposition findet die digitaleZoomfunktion Anwendung VIDEO PROG Sie können die ausgangsbezogenen Video Einstellungen konfigurieren Wenn Sie den Schalter Einstellung bei Auswahl von unter VIDEO PROG drücken wird der entsprechende Bildschirmangezeigt Sie können die Werte für REVERSION DETAIL Y PEGEL C PEGEL und POSI NEGA f...

Страница 73: ...Auswahl von EIN im Menü DNR gedrückt wird der entsprechende Bildschirm eingeblendet Sie können den Pegel für diese Konfiguration festsetzen FLIMMERFREI Wenn dies auf EIN gesetzt wird wird die Verschlussgeschwindigkeit auf 1 100 Sek für NTSC oder 1 120 Sek für PAL festgelegt um ein Flimmern aufgrund der Abweichung zwischen der vertikalen Synchronisationsfrequenz und der ein und aus Frequenz des Lich...

Страница 74: ...formationen prüfen Wird der Schalter Einstellung bei Auswahl von EIN im Menü SYSTEM INFO gedrückt wird der entsprechende Bildschirm eingeblendet Sie finden hier die Systeminformationen über die ROM Version EEP Version Protokoll Adresse typ Baudrate und Seriennummer RS 485 Das Menü RS 485 dient für die Konfiguration der RS 485 kommunikationsbezogenen Einstellungen für diese Kamera Sie können RS 485 ü...

Страница 75: ...er entsprechende Bildschirm eingeblendet Sie können das Protokoll die Baudrate und die Adresse Bereich 0 bis 255 für diese Kommunikation festsetzen AUSGANG Mit dem Menü AUSGANG Sie das Menü EINSTELLUNG Sie kön nen folgende Optionen auswählen VERL Ignoriert die Änderung und kehrt zu den vorherigen Einstellungen zurück SICHERN Speichert die Änderung PRESET Ignoriert die Änderung und kehrt zu den wer...

Страница 76: ...nmodus NTSC 525 Lines 2 1 Interlace PAL 625 Lines 2 1 Interlace Scannen der Linienfrequenz Horizontal NTSC 15 734Hz INT 15 750Hz LL PAL 15 625Hz INT 15 625Hz LL Vertikal NTSC 59 94Hz INT 60Hz LL PAL 50Hz INT 50Hz LL Synchronisationsmodus INT Linie Lock Auflösung 540 570 TV Linien FARBE SW Signal Rauschabstand ca 50 dB Min Szenenbeleuchtung Produktspezifikationen Farbe Lux Sens Up Aus 0 40 Lux F1 2 5...

Страница 77: ...SLANGSAM Beweg ungserkennung EIN AUS Tag Nacht TAG NACHT AUTO EXT Weißabgleich ATW1 ATW2 AWC MANUELLER Modus 3200 K 5600 K R B Gain Einstellung Privat EIN AUS Signalausgabe Composite Video 1 0 Vp p 75ohm BNC AI Objektiv VIDEO DC Objektivhalterung CS C Montage Adaptor Betriebstemperatur 10 C 50 C Betriebsfeuchtigkeit 90 Größe 65 B x 55 H x 130 5 T mm Gewicht SCC B2315 P Circa 410g SCC B2015P Circa ...

Страница 78: ...38 38 Memo CC B2315_Ger indd 38 18 05 2007 15 56 40 ...

Страница 79: ...GER 39 39 CC B2315_Ger indd 39 18 05 2007 15 56 40 ...

Страница 80: ...Gesundheit nicht durch unkontrollierte Müllbeseitigung zu schaden Helfen Sie mit das Altgerät fachgerecht zu entsorgen um die nachhaltige Wiederverwertung von stofflichen Ressourcen zu fördern Private Nutzer wenden sich an den Händler bei dem das Produkt gekauft wurde oder kontaktieren die zuständigen Behörden um in Erfahrung zu bringen wo Sie das Altgerät für eine umweltfreundliche Entsorgung abge...

Страница 81: ...WDR CAMERA COULEUR JOUR NUIT SCC B2315 P SCC B2015P Guide d utilisation FRE CC B2315_FRA indd 1 18 05 2007 15 55 22 ...

Страница 82: ...d objets conducteurs tourne vis pièces de monnaie objets en métal etc par exemple ou des récipients remplis d eau sur la caméra Cela peut causer des blessures dues au feu au choc électrique ou à la chute d objets 7 Ne pas installez l appareil dans des lieux humides poussiéreux ou couverts de suie Cela peut provoquer des risques d incendie ou des chocs électriques 8 Si vous constatez une odeur ou u...

Страница 83: ...e de déconnexion elle doit donc rester disponible en permanence Déclaration FCC Cet appareil est conforme à la partie 15 des réglementations FCC Le fonctionnement est soumis aux deux conditions suivantes 1 Il se peut que cet appareil ne cause pas d interférences nuisibles et 2 Cet appareil doit tolérer toutes interférences reçues y compris des interférences pouvant provoquer un fonctionnement inap...

Страница 84: ...d pas à votre prise murale demandez à un électricien de remplacer la prise obsolète 10 Veillez à ce que personne ne marche ou se prenne les pieds dans le cordon d alimentation et particulièrement au niveau des fiches et des prises de courant et au niveau où ils se situent 11 N utilisez que des accessoires ou des produits additionnels spécifiés par le fabricant 12 N utilisez que des chariots des pied...

Страница 85: ... objectif Auto Iris 14 Installation de la caméra 15 Montage de l objectif 15 Réglage du commutateur de sélection de l objectif ALC 16 Réglage de la focale minimale 16 Connexion des câbles et opération de vérification 17 Réglage de la caméra 19 CAMERA ID 20 IRIS 20 WDR 20 ALC 21 ELC 22 SHUTTER 22 CAG 23 MOUVE 24 DET MOUVE 24 JOUR NUIT 26 JOUR 27 NUIT 28 AUTO 28 EXT 29 BAL BLANCS 30 PRIVEE 30 SPECIA...

Страница 86: ... même s ils se trouvent dans une zone sombre Elle comprend également les fonctions obturateur basse vitesse et Sens Up Utilise la méthode d accumulation de champ pour améliorer l option faible luminosité Cette caméra peut être principalement utilisée dans des endroits sombres tels que des parkings souterrains ou dans des endroits offrant des conditions de faible luminosité similaires Dans la journ...

Страница 87: ... et Jour Nuit qui permettent à votre caméra d identifier des objets même dans le pire des environnements Réglage optimal du contre jour Lorsqu un objet est éclairé de manière vive ou se trouve à contre jour la caméra améliore automatiquement la qualité d image de l objet ombré Synchronisation alimentation numérique La fonction Ligne bloc entièrement numérique règle directement la synchronisation v...

Страница 88: ...vez régler la focale minimale du zoom en le déplaçant vers le haut ou vers le bas 4 Câble de commande de l obturateur d objectif automatique Ce câble transmet l alimentation et les signaux émis par la caméra pour commander l obturateur de l objectif Nom des pièces et fonctions 4 Câble de commande de l obturateur automatique de l objectif 5 Sélecteur de l objectif ALC 1 Connecteur objectif Auto Iri...

Страница 89: ...uto Iris est installé pour des signaux de commande DC positionnez le sélecteur sur DC VIDEO Lorsque l objectif Auto Iris est installé pour des signaux de commande vidéo positionnez le sélecteur sur VIDEO Objectif Auto iris En option Cet objectif est installé sur cette caméra Note Lorsque l objectif de la caméra est sale nettoyez le précautionneusement en utilisant un tissu prévu à cet effet ou un ...

Страница 90: ...10 10 Panneau arrière AC24 DC12V SCC B2315 B2315P AC220V 240V SCC B2015P 1 5 2 3 4 1 2 3 4 CC B2315_FRA indd 10 18 05 2007 15 55 25 ...

Страница 91: ...RS 485 DONNEES ligne de signal 2 RS 485 DONNEES Jack pour la connexion à RS 485 Ligne de signal DONNEES 3 SORT ALARME Jack sortie alarme pour détection de mouvements Connecteur ouvert à la masse 4 MASSE Jack de mise à la masse 5 DC 5V Jack d alimentation électrique pour RS 485 JIG Ne pas dépasser DC 5V 100mA 6 CAPTEUR EXTERNE Jack d entrée pour la conversion Jour Nuit Haut DC 3V 5V Mode Jour Bas 0...

Страница 92: ...n déplaçant ce commutateur vers le haut ou vers le bas vous pouvez monter ou descendre dans le menu Réglage En appuyant sur ce commutateur dans le menu vous confirmez la valeur sélectionnée ou la fonction Pour accéder à un sous menu appuyez sur ce commutateur 3 LED d affichage de l alimentation Lorsque l alimentation est correctement connectée la LED rouge s allume 4 Jack SORTIE Vidéo Est connecté...

Страница 93: ...utions lors du rangement et de l utilisation de la caméra Ne placez pas et n utilisez pas la caméra dans un environnement humide sous la pluie ou sur une surface mouillée par exemple Ne nettoyez pas la caméra avec du papier abrasif Utilisez toujours un chiffon sec pour nettoyer la caméra Rangez la caméra dans un endroit tempéré à l abri du rayonnement solaire direct Dans le cas contraire la caméra...

Страница 94: ...mpose des pièces suivantes Connectez comme suit chacun des fils dénudés des commandes d obturateur au connecteur d objectif Auto Iris Broche No Type de commande DC Type de commande vidéo 1 Amortir Alimentation 12V 2 Amortir Non applicable 3 Pulsion Signal vidéo 4 Pulsion Masse CC B2315_FRA indd 14 18 05 2007 15 55 27 ...

Страница 95: ...S en le faisant tourner dans le sens horaire comme indiqué sur l image Lors de l utilisation de l objectif C Après avoir monté l adaptateur pour objectif C en le faisant tourner dans le sens horaire faites pivoter l objectif C dans le sens horaire jusqu à ce qu il soit fixé comme indiqué sur l image CC B2315_FRA indd 15 18 05 2007 15 55 28 ...

Страница 96: ...om Après avoir exposé la caméra à un objet avec une résolution importante une image avec un motif à damiers par exemple à une distance supérieure à 10m réglez la bague de l objectif sur l infini Régler le levier de commande la focale minimale jusqu à ce que l objet soit parfaitement net Serrez la vis du levier de focale minimale Dans le cas d un objectif avec fonction zoom Après avoir exposé la ca...

Страница 97: ...xtrémité du câble BNC au jack SORTIE VIDEO situé à l arrière de la caméra 2 Connectez l autre extrémité du câble BNC au jack ENTREE VIDEO sur le moniteur Câble BNC Terminal Sortie Vidéo Vidéo sur le terminal de Surface arrière du moniteur CC B2315_FRA indd 17 18 05 2007 15 55 30 ...

Страница 98: ... lignes de l adaptateur secteur à la caméra à l aide d un tournevis plat comme indiqué sur l image Masse câble à rayures Note Connectez une source d alimentation de 24V Courant alternatif et 12V Courant continu sans tenir compte de la polarité CC B2315_FRA indd 18 18 05 2007 15 55 31 ...

Страница 99: ...ît La carte du réglage OSD Affichage à l écran se présente comme suit CAMERA ID ON OFF IRIS WDR ALC ELC SHUTTER OFF AUTO X2 X256 1 100 ou 1 120 1 10K CAG OFF BAS HAUT MOUVEMENT NORM VITE T Vite T LENT LENT MENU DE R GLAGE DET MOUVE ON OFF JOUR NUIT JOUR NUIT AUTO EXT BAL BLANCS BA1 BA2 BM MANU PRIVEE OFF ON SPECIAL RS485 SORTIE QUITTER SAUVER PRESET CC B2315_FRA indd 19 18 05 2007 15 55 31 ...

Страница 100: ...e chaîne jusqu à 20 caractères en tout de lettres de chiffres et caractères spéciaux Le nom de caméra entré peut être affiché à l endroit souhaité à l aide du sous menu POSITION Lorsque vous appuyez sur le commutateur Réglage dans RET l écran revient au menu supérieur IRIS Le menu IRIS sert à régler la méthode de commande automatique de la lumière de cette caméra Après avoir réglé le Sélecteur de ...

Страница 101: ...XTERIEUR et INDOOR dans BAL BLANCS Si vous sélectionnez TOLUT cette caméra contrôlera à la fois les images de l INDOOR et de l extérieur ALC Si vous appuyer sur le commutateur Réglage lorsque le sous menu ALC est sélectionné l écran correspondant apparaît Commencez par sélectionner DC OBJECTIF ou VIDEO OBJECTIFdans TYPE Vous pouvez reprendre la fonction BLC Compensation contre jour active ou inact...

Страница 102: ...pouvez régler la zone BLC et affecter le niveau de l obturateur à grande vitesse SHUTTER Le menu SHUTTER sert à régler l obturateur électronique à grande vitesse vitesse et l obturateur basse vitesse AUTO L obturateur électronique à grande vitesse peut utiliser 7 vitesses différentes et est généralement utilisé pour filmer des objets se déplaçant rapidement NTSC de 1 100 à 1 10K PAL de 1 120 à 1 1...

Страница 103: ...RIS est ELC ou WDR vous ne pouvez pas utiliser les obturateurs à grande vitesse CAG Lemenu CAG Commande automatique de gain sert à régler le niveau CAG de la caméra Lorsque le CAG est actif la caméra augmente automatiquement la sensibilité en amplifiant le signal vidéo lorsque la puissance de celui ci descend en dessous de la valeur normale Vous pouvez régler le niveau CAG uniquement lorsque OFF o...

Страница 104: ...TE et T VITE en fonction du niveau d intensité CAG Pour surveiller des objets se déplaçant à grande vitesse dans des cas de luminosité faible sélectionnez T VITE Pour surveiller des objets immobiles dans des cas de luminosité faible sélectionnez T LENT DET MOUVE Le menu DET MOUVE sert à configurer les réglages relatifs à la détection de mouvements Si vous appuyez sur le commutateur Réglage lorsque...

Страница 105: ...DROITE pour régler la taille Pour se déplacer sur POSITION appuyez sur le commutateur Après avoir réglé la position à l aide du commutateur de réglage HAUT BAS GAUCHE DROITE appuyez sur le commutateur Réglage pour accéder au menu supérieur Pour régler la taille de ZONE sélectionnez parmi 0 1 2 et 3 2 Type étiquette La zone de détection de mouvements de forme carrée est prédéfinie La zone détectée ...

Страница 106: ...a zone de détection de mouvements à votre convenance vous devez spécifier la taille et la position pour le réglage de la zone Lorsque ON est sélectionné dans DISPLAY le mouvement détecté s affiche sur l écran et la caméra envoie le signal de sortie d alarme Vous pouvez également choisir la sensibilité pour la détection de mouvements JOUR NUIT Le menu JOUR NUIT sert à configurer les réglages jour e...

Страница 107: ... ex l utilisation d un obturateur risque de réduire la profondeur de la caméra Il est nécessaire de régler la mise au point si le DIAPHRAGME est ouvert au maximum en mode couleur JOUR Si vous appuyez sur le commutateur Réglage lorsque le sous menu JOUR est sélectionné l écran correspondant apparaît Vous pouvez régler les valeurs pour GAIN C CAG CAG DETAIL et FILTRE C dans le mode Jour Les images c...

Страница 108: ... réglages pour les couleurs rouge et bleu à votre convenance Dans le cas de N B lorsque S PORTEUSE est réglée sur ON les signaux de salve sont émis avec les signaux vidéo composite N B Et aucun signal de salve n est émis lorsque S PORTEUSE est réglée sur OFF AUTO Convertit automatiquement le mode JOUR en mode NUIT et inversement en fonction de la luminosité Pour une luminosité faible il supprime l...

Страница 109: ...z donc pas changer son réglage EXT Convertit automatiquement le mode couleur en mode N B et in versement en servant d interface avec le capteur externe BAL BLANCS Le menu BAL BLANCS sert à configurer les réglages de la balance des blancs relatifs à cette caméra Pour régler la balance des blancs vous disposez des 4 modes suivants BA1 Mode de traçage automatique de la balance des blancs 1 La caméra ...

Страница 110: ...e de couleur et appuyez sur le commutateur Réglage La température de couleur fixée s applique MANU Vous pouvez régler manuellement la température de couleur actuelle Vous pouvez également spécifier les réglages pour les couleurs rouge et bleu à votre convenance PRIVEE Le menu PRIVEE sert à configurer les réglages relatifs à privée de cette caméra Si vous appuyez sur le commutateur Réglage lorsque O...

Страница 111: ...a mosaïque dans la mesure où celle ci a été prédéfinie Entre 16 et 23 vous ne pouvez pas régler la couleur de la mosaïque SPECIAL Le menu SPECIAL sert à configurer les réglages spéciaux relatifs à cette caméra Si vous appuyez sur le commutateur Réglage lorsque est sélectionné dans le menu SPECIAL l écran correspondant apparaît LANGUE Vous pouvez changer la langue de l OSD à l aide du commutateur Ré...

Страница 112: ...lage lorsque ON est sélectionné dans ZOOM DIGITAL l écran correspondant apparaît Le premier chiffre affiché indique le rapport du zoom et le deuxième chiffre affiché correspond au grossissement Lorsque le niveau atteint 130 le gros sissement est de 2 Après avoir sélectionné la position de zoom la fonction zoom numérique s applique PROG VIDEO Vous pouvez configurer les réglages relatifs à la sortie vi...

Страница 113: ... commutateur Réglage lorsque ON est sélectionné dans DNR l écran correspondant apparaît Vous pouvez régler le niveau pour cette configuration ANTI BATTEMENT Lorsque le réglage est sur ON la vitesse de l obturateur est réglée sur 1 100 sec pour NTSC ou 1 120 sec pour PAL pour éviter tout battement du à une discordance entre la fréquence de synchronisa tion verticale et la fréquence on et off de la l...

Страница 114: ...tions relatives au système Si vous appuyez sur le commutateur Réglage lorsque est sélectionné dans INFO SYSTEME l écran correspondant apparaît Vous pouvez trouver des informations concernant la version ROM la version EEP le protocole l adresse le type la vitesse et le numéro de série RS 485 Le menu RS 485 sert à configurer les réglages de communication RS 485 relatifs à cette caméra Vous pouvez vou...

Страница 115: ...tionné dans le menu RS 485 l écran correspondant apparaît Vous pouvez sélectionner le protocole la vitesse et l adresse plage 0 à 255 pour cette communication SORTIE Le menu SORTIE sert à sortir du menu REGLAGE Vous pouvez sélectionner les options suivantes QUITTER Ignore les changements et revient au réglages précédents SAUVER Enregistre le changement PRESET Ignore le changement et revient au rég...

Страница 116: ...trelacé PAL 625 Lignes 2 1 entrelacé Fréquence de ligne de balayage Horizontal NTSC 15 734Hz INT 15 750Hz LL PAL 15 625Hz INT 15 625Hz LL Vertical NTSC 59 94Hz INT 60Hz LL PAL 50Hz INT 50Hz LL Mode de synchronisation INT Ligne bloc Résolution 540 570 Lignes TV COULEUR N B Rapport signal bruit Env 50 dB Luminosité min de la scène Spécifications du produit Couleur Lux Augmentation de la sensibilité O...

Страница 117: ...ents ON OFF Jour Nuit JOUR NUIT AUTO EXT Balance des blancs Mode BA1 BA2 BM MANUEL 3200 K 5600 K Réglage du gain N B Privée ON OFF Sortie de signal Vidéo composite 1 0 Vp p 75ohm BNC Objectif Al VIDEO DC Monture d objectif CS C Adaptateur de monture Température d utilisation 10 C 50 C Humidité lors de l utilisation 90 Taille 65 W x 55 H x 130 5 D mm Poids SCC B2315 P env 410g SCC B2015P Env 600g C...

Страница 118: ...38 38 Mémo CC B2315_FRA indd 38 18 05 2007 15 55 36 ...

Страница 119: ...39 39 FRE CC B2315_FRA indd 39 18 05 2007 15 55 36 ...

Страница 120: ...euillez le séparer des autres types de déchets et le recycler de façon responsable Vous favoriserez ainsi la réutilisation durable des ressources matérielles Les particuliers sont invités à contacter le distributeur leur ayant vendu le produit ou à se renseigner auprès de leur mairie pour savoir où et comment ils peuvent se débarrasser de ce produit afin qu il soit recyclé en respectant l environne...

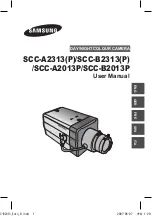
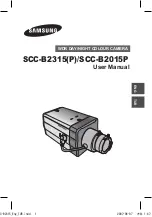
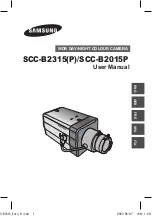
Страница 121: ...CÁMARA DE COLOR DIA NOCHE WDR SCC B2315 P SCC B2015P Manual de usuario SPA CC B2315_SPN indd 1 2007 5 18 15 55 06 ...

Страница 122: ...ad puede generar calor de manera anormal o crear un incendio 4 Enchufe de manera segura el cable de alimentación en la toma de corriente Una conexión no segura puede provocar un incendio 5 Al instalar la cámara ajústela firmemente y de manera segura La caída de una cámara puede causar daños personales 6 No coloque objetos conductores p ej destornilladores monedas objetos de metal etc o recipientes ...

Страница 123: ...eclaración de la Comisión Federal de Comunicaciones de Estados Unidos de América FCC Este aparato cumple con la parte 15 de la normativa de la FCC El funcionamiento está sujeto a las dos condiciones siguientes 1 Este aparato no puede producir interferencias perjudiciales y 2 Este aparato debe aceptar cualquier interferencia recibida incluidas las interferencias que puedan provocar un funcionamient...

Страница 124: ...u toma de corriente póngase en contacto con un electricista para cambiar la toma de corriente obsoleta 10 Evite pisar o doblar el cable de alimentación Ponga especial cuidado para no hacerlo en enchufes tomas de corriente y en los puntos en los que salen desde el aparato 11 Utilice únicamente los dispositivos y accesorios especificados por el fabricante 12 Utilice únicamente la carretilla platafor...

Страница 125: ...Instalar la cámara 15 Montar la lente 15 Configuración del conmutador de selección de lente ALC 16 Ajuste del enfoque posterior 16 Conexión de los cables y comprobación de funcionamiento 17 Configuración de la cámara 19 CÁMARA ID 20 DIAFRAGMA 20 WDR 20 ALC 21 ELC 22 OBTURADOR 22 CAG 23 MOVIMIENTO 24 DET MOVI 24 DIA NOCHE 26 DIA 27 NOCHE 28 AUTO 28 EXT 29 BAL BLANCO 29 PRIVADA 30 ESPECIAL 31 IDIOMA...

Страница 126: ...mejorar la sensibilidad identificando objetos incluso en la oscuridad También incorpora el obturador de baja velocidad y las funciones Sens Up utiliza el método de acumulación de campo para aumentar la poca iluminación Esta cámara se puede usar sobre todo en lugares oscuros como en los aparcamientos subterráneos con relativamente poca iluminación Durante el día la pantalla de color dispone de una ...

Страница 127: ...ía noche que hace que su cámara identifique objetos incluso en un medio hostil Ajuste superior de retroiluminación Cuando un objeto tiene detrás una iluminación clara o la luz del sol esta cámara automáticamente mejora la calidad de la imagen del objeto sombreado Sincronización de la potencia digital La funcióndigital de Sincronización de Línea ajusta directamente la sincronización vertical de la ...

Страница 128: ...ámara sobre él 3 Barra de control del enfoque posterior Puede ajustar el enfoque posterior moviéndola hacia arriba o hacia abajo 4 Cable de control del obturador de lente automático Este cable transmite la corriente y las señales desde la cámara para controlar el obturador de lente 4 Cable de control de obturador de lente automático 5 Conmutador de selección de lentes ALC 1 Conector de lente de ir...

Страница 129: ...AGRAGMA DC Cuando la lente de iris automática se coloca para señales de control DC coloque el conmutador en DC VÍDEO Cuando la lente de iris automática se coloca para señales de control de Vídeo coloque el conmutador en VIDEO Lente de iris automática Opcional Se instala esta lente en la cámara Nota Cuando las lentes de la cámara se ensucien límpielas suavemente con un paño para lentes o un paño mo...

Страница 130: ...10 10 Panel posterior AC24 DC12V SCC B2315 B2315P AC220V 240V SCC B2015P 1 5 2 3 4 1 2 3 4 CC B2315_SPN indd 10 2007 5 18 15 55 08 ...

Страница 131: ...señal RS 485 DATA 2 RS 485 DATA Toma para conexión a la línea de señal RS 485 DATA 3 SALIDA ALARMA La toma de salida de la alarma para detectar el movimiento Colector abierto toma a tierra 4 TIERRA Toma a tierra 5 DC 5 V Toma de alimentación eléctrica para RS 485 JIG Utilizar en DC típica 5 V 100 mA 6 SENSOR EXTERNO Toma de entrada para conversión Día y Noche Alta DC 3 V 5 V Modo día Baja 0 V Modo...

Страница 132: ... que se muestra movimiento arriba abajo Pulsando este conmutador hacia arriba o abajo puede desplazarse hacia arriba o abajo por el menú Configuración Cuando pulsa este conmutador en el menú se confirma el valor o la función seleccionados Para entrar en un submenú pulse este botón 3 LED de conexión El LED rojo se ilumina cuando el dispositivo está conectado 4 Toma de salida de Vídeo Está conectada...

Страница 133: ... sus puños ni la agite Le rogamos que tenga cuidado cuando la guarde o la esté usando No ponga o utilice la cámara en un medio húmedo como en ambientes lluviosos o superficies húmedas No limpie la cámara con papel de lija áspero Utilice siempre un paño seco cuando la limpie Ponga la cámara en un área fresca lejos de la luz de sol directa De lo contrario la cámara podría resultar dañada Soporte de ...

Страница 134: ... de las siguientes piezas Conecte cada cable de control del obturador descubierto al conector de la lente iris automática siguiendo estos pasos Núm de Pin Tipo de control DC Típo de control de vídeo 1 Damp Potencia 12 V 2 Damp No es pertinente 3 Drive Señal de Vídeo 4 Drive Toma a tierra CC B2315_SPN indd 14 2007 5 18 15 55 11 ...

Страница 135: ...jas del reloj tal y como se muestra en la figura Cuando utilice la lente C Después de montar el adaptador del soporte C girándolo en el sen tido de las agujas del reloj gire la lente C en el sentido de las agujas del reloj hasta que esté fija como se muestra en la figura Lente CS Lente C CC B2315_SPN indd 15 2007 5 18 15 55 11 ...

Страница 136: ...ón de zoom Después de exponerla cámara a un objeto con gran resolución como una imagen con diseño de dardos a una distancia de más de 10 m configure el anillo de enfoque de la lente al infinito Ajuste la barra de control del enfoque posterior hasta que el objeto sea de la mejor calidad Fije el tornillo de la barra de control del enfoque posterior Se trata de lente con función de zoom Después de ex...

Страница 137: ...el cable BNC a la toma SALIDA DE VÍDEO en el panel posterior de la cámara 2 Conecte el otro extremo del cable BNC a la toma ENTRADA DE VÍDEO en el monitor Cable BNC Terminal de salida de Vídeo Vídeo en el terminal de la superfice posterior del monitor CC B2315_SPN indd 17 2007 5 18 15 55 13 ...

Страница 138: ...s del adaptador de potencia a la cámara utilizando el destonillador de punta plana como se muestran en la figura Toma a tierra cable con la línea blanca Nota Conecte la fuente de alimentación de CA a 24 V y DC 12 V independientemente de la polaridad CC B2315_SPN indd 18 2007 5 18 15 55 14 ...

Страница 139: ...guración OSD Visualización en pantalla es el siguiente C MARA ID ACTIVAR APAGAR DIAFRAGMA WDR ALC ELC OBTURADOR APAGAR AUTO X2 a X256 1 100 o 1 120 a 1 10K CAG APAGAR BAJO ALTO MOVIMIENTO NORM R PIDO R R pido M DULC DULC MEN DE DET MOVI ACTIVAR APAGAR DIA NOCHE DIA NOCHE AUTO EXT BAL BLANCO BA1 BA2 BM MANU PRIVADA APAGAR ACTIVAR ESPECIAL RS 485 SALIDA SALIR ACTIVAR PRESET MEN DE CONFIGURACI N CC B...

Страница 140: ...identificador compuesto por letras números y caracteres especiales hasta un total de 20 caracteres El identificador de entrada puede aparecer en el lugar deseado cuando utilice el submenú de POSICIÓN Cuando pulse el conmutador de Configuración en VUE la pantalla volverá al menú anterior DIAFRAGMA El menú DIAFRAGMA se utiliza para configurar el control automático de luz de la cámara Después de conf...

Страница 141: ...én puede seleccionar TODO EXTERIOR o INTERIOR en BAL BLANCO En caso de seleccionar TODO esta cámara controla las imágenes INTERIOR y exteriores ALC Si pulsa el conmutador de Configuración cuando el submenú ALC esté seleccionado aparecerá la pantalla correspondiente En primer lugar seleccione cualquier ÓPTICA DC u ÓPTICA VÍDEO en TIPO Puede activar o desactivar la función CLUZ Compensación de luz p...

Страница 142: ...de ALC puede configurar la zona CLUZ y determinar el nivel del obturador de alta velocidad OBTURADOR El menú OBTURADOR se utiliza para configurar el obturador electrónico de alta velocidad y el obturador de baja velocidad automático El obturador electrónico de alta velocidad admite 7 velocidades diferentes y se suele utilizar para imágenes de objetos en movimiento rápido NTSC de 1 100 a 1 10K PAL d...

Страница 143: ...tiliza para configurar el nivel AGC de la cámara Cuando el CAG está activado la cámara aumenta automáticamente la sensibilidad ampliando la señal de Vídeo si la potencia de la señal disminuye por debajo del valor normal Sólo si se ha seleccionado APAGADO o un obturador de alta velocidad en el menú OBTURADOR podrá configurar el nivel CAG Puede seleccionar APAGADO BAJO y ALTO Nota Cuando DIA NOCHE e...

Страница 144: ...ULC DET MOVI El menú DET MOVI se utiliza para fijar las configuraciones relacionadas con la detección de movimiento Si pulsa el conmutador Configuración cuando esté seleccionado ACTIVAR en el menú DET MOVI aparecerá la pantalla correspondiente CÁMARA ID APAGAR DIAFRAGMA ALC OBTURADOR AUTO X2 MOVIMIENTO DULC DET MOVI APAGAR DIA NOCHE DIA BAL BLANCO BA2 PRIVADA APAGAR ESPECIAL RS 485 SALIDA SALIR CÁ...

Страница 145: ...de configurar manualmente el área de detección de movimiento Puede utilizar el conmutador ARRIBA ABAJO IZQUIERDA DERECHA para configurar el tamaño Para desplazarse a POSICIÓN pulse el conmutador Una vez configurada la posición mediante el conmutador de configuración ARRIBA ABAJO IZQUIERDA DERECHA pulse el conmutador para desplazarse al menú superior Para fijar el tamaño y la posición para ÁREA sel...

Страница 146: ...configurar por sí sólo el área de detección de movimiento tiene que especificar el tamaño y localización para el área Cuando esté seleccionado ACTIVAR en DISPLAY aparece en pantalla el movimiento detectado y la cámara envía la señal de Salida Alarma También puede determinar la sensibilidad para la detección de movimiento DIA NOCHE El menú DIA NOCHE se utiliza para fijar las configuraciones de día ...

Страница 147: ... disminuir la profundidad de la cámara Se exige que se configure el enfoque teniendo en cuenta que el IRIS esté abierto al máximo en el modo a color DIA Si pulsa el conmutador de Configuración cuando el submenú DIA está seleccionado aparecerá la pantala correspondiente Puede configurar los valores para GAN CROMA CAG COLOR CAG DETALLE y KNEE CROMA en el modo Día Las imágenes de color están fijadas con...

Страница 148: ...CIÓN está en ACTIVAR las señales de saturación salen junto con las señales de Vídeo compuesto ByN No salen señales de satuRación cuando la SATURACIÓN está en APAGAR AUTO Convierte automáticamente el modo DIA en modo NOCHE y viceversa dependiendo de la iluminación Con iluminación baja quita la función de filtro IR para aumentar la sensibilidad En caso contrario activa la función de filtro IR para dis...

Страница 149: ...onfiguración EXT Convierte automáticamente el modo color en modo ByN y viceversa relacionándose con un sensor externo BAL BLANCO El menú BAL BLANCO se utiliza para configurar el balance de blancos relacionado con las configuraciones para esta cámara Para ajustar el balance de blancos se proporcionan 4 modos diferentes detallados a continuación BA1 Seguimiento automático de balance de blancos modo ...

Страница 150: ... memorizar la temperatura de éste y pulse el conmutador Configuración Se aplicará la temperatura de color fijada MANU Puede configurar de forma manual la temperatura del color actual También puede especificar usted mismo las configuraciones para rojo y azul PRIVADA El menú PRIVADA se utiliza para configurar la privacidad relaciona da con las configuraciones para esta cámara Si pulsa el conmutador Co...

Страница 151: ...ño del mosaico porque ya está prefijado En caso de privacidad de 16 a 23 no puede fijar el color del mosaico ESPECIAL El menú ESPECIAL se utiliza para fijar las configuraciones especiales para esta cámara Si pulsa el conmutador Configuración cuando esté seleccio nado en el menú ESPECIAL aparecerá la pantalla correspondiente IDIOMA Puede cambiar el idioma OSD utilizando el conmutador IZQUIERDA DERECHA...

Страница 152: ... esté seleccionado ACTIVAR en ZOOM DIGITAL aparece rá la pantalla correspondiente El primer número que aparece corresponde a la proporción del zoom y el segundo número es el aumento Cuando el nivel alcanza 130 el aumento se convierte en 2 Una vez que se ha fijado la posición del zoom se aplica la función del zoom digital PROG VÍDEO Puede fijar la salida de vídeo relacionada con las configuraciones Si...

Страница 153: ...Configuración cuando esté selec cionado ACTIVAR en RDR aparecerá la pantalla correspondiente Puede determinar el nivel para esta configuración OSCILACIÓN RED Cuando está fijado en ACTIVAR la velocidad del obturador estará establecida en 1 100 seg para NTSC o 1 120 seg para PAL para evitar oscilaciones por la contrariedad entre la frecuencia de sincron ización vertical y la frecuencia de encendido y a...

Страница 154: ...ión relacionada con el sistema Si pulsa el conmutador Configuración cuando esté seleccionado en INFOR SISTEMA aparecerá la pantalla correspondiente Puede encontrar la información del sistema sobre la versión ROM versión EEP protocolo dirección tipo velocidad en baudios y número de serie RS 485 El menú RS 485 se utiliza para configurar la comunicación RS 485 relacionada con las configuraciones para es...

Страница 155: ...el menú RS 485 aparecerá la página correspondiente Puede configurar el protocolo la velocidad en baudios y la dirección entre 0 y 255 para esta comunicación SALIDA El menú SALIDA se utiliza para salir del menú CONFIGURACIÓN Puede seleccionar las siguientes opciones SALIR Ignora los cambios y vuelve a las configuraciones anteriores ACTIVAR Guarda los cambios PRESET Ignora los cambios y vuelve a las ...

Страница 156: ...eo NTSC 525 líneas entrelazadas 2 1 PAL 625 líneas entrelazadas 2 1 Frecuencia de línea de escaneo Horizontal NTSC 15 734Hz INT 15 750Hz LI PAL 15 625Hz INT 15 625Hz LI Vertical NTSC 59 94Hz INT 60Hz LI PAL 50Hz INT 50Hz LI Modo de sincronización INT Sinc línea Resolución 540 570 líneas TV COLOR ByN Índice S N Aprox 50dB Iluminación mín de la escena Especificaciones técnicas Color Lux Sentido Super...

Страница 157: ...movimiento ACTIVAR APAGAR Día Noche DIA NOCHE AUTO EXT Balance de blancos Modo BA1 BA2 BM MANUAL 3200 K 5600 K ajuste del aumento R B Privada ACTIVAR APAGAR Salida de señal Vídeo compuesto 1 0Vp p 75ohm BNC Lente AI VÍDEO DC Soporte de lente CS C Adaptador de soporte Temperatura de funcionamiento 10 C 50 C Humedad de funcionamiento 90 Tamaño 65 A x 55 L x 130 5 D mm Peso SCC B2315 P Aprox 410g SCC...

Страница 158: ...38 38 Notas CC B2315_SPN indd 38 2007 5 18 15 55 19 ...

Страница 159: ...39 39 SPA CC B2315_SPN indd 39 2007 5 18 15 55 19 ...

Страница 160: ... la eliminación incontrolada de residuos separe este producto de otros tipos de residuos y recíclelo correctamente para promover la reutilización sostenible de recursos materiales Los usuarios particulares pueden contactar con el establecimiento donde adquirieron el producto o con las autoridades locales pertinentes para informarse sobre cómo y dónde pueden llevarlo para que sea sometido a un reci...

Страница 161: ...ITA TELECAMERA A COLORI WDR GIORNO NOTTE SCC B2315 P SCC B2015P Manuale d uso CC B2315_ITA indd 1 2007 6 5 14 58 01 ...

Страница 162: ... in modo sicuro e saldo Una telecamera che cade può causare danni alle persone 6 Non sistemare oggetti conduttori es cacciaviti monete oggetti metallici ecc o contenitori con acqua sulla telecamera Ciò può causare danni alle persone dovuti a incendio scossa elettrica o caduta di oggetti 7 Non istallare l unità in luoghi umidi con polveri o ceneri Ciò può causare incendi o scosse elettriche 8 Se l ...

Страница 163: ...er scollegare l apparecchio e deve essere facilmente accessibile in qualsiasi istante Dichiarazione FCC Questo apparecchio è conforme alla parte 15 delle norme FCC Il suo funzionamento è soggetto alle seguenti condizioni 1 Questo apparecchio non deve causare interferenze dannose e 2 Questo apparecchio deve accettare ogni interferenza in ricezione comprese quelle che possano determinare un funziona...

Страница 164: ...tituzione della presa obsoleta 10 Proteggere il cavo dell alimentazione per evitare che sia calpestato o schiacciato facendo particolare attenzione alle spine alle prese e al punto in cui i cavi escono dell apparecchio 11 Utilizzare solo connettori accessori indicati dal fabbricante 12 Utilizzare solo su carrelli piedistalli treppiedi staffe o tavoli indicati dal fornitore o venduti con l apparecc...

Страница 165: ...framma automatico 14 Istallazione della telecamera 15 Montare l obiettivo 15 Impostare la leva dell obiettivo ALC 16 Regolare la profondità di campo 16 Collegare i cavi e controllare il funzionamento 17 Impostazione videocamera 19 ID TELECAMERA 20 DIAFRAMMA 20 WDR 20 ALC 21 ELC 22 SHUTTER 22 AGC 23 MOVIMENTO 24 ACTIVITY DET 24 GIORNO NOTTE 26 GIORNO 27 NOTTE 28 AUTO 28 EST 29 BIL BIANCO 29 PRIVACY...

Страница 166: ...ne anche delle funzioni otturatore a bassa velocità e Sens Up Utilizza il metodo di accumulazione campo per aumentare la caratteristica di scarsa illuminazione Questa telecamera può essere utilizzata soprattutto in luoghi bui quali parcheggi sotterranei con illuminazione relativamente scarsa Durante il giorno mostra lo schermo a colori con una risoluzione orizzontale di 540 linee ma di notte utili...

Страница 167: ...nte con scarsa illuminazione Regolazione della retroilluminazione Quando un soggetto ha una forte illuminazione o la luce del sole lo colpisce direttamente intorno allo stesso si crea un ombra che non permette la visione nitida del soggetto stesso Questa telecamera dispone di funzionalità innovative che migliorano notevolmente l iimagine in questo tipo di applicazione Sincronizzazione digitale all...

Страница 168: ...talla la telecamera 3 Barra di controllo profondità di campo È possibile regolare la profondità di campo muovendola in su e in giù 4 Cavo di controllo otturatore automatico obiettivo Questo cavo trasmette l alimentazione e i segnali dalla telecamera per controllare l otturatore dell obiettivo 4 Cavo di controllo otturatore automatico obiettivo 5 Levetta di selezione ALC 1 Connettore obiettivo a di...

Страница 169: ...ettivo a diaframma automatico è istallato per i segnali di controllo DC impostare la levetta su DC VIDEO Quando l obiettivo a diaframma automatico è istallato per i segnali di controllo Video impostare la levetta su VIDEO Obiettivo a diaframma automatico opzionale Questo obiettivo è installato sulla telecamera Nota Quando l obiettivo della telecamera si sporca pulirlo delicatamente con tessuto per...

Страница 170: ...10 10 Pannello Posteriore AC24 DC12V SCC B2315 B2315P AC220V 240V SCC B2015P 1 5 2 3 4 1 2 3 4 CC B2315_ITA indd 10 2007 6 5 14 58 04 ...

Страница 171: ... segnale RS 485 DATA 2 RS 485 DATA Terminale per il collegamento del segnale RS 485 DATA 3 USCITA ALLARME Terminale d uscita allarme per la segnalazione rilevamento movimento Open Collector On Gnd 4 GND Terminale di GND 5 5VDC Terminale di alimentazione Utilizzare per DC 5V 100mA max 6 SENSORE ESTERNO Terminale per il comando esterno della funzione Giorno e Notte Livello Alto DC 3V 5V Modalità Gio...

Страница 172: ...alizzato Movimento Su Giù Premendo il tasto su o giù è possibile muoversi su o giù nel menu Impostazione Quando si preme questo tasto nel menu viene confermato il valore selezionato o la funzione Per entrare in un sottomenu premere questo pulsante 3 LED visualizzazione alimentazione Quando l alimentazione è collegata il LED rosso si accende 4 Terminale USCITA Video È collegato all ingresso video d...

Страница 173: ... attenzione quando la si conserva o la si fa funzionare Non collocare o far funzionare la telecamera in un ambiente umido con pioggia o su superfici bagnate Non pulire la telecamera con oggetti ruvidi Utilizzare sempre per la pulizia un pano asciutto Sistemare la telecamera in una zona fresca lontano dalla luce diretta del sole In caso contrario la telecamera potrebbe venir danneggiata Telecamera ...

Страница 174: ... telecamera è formato dalle seguenti parti Collegare ciascun cavo di controllo dell otturatore libero al connettore obiettivo a diaframma automatico come segue Nº Pin Tipo di controllo DC Tipo di controllo Video 1 Damp Alimentazione 12V 2 Damp Non applicabile 3 Drive Segnale video 4 Drive Terra CC B2315_ITA indd 14 2007 6 5 14 58 06 ...

Страница 175: ...tivo CS ruotandolo in senso orario come mostrato nell immagine Quando si utilizza l obiettivo C Dopo aver montato l adattatore di montaggio C ruotandolo in senso orario girare l obiettivo C in senso orario fin a fissarlo come indicato nell immagine Obiettivo CS Obiettivo C CC B2315_ITA indd 15 2007 6 5 14 58 06 ...

Страница 176: ...lecamera a un oggetto con alta risoluzione come un immagine decorata a una distanza di più di 10m impostare l anello di messa a fuoco dell obiettivo Regolare la barra di controllo della profondità di campo fino a migliorare la qualità dell oggetto Stringere la vitedella barra di controllo profondità di campo Nel caso di obiettivo con funzione di zoom Dopo aver esposto latelecamera ad un oggetto co...

Страница 177: ...n estremo del cavo BNC al jack di USCITA VIDEO sul retro della telecamera 2 Collegare l altro estremo del cavo BNC al jack di ENTRATA VIDEO sul monitor cavo BNC Terminale di uscita video Terminale di entrata video sul retro del monitor CC B2315_ITA indd 17 2007 6 5 14 58 08 ...

Страница 178: ...legare due cavi dell adattatore di corrente alla telecamera utilizzando il cacciavite a taglio come mostrato nell immagine GND cavo con la striscia bianca Nota Collegare sorgenti di alimentazione di AC 24V e DC 12V indipendentemente dalla polarità CC B2315_ITA indd 18 2007 6 5 14 58 08 ...

Страница 179: ...impostazione OSD On screen Display è il seguente ID CAMERA ON OFF IRIS WDR ALC ELC SHUTTER OFF AUTO X2 fino a X256 1 100 o 1 120 fino a 1 10K AGC OFF BASSO ALTO MOVIMENTO NORM VELOC M Veloc M LENTO LENTO MENU ACTIVITY DET ON OFF GIORNO NOTTE GIORNO NOTTE AUTO EST BIL BIANCO ATW1 ATW2 AWC MANU PRIVACY OFF ON SPECIALE RS 485 USCITA ESCI SALVA PRESET MENU IMPOSTAZIONE CC B2315_ITA indd 19 2007 6 5 14...

Страница 180: ...re un ID telecamera composto da lettere numeri e caratteri speciali fino a 20 caratteri L ID telecamera inserita può essere visualizzata nella posizione desiderata utilizzando il sottomenu POSIZIONE Quando si preme il tasto Impostazione in RET lo schermo ritorna al menu superiore DIAFRAMMA Il menu DIAFRAMMA è utilizzato per impostare il metodo di controllo automatico della luce per questa telecame...

Страница 181: ...le selezionare TUTTI ESTERNO e INDOOR in BIL BIANCO In caso di TUTTI la telecamera controlla sia immagini esterne sia INDOOR ALC Sesi premeiltasto Impostazione quando è selezionato il sottomenu ALC appare lo schermo corrispondente Per prima cosa selezionare OBIETTIVO DC e OBIETTIVO VIDEO in TIPO È possibile attivare o meno la funzione BLC Compensazione della retroilluminazione Per impostare la zon...

Страница 182: ...a BLC e assegnare il livello dell otturatore ad alta velocità SHUTTER Il menu SHUTTER è utilizzato per impostare l otturatore elettronico ad alta velocità e l otturatore a bassa velocità AUTOMATICO L otturatore elettronico ad alta velocità può essere utilizzato in 7 diverse velocità ed è comunemente utilizzato per oggetti che si muovono rapidamente NTSC da 1 100 a 1 10K PAL da 1 120 a 1 10K L ottu...

Страница 183: ...dalità DIAFRAMMA è ELC o WDR non si possono utilizzare gli otturatori da alta velocità AGC Il menu AGC Auto Gain Control è utilizzato per impostare il livello AGC della telecamera Quando AGC è attivo la telecamera automaticamente aumenta la sensibilità amplificando il segnale Video quando la forza del segnale scende al di sotto del valore normale Solo quando lo SHUTTER è OFF o l otturatore ad alta...

Страница 184: ...lla telecamera per monitorare movimenti La funzione è disponibile solo in modalità velocità bassa AUTOMATICA È possibile selezionare M LENTO LENTO NORM VELOC e M VELOC a seconda del livello di intensità AGC Per monitorare oggetti che si muovono molto rapidamente con scarsa illuminazione selezionare M VELOC Per monitorare oggetti fermi con scarsa illuminazione selezionare M LENTO ACTIVITY DET Il me...

Страница 185: ...sibile impostare manualmente l area di rilevazione movimento Si possono utilizzare i tasti di impostazione SU GIÙ SINISTRA DESTRA per impostare le dimensioni Per muoversi a POSIZIONE premere il tasto Dopo aver impostato la posizione utilizzando il tasto SU GIÙ SINISTRA DESTRA premere Impostazione per muoversi al menu superiore Per impostare le dimensioni e la posizione per AREA selezionare 0 1 2 o...

Страница 186: ...one SU GIÙ SINISTRA DESTRA per impostare l area Per cancellare il blocco selezionato premere Impostazione Per impostare l area di rilevamento movimento si dovranno specificare le dimensioni e la posizione per l impostazione dell area Quando viene selezionato ON in DISPLAY il movimento rilevato è visualizzato sullo schermo e la telecamera invia il segnale uscita Allarme È possibile anche assegnare ...

Страница 187: ...di campo es Utilizzare un otturatore elettronico da alta velocità può diminuire la profondità della telecamera È necessario di impostare il fuoco nelle condizioni in cui il DIAFRAMMA si apre al massimo in modalità colore GIORNO Se si preme il tasto Impostazione quando viene selezionato il sottomenu GIORNO appare il corrispondente schermo È possibile impostare i valori C GAIN COLORE AGC DETTAGLIO A...

Страница 188: ...tazioni per i colori rosso e blu Nel caso di BN quando BURST è impostato su ON vengono emessi dei segnali di sincronismo insieme ai segnali video Composito BN Nessun segnale di saturazione viene emesso quando BURST è impostato su OFF AUTO Questo comando gestisce automaticamente la modalità GIORNO in modalità NOTTE e vice versa a seconda dell illuminazione Con scarsa illuminazione la telecamera rim...

Страница 189: ... non si possono cambiare le impostazioni EST Passa automaticamente dalla modalità colore alla modalità BN e vice versa tramite un comando esterno BIL BIANCO Il menu BIL BIANCO è usato per configurare le impostazioni del bilanciamento del bianco per la telecamera Per regolare il bilanciamento del bianco sono previste le seguenti quattro differenti modalità ATW1 Modalità bilanciamento del bianco con...

Страница 190: ...zare la sua temperatura del colore e premere il tasto Impostazione La temperatura del colore fissata viene applicata MANU È possibile impostare manualmente la temperatura del colore attuale È anche possibile specificare le impostazioni per i colori rosso e blu PRIVACY Il menu PRIVACY è usato per configurare le impostazioni della privacy per la telecamera Se si preme il tasto Impostazione quando è s...

Страница 191: ...ne del mosaico perchè è prefissata Per privacy da 16 a 23 non si può impostare il colore del mosaico SPECIALE Il menu SPECIALE è usato per configurare le impostazioni speciali della telecamera Se si preme il tasto Impostazione quando è selezionato ON nel menu SPECIALE appare lo schermo corrispondente LINGUA È possibile cambiare la lingua dell OSD usando il tasto SINISTRA DESTRA in Impostazione V SY...

Страница 192: ...ostazione quando è selezionato ON in ZOOM DIGITALE appare lo schermocorrispondenters Il primo numerovisualizzatoindica il rapporto dello zoom e il secondo è l ingrandimento Quando il livello raggiunge 130 l ingrandimento diventa X2 Dopo aver selezionato la posizione di zoomviene applicata la funzione zoom digitale PROG VIDEO È possibile configurare le impostazioni dell uscita video Se si preme il t...

Страница 193: ... tasto Impostazione quando è selezionato ON nel menu DNR appare lo schermo corrispondente Si può impostare il livello per questa configurazione FLICKERLESS Quando è impostata su ON la velocità dell otturatore è impostata su 1 100 sec per NTSC o 1 120 sec per PAL per evitare il tremolio dovuto al disaccordo tra la frequenza di sincronizzazione verticale e la frequenza intermittente della luce CC B23...

Страница 194: ...formazioni relative al sistema Se si preme il tasto Impostazione quando è selezionato ON nel menu INFO SISTEMA appare lo schermo corrispondente Si possono trovare le informazioni di sistema su versione ROM versione EEP protocollo indirizzo tipo baudrate e numero di serie RS 485 il menu RS 485 è usato per configurare le impostazioni della seriale di comunicazione RS 485 per la telecamera Ci si può c...

Страница 195: ... nel menu RS 485 appare lo schermo corrispondente È possibile impostare il protocollo baudrate e indirizzo intervallo da 0 a 255 per questo tipo di comunicazione USCITA Il menu USCITA è utilizzato per uscire dal menu IMPOSTAZIONE È possibile selezionare le seguenti opzioni ESCI Ignora la modifica e torna all impostazione precedente SALVA Salvia la modifica PRESET Ignora la modifica e torna alle im...

Страница 196: ...PAL 752 H x 582 V Modalità di scansione NTSC 525 Linee interlacciato 2 1 PAL 625 Linee interlacciato 2 1 Frequenza linea di scansione Orizzontale NTSC 15 734Hz INT 15 750Hz LL PAL 15 625Hz INT 15 625Hz LL Verticale NTSC 59 94Hz INT 60Hz LL PAL 50Hz INT 50Hz LL Modalità di sincronizzazione INT Line Lock Risoluzione 540 570 Linee TV COLORE BN Rapporto S N 50dB Illuminazione minima scena Specifiche de...

Страница 197: ...o ON OFF Giorno Notte GIORNO NOTTE AUTO EST Bilanciamento del bianco Modalità ATW1 ATW2 AWC MANUALE 3200 K 5600 K R B Regolazione guadagno Privacy ON OFF Segnale in uscita Video composito 1 0Vp p 75ohm BNC Obiettivo AI VIDEO DC Montaggio obiettivo CS C Adattatore montaggio Temperatura di esercizio 10 C 50 C Umidità di esercizio 90 Dimensioni 65 L x 55 A x 130 5 D mm Peso SCC B2315 P Circa 410g SCC...

Страница 198: ...38 38 Memo CC B2315_ITA indd 38 2007 6 5 14 58 13 ...

Страница 199: ...ITA 39 39 CC B2315_ITA indd 39 2007 6 5 14 58 13 ...

Страница 200: ...esto prodotto da altri tipi di rifiuti e di riciclarlo in maniera responsabile per favorire il riutilizzo sostenibile delle risorse materiali Gli utenti domestici sono invitati a contattare il rivenditore presso il quale è stato acquistato il prodotto o l ufficio locale preposto per tutte le informazioni relative alla raccolta differenziata e al riciclaggio per questo tipo di prodotto Gli utenti azi...

Отзывы: