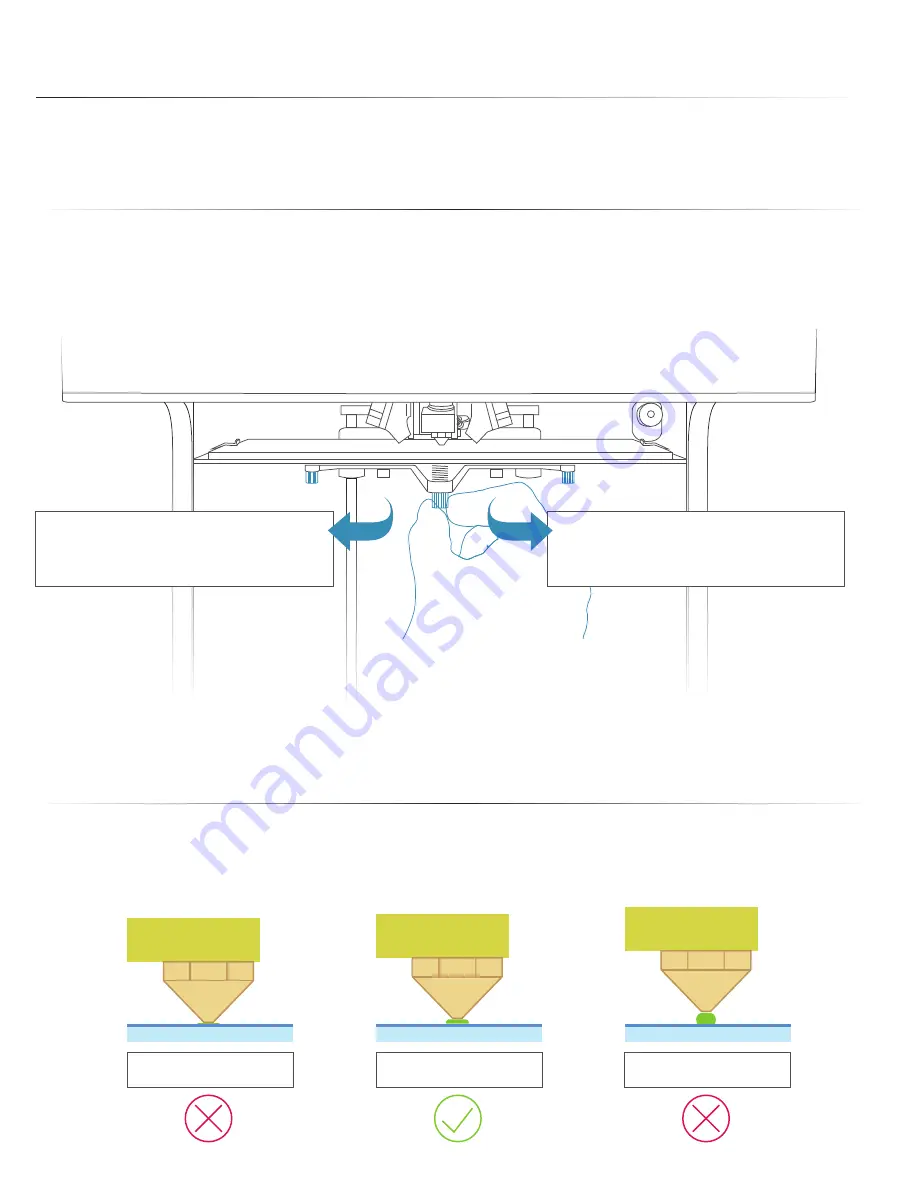
To ensure that your prints always stick to the glass build plate, the build surface must be properly leveled so that the nozzle
is at an equal set distance across the print surface. Use the Bed Leveling Wizard and follow the on-screen instructions to
assist you in leveling the print bed.
Initialize the Bed Leveling Wizard from the LCD menu on your Trifecta™ 800 3D Printer and follow the
on-screen instructions to begin bed leveling. To level your bed, the wizard will move the extruder to
three points on the print bed and ask you to adjust the thumb screws to make the distance between
the nozzle tip and print bed equal across the print surface.
With each of the three thumbscrews, adjust until the gap between the nozzle tip and print surface is roughly the thickness
of a piece of paper. If there is a large gap, you will need to turn the screw clockwise to bring the bed closer to the nozzle.
If there is no gap and the nozzle is scraping the print tape, you will need to turn the thumbscrew counter-clockwise until
you see a small gap.
Turning Clockwise
This loosens the spring tension and brings
the print surface closer to the nozzle.
Turning Counter-Clockwise
This tightens the spring tension and brings the
print surface further away from the nozzle.
Whenever you begin a print, always check that the first layer of the print is properly stuck onto the blue paint-
er’s tape. A properly leveled bed should have the extruded filament a bit squished and shouldn’t pop off the
bed easily. While the printer is performing the skirt nozzle purge, observe the deposited filament and make
micro-adjustments with the thumbscrew if necessary.
TOO CLOSE
LEVELED
TOO FAR
PAGE 12
Bed Leveling Guide
Содержание Trifecta 800
Страница 1: ...Trifecta 800 3D Printer User s Guide...


