8 Electrical installation
28
Installation and maintenance instructions flexoTHERM exclusive 0020213394_01
8.7
Connecting the system controller and
accessories to the electronics system
1.
Install the system controller in accordance with the in-
stallation instructions supplied.
2.
Open the electronics box. (
→
Page 21)
3.
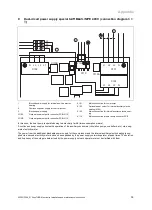
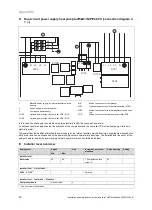
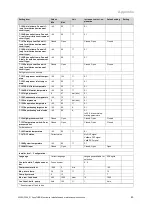
Carry out the wiring. (
→
Page 28)
4.
Connect controllers and accessories in accordance with
the relevant system diagrams and installation instruc-
tions.
5.
Install the VRC DCF receiver.
6.
Close the electronics box.
8.8
Carrying out the wiring
Caution.
Risk of material damage caused by incor-
rect installation.
Mains voltage at incorrect terminals and plug
terminals may destroy the electronics.
▶
Do not connect any mains voltage to the
eBUS terminals (+/-).
▶
Only connect the mains connection cable
to the terminals marked for the purpose.
1.
Route the supply lines of the components to be connec-
ted through the cable duct provided on the rear of the
product on the left.
2.
Use the cable channel on the top of the product.
3.
Use strain reliefs.
4.
Shorten the supply lines as necessary.
30 mm max.
5.
To prevent short circuits if a strand accidentally comes
loose, only strip the outer sheathing of flexible lines to a
maximum of 30 mm.
6.
Ensure the inner conductor insulation is not damaged
when stripping the outer sheathing.
7.
Only strip inner conductors just enough to establish
good, sound connections.
8.
To avoid short circuits resulting from loose individual
wires, fit conductor end sleeves on the stripped ends of
the conductors.
9.
Screw the respective plug to the supply line.
10. Check whether all conductors are sitting mechanically
securely in the terminals of the plug. Remedy this if
necessary.
11. Plug the plug into the associated PCB slot.
8.9
Installing the VRC DCF
▶
Install the VRC DCF receiver in accordance with the in-
stallation instructions for the system controller.
8.10
Installing optional accessories
1.
Route the lines through the ducts in the back wall of the
product.
2.
Open the electronics box. (
→
Page 21)
3.
Connect the connection cable to the corresponding
plugs or slots on the mains connection PCB or control-
ler PCB.
4.
Use the strain reliefs to secure the lines in the product.
8.11
Checking the electrical installation
1.
After the installation is complete, check the electrical in-
stallation to ensure that the connections that have been
established are secured properly and are sufficiently in-
sulated.
2.
Install the cover of the electronics box. (
→
Page 21)
8.12
Completing installation
8.12.1 Fitting the casing
1.
Fit the side casings and screw in the screws.
2.
Place the casing top on the side casings and slide it
back into the recesses provided for this in the back wall.
3.
Hook the upper part of the front casing, using the retain-
ing brackets, into the recesses in the side casings and
lower it down.
4.
Hook the lower part of the front casing, using the retain-
ing brackets, into the recesses in the side casings and
fold it up.
5.
Install the panel on the operator control panel.
6.
Attach the operator control panel cover and check that
the cover can move easily when it is opened from either
side.
8.12.2 Checking the system pressure and leak-
tightness
1.
After completing the installation, carry out a check of
the system.
2.
Start up the product in accordance with the relevant
operating instructions.
3.
Check the filling pressure of the heating installation and
check for leaks.


