Maintenance
ecoLEVEL installation and maintenance instructions 0020029316_01
17
8
8 Maintenance
a
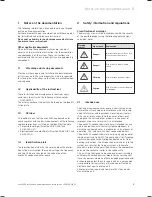
Danger!
Risk of death from electric shock!
There is a risk of electrical shock from live con-
nections.
>
Always switch off the power supply to the
pump and to the boiler before performing
maintenance work.
>
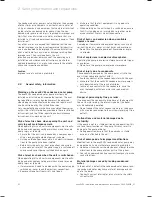
Make sure that the infeeds and drains are free from
blockage.
>
Clean the non-return valve, as described in (
¬
sec-
tion 8.1
).
>
Remove the cover from the pump and check the conden-
sate vessel for contamination. If necessary, clean the
condensate vessel with warm water and a mild cleaner
(
¬
section 8.2
)
>
Check the inlet and drain lines and clean these if neces-
sary.
>
Check that the lines are not kinked to ensure that the
flow rate is unhindered.
i
The maintenance of the pump can be based
upon the maintenance intervals of the boiler.
The pump should be maintained at least once
a year.
8.1
Cleaning the non-return valve
1
8.1 Removing the non-return valve
Removing the non-return valve
>
Remove the drain hose.
In doing so, protect against leaking condensed water. For
more information, see the "Safety" section (
¬
section 2
)
>
Remove the non-return valve (
1
) from the pump cover by
turning it anti-clockwise.
1
4
3
2
3
8.2
Removing the sealing insert
Removing the sealing insert from the non-return
valve
>
Proceed carefully when removing the sealing insert.
Ensure that the sealing insert is not damaged.
>
To remove the sealing insert (
2
) from the casing of the
non-return valve, use a screwdriver to carefully push in
the four protruding burls (
3
).
The sealing insert becomes loose from the casing.
Cleaning the non-return valve
>
Remove the ball (
4
) from the non-return valve.
>
Flush the casing of the non-return valve thoroughly with
warm water.
>
Clean the ball from the non-return valve with warm
water.
Reinstalling the non-return valve
>
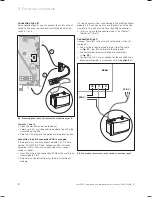
If required, clean the pump first before you reinstall the
non-return valve (
¬
section 8.2
)
>
Proceed with the installation carefully. Ensure that the
sealing insert is not damaged.
>
Place the ball (
¬
fig. 8.2
), item 4) into the non-return
valve.
>
Position the burls (
¬
fig. 8.2
), item 3) of the sealing
insert (
¬
fig. 8.2
),
item 2) at the designated position.
>
Carefully push the sealing insert into the non-return
valve.
Содержание ecoLEVEL
Страница 21: ......
Страница 22: ......
Страница 23: ......
Страница 24: ...0020029316_01 GBIE 102012 Subject to change Manufacturer Supplier ...


