User Guide Ver:1.1 Page:
44
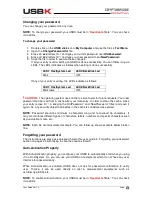
nickname helps you distinguish between different USBK devices since you can have multiple
USBKs.
NOTE:
To change/set Device Label, your USBK must be in “
Deactivate
State”. If not,
deactivate your USBK before using the instruction herein this guide on page 41.
To change device name
1. Double-click on the
USBK disk
icon in
My Computer
and use the files in
Text Menu
2. Open the
SetDeviceLabel.txt
file
3. Erase all ‘
xxx
’ letters till ‘
:
’ and type your current password near
Password:
4. Erase all ‘
xxx
’ letters till ‘
:
’ and type a name for your device near
Name:
5. Save the file. If your password is valid, The LEDs indicates as below table:
LED1: HostSystem Led
LED2:BackDisk Led
ON
ON
It means that you should remove and re-plug your USBK for changing to be applied.
6. Un- plug your device (USBK)
7. When you plug it, you see your device with new name instead of USBK as default
name. New name is also indicated at
About.txt
near
Device Label:
!
CAUTION:
The operating system uses cache to serve faster for future requests. Your
password can be read from a cache after your data entry. In order to clean the cache, erase
your entry (erase till ‘:’ in keeping the ‘OldPassword:’ and ‘NewPassword:’ titles)
and save it
again. So, any security object that resides in the cache is considered as expired.
Changing your encryption key(s)
You can change your encryption key(s) in any time you want.
!
CAUTION:
You can not read current data on your Backdisk with your new encryption key.
Before changing your encryption key, be sure to back up your files in your BackDisk used
with your current encryption key.
NOTE:
To change your encryption key(s), your USBK must be in “
Deactivate
State”. You
can check it via LEDs.
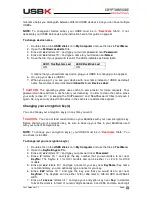
To change/set your encryption key(s)
1. Double-click on the
USBK disk
icon in
My Computer
and use the files in
Text Menu
2. Open the
KeySettings.txt
file
3. Erase all ‘
xxx
’ letters till ‘
:
’ and type your password near
Password:
4. Erase ‘
#
’ letters till ‘
:
’ and type the key number that you would like to set near
KeyNo:
. The KeyNo is 1 for A101 models and can be either 1 or 2 or 3 for A103
models.
5. Erase all ‘
xxx
’ letters till ‘
:
’ and type a name for your key near
KeyName:
Key name
is not mandatory; you can optionally type a name for your key.
6. Erase ‘
###
’ letters till ‘
:
’ and type the key size that you would like to set near
KeySize:
. The KeySize can be either 128 or 256 refer to 128-bit AES and 256-bit
AES.
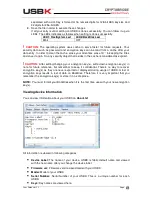
7. Erase all ‘
xxx.xxx
’ letters till ‘
:
’ and type your encryption key near
Key:
in decimal
format. Decimal is formed of numeric digits between 0 and 255 and also each digit


