background image

  Gigarouter 

UF72N User Manual


Page 177 of 203 


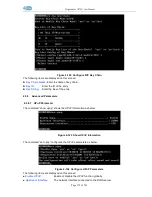
Figure 4-127  Show Sip Server Information 


Execute the command “set sip” to set the sip information as below: 


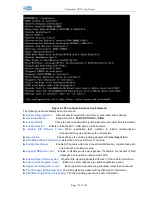
Figure 4-128  Configure Sip Server   

At first, the command will show the sip server information, and then begin to configure sip server. 
The following items are displayed on this screen: 

 Register server ip or domain:   

Domain or IP of SIP server. 

 Register Server Port:           

Listening port of SIP server. 

 Enable Backup Server or not:     

Enable or disable backup SIP server. 

 Backup Server IP or Domain:

    Domain or IP of backup SIP server. 

 Backup Register Server Port:           

Listening port of backup SIP server. 

 Enable Proxy Server or not:         

Enable or disable Proxy server. 

 Proxy Server domain name or IP:   

Domain or IP of proxy server. 

 Proxy Server Port:                           

Listening port of proxy server. 

 Enable Backup Proxy register or not: 

Enable or disable backup proxy server. 

 Backup Proxy Register Server ip or domain: 

Domain or IP of backup proxy server. 

 Backup Proxy Register Server Port:     

Listening port of backup proxy server. 

  Register  Interval:               

Enter  the  desired  time  interval  at  which  the  sip  UA  will  send  register 

message. 

 RTP begin:                         

Local RTP port range begin. 

 RTP end:                             

Local RTP port range end. 

 Local SIP Port:                   

Local listening port. 

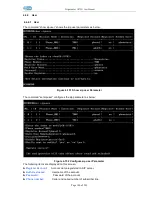
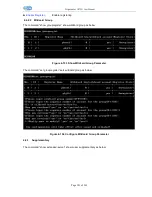
The command “show sipadvance” shows the advanced SIP information as below: 

Содержание UNIFIBER GIGAROUTER UF72N

Страница 1: ......

Страница 2: ...ch support in every way You can get in touch with local dearer as well as contact to Customer Service Department directly Unidata SpA Via Portuense 1555 00148 Roma RM c o Commercity M25 M26 Tel 39 06...

Страница 3: ...nsmitted in any form or by any means without prior written consent of Unidata SpA is the trademarks of Unidata SpA No the trademarks may be counterfeited Disclaimer Unidata SpA reserves the right to c...

Страница 4: ...enus are separated by character For instance file new directory means the menu item directory in menu new which in turn in the menu file Used to highlight important area in diagrams Indicates the inpu...

Страница 5: ...move the mouse Table 3 Convention for Keyboard Operation Style Meanings Ctrl C means an operation which presses down several keys in the keyboard in the same time E g Ctrl C means press down the key o...

Страница 6: ...gement 24 3 3 7 IPv6 Configuration 25 3 4 DATA SERVICE 26 3 4 1 Status 26 3 4 2 DHCP Server 28 3 4 3 NAT Config 30 3 4 4 Firewall Config 33 3 4 5 QoS 44 3 4 6 DDNS 49 3 4 7 VPN 51 3 4 8 Routing 59 3 4...

Страница 7: ...3 1 DHCP Server 122 4 3 2 NAT Config 124 4 3 3 Firewall Config 129 4 3 4 QoS 145 4 3 5 DDNS 153 4 3 6 VPN 154 4 3 7 Routing 167 4 3 8 Advanced Parameters 175 4 3 9 Multicast 176 4 4 VOIP SERVICE 176...

Страница 8: ...4 5 7 SNMP 201...

Страница 9: ...pital investment to communicate with various kinds of users the complete VoIP features are built in Comparing with other Voice equipments GIGAROUTER UF72N has integrated high data capacity of WIFI 300...

Страница 10: ...Solid Green Optical signal is detected WAN Off No Ethernet signal is detected Flash Green User data going through Ethernet port Solid Green Ethernet interface is ready to work LAN1 LAN4 Off No Etherne...

Страница 11: ...4 WIFI access point support 802 11b g n SFP 1 Gigabit fiber interface USB 1 USB 2 0 port use for storage or 3G modem 2 3 Features Data Network l WAN 1xGE 1xSFP and 1xUSB port for 2G 3G USB Modem Conne...

Страница 12: ...PSK WPA2 PSK l WIFI Features WMM WLAN LAN Isolation Multi SSID X4 AP Isolation l Antenna Type 2R2T Voice Capacity and Functions l Analog User Co line 2 4 8xLines FXS FXO Centrex Functions List l Call...

Страница 13: ...rt Enter IP address in the address bar of web browser and then press ENTER you can get access to the Login interface There are two languages provided Chinese and English Figure 3 1 Login Interface 3 2...

Страница 14: ...WAN to load the following page Figure 3 3 WAN Status 3 3 1 2 LAN Status Choose the menu Network Status LAN to load the following page Figure 3 4 LAN Status 3 3 1 3 Link Status Choose the menu Network...

Страница 15: ...IP if your ISP has assigned a static IP address for your VLAN Enable Optional Enable VLAN to configure VLAN ID and VLAN Priority Level VLAN ID Optional VLAN ID of this WAN interface Priority Level Op...

Страница 16: ...LAN ID Optional VLAN ID of this WAN interface Priority Level Optional VLAN Priority Level of this WAN interface Primary DNS Enter the IP address of your ISP s Primary DNS Domain Name Server manually I...

Страница 17: ...his WAN interface Primary DNS Enter the IP address of your ISP s Primary DNS Domain Name Server manually If you are not clear please consult your ISP It s not allowed to access the Internet via domain...

Страница 18: ...y Level Optional VLAN Priority Level of this WAN interface Primary DNS Enter the IP address of your ISP s Primary DNS Domain Name Server If you are not clear please consult your ISP It s not allowed t...

Страница 19: ...of your ISP s DHCP server Vendor Class Identifier Optional This option 60 is used by DHCP clients to optionally identify the vendor type and configuration of a DHCP client Enterprise Code Optional Man...

Страница 20: ...Password provided by your ISP Enable Encryption Enable PPTP link encryption Secondary Connection Here allow you to configure the secondary connection DHCP and Static IP connection types are provided I...

Страница 21: ...AN page 1 Part 1 Configure LAN interfaces Click the Interface Name of existent LAN interface you want to modify If you want to delete the entry select it and click the Del the VLAN1 is default existed...

Страница 22: ...eway Optional If Enable DHCP Server is selected enter the Gateway address to be assigned Primary DNS Optional If Enable DHCP Server is selected enter the Primary DNS server address to be assigned Seco...

Страница 23: ...aptops PDAs or phones and nearby Wi Fi access points special hardware connected to a wired network 3 3 4 1 Basic Settings Choose the menu Network WLAN Basic Settings to load the following page Figure...

Страница 24: ...e wireless station LAN Isolated Enable or disable isolation between the LAN and SSID Max Client Enter the maximum number of clients allowed to connect to the SSID SSID AP Isolated This function can is...

Страница 25: ...ty The following items are displayed on this screen SSID The SSID enabled in WLAN Basic Settings page Read only Authentication The authentication type selected Open WEP Shared WEP WEP Auto Default Key...

Страница 26: ...Server Rasius Server Port Enter the port that radius service used Shared Seret Enter the password for the Radius Server Session Timeout Specify the session timeout in seconds Enter 0 to not limit the...

Страница 27: ...Code If PIN mode is chosen enter the 8 digit PIN code and then click Connect 2 PBC Mode If PBC mode is selected the following page is loaded Figure 3 19 Configure WIFI WPS PBC The following items are...

Страница 28: ...e 100 is the default setting and is recommended Enable WMM Enable or disable the WIFI WMM function globally WMM function can guarantee the packets with high priority messages being transmitted prefere...

Страница 29: ...ny deny the stations specified by entries in the list to access To delete Wireless MAC Address filtering entries select the entries and click the Del button To Add a Wireless MAC Address filtering ent...

Страница 30: ...n this screen SP Network Other or Swisscom If it is not the target user you need to select the other Connect Mode Manual or Auto The default is Auto Online Mode always online and disconnect after idle...

Страница 31: ...Link Backup When enabled if WAN uplink port is disconnected the routing switches to the 3G link Heartbeat Address Set the heartbeat detecting address of the link the default configuration is not requ...

Страница 32: ...r monitoring and troubleshooting the network Choose the menu Network Port Management Port Mirror to load the following page Figure 3 27 Port Mirror The following items are displayed on this screen Ena...

Страница 33: ...are displayed on this screen IP Stack Version Choose the IP stack version to use Provides the following three types IPv4 IPv6 IPv4 v6 WAN Configuration Enable WAN If IPv6 or IPv4 v6 is chosen select t...

Страница 34: ...oconfiguration DHCPv6 DHCPv6 Manual Allocate Address Prefix Configure the manual allocate address prefix Prefix Life Time Enter the life time of prefix Default Gateway Life Time Enter the life time of...

Страница 35: ...f 203 Figure 3 31 ARP Table 3 4 1 3 Route Table Choose the menu Data Service Status Route Table to load the following page Figure 3 32 Route Table 3 4 1 4 Net State Choose the menu Data Service Status...

Страница 36: ...n you specify a static IP address for a client on the LAN that client will always receive the same IP address each time when it accesses the DHCP server The Reserved IP addresses should be assigned to...

Страница 37: ...Relay A DHCP relay agent is any host that forwards DHCP packets between clients and servers Relay agents are used to forward requests and replies between clients and servers when they are not on the s...

Страница 38: ...ed Server Interface Choose the interface which connects DHCP server Server IP Configure the DHCP server IP address 3 4 3 NAT Config Network Address Translation NAT is a network protocol used in IPv4 n...

Страница 39: ...ne or a few external addresses by using a feature called overload which is also referred to as PAT PAT is a subset of NAT functionality where it maps several internal addresses to a single external ad...

Страница 40: ...nter a name for Virtual Server entry 3 4 3 3 DMZ Settings In computer security a DMZ or Demilitarized Zone sometimes referred to as a perimeter network is a physical or logical network that contains a...

Страница 41: ...wing items are displayed on this screen Enable SIP Enable or disable SIP ALG Enable H323 Allow Microsoft NetMeeting clients to communicate across NAT if selected Enable FTP Allow FTP clients and serve...

Страница 42: ...een a client and a host set from a host to any port that is open and listening If the packet is programmed to have the same destination and source IP address when it is sent to a machine via IP spoofi...

Страница 43: ...46 View Service Type Configuration Click the Index in the entry you want to modify If you want to delete the entry select it and click the Del Click the Add button to add a new entry Figure 3 47 Add...

Страница 44: ...it and click the Del Click the Add button to add a new entry Figure 3 49 Add or Modify Access Control Entry The following items are displayed on this screen Action The policy of this entry Allow or De...

Страница 45: ...Index in the entry you want to modify If you want to delete the entry select it and click the Del Click the Add button to add a new entry Figure 3 51 Add or Modify User Authentication Entry The follow...

Страница 46: ...owing page Figure 3 52 Configure Page Push The following items are displayed on this screen Enable Page Push If enabled push specified HTTP page to the browser when accessing the Internet for the firs...

Страница 47: ...device from the Intranet via WEB IP Limit If enabled allow only specific IP range to access the device from the Intranet via WEB IP Range If IP Limit enabled specifies the IPv4 address range that is o...

Страница 48: ...4 3 SSH Choose the menu Data Service Firewall Config Netword Access Ctrl SSH to load the following page Figure 3 55 Configure SSH Access Ctrl The following items are displayed on this screen Port Port...

Страница 49: ...odify If you want to delete the entry select it and click the Del Click the Add button to add a new entry Figure 3 56 Configure Keyword Filter The following items are displayed on this screen Keyword...

Страница 50: ...local hosts by specifying their MAC addresses Choose the menu Data Service Firewall Config Filter Strategy MAC Filter to load the following page Figure 3 58 Configure MAC Filter The following items ar...

Страница 51: ...ry 3 4 4 6 IP MAC Binding Choose the menu Data Service Firewall Config IP MAC Binding to load the following page There are two ways to add a binding entry You can manually enter a pair of IP and MAC a...

Страница 52: ...s first sending packets of high priority queue WRR All queues use weighted fair queuing scheme which is defined in Weight Ratio PQ WRR Only highest queue use strict priority others use weighted fair q...

Страница 53: ...16 23 2 24 31 3 32 to 39 4 40 47 5 48 55 6 56 to 63 7 3 4 5 2 Port Rate Limit Rate limit for physical LAN ports you can select the package type restrictions limiting the entrance All multiples of 32k...

Страница 54: ...are in active Active Day If not configured which means that all time in active Direction Up Check the frame from the direction of the LAN port to the WAN port and match the source IP and destination p...

Страница 55: ...ce to load the following page Figure 3 66 View Qos Service The following items are displayed on this screen Name Service name Read only Remap Queue Priority Check the box to remap scheduling queue Pri...

Страница 56: ...Name The custom name Physical Port Rule s source port Rule Type Type of rule L2 data or L3 data If L3 Data is selected Figure 3 69 L3 Data Rule Type The following items are display on this page Src I...

Страница 57: ...D Change the VID of packets matched with the rule Remark 802 1p Change the 802 1P priority of packets matched with the rule Remark DSCP Change the DSCP of packets matched with the rule Priority Change...

Страница 58: ...rom pull dwon list DYNDNS For dyndns org FREEDNS For freedns afraid org ZONE For zoneedit com NOIP For no ip com 3322 For 3322 org CUSTOM For custom self defined DDNS server type Server Name If CUSTOM...

Страница 59: ...o endpoints It is a connection secured by encrypting the data and using point to point authentication The following diagram is a typical VPN topology Figure 3 72 VPN Network Topology As the packets ar...

Страница 60: ...P tunnel will be encrypted by MPPE Click the Index in the entry you want to modify If you want to delete the entry select it and click the Del Click the Add button to add a new entry Figure 3 75 Add o...

Страница 61: ...led enter the authentication secret Enable Debug Specify whether to enable the debug for L2TP Click the Index in the entry you want to modify If you want to delete the entry select it and click the De...

Страница 62: ...eed to negotiate a security key for communication with IKE Internet Key Exchange protocols Actually IKE is a hybrid protocol based on three underlying security protocols ISAKMP Internet Security Assoc...

Страница 63: ...negotiation Options include MD5 MD5 Message Digest Algorithm takes a message of arbitrary length and generates a 128 bit message digest SHA1 SHA1 Secure Hash Algorithm takes a message less than 2 64...

Страница 64: ...er security which applies to scenarios with lower requirement for identity protection Enable Local ID If enabled enter a name for the local device as the ID in IKE negotiation Enable Remote ID If enab...

Страница 65: ...ation data integrity and anti replay services ESP AH Both ESP and AH security protocol Encryption Algorithm Select the algorithm used to encrypt the data for ESP encryption Options include DES DES Dat...

Страница 66: ...the client is a network PC to Site Select this option when the client is a host Local Subnet IP Local Subnet Netmask Specify IP address range on your local LAN to identify which PCs on your LAN are c...

Страница 67: ...stination IP Enter the destination host the route leads to Netmask Enter the Subnet mask of the destination network Next Hop Type Include Next Hop Interface and Next Hop Address see following option N...

Страница 68: ...Ipv4 address 3 4 8 2 Policy Route Choose the menu Data Service Route Policy Route to load the following page Figure 3 88 View Policy Route Click the Index in the entry you want to modify If you want...

Страница 69: ...pecify the active time range for the rule entry Active Day Specify the active days for the rule entry 3 4 8 3 RIP The Routing Information Protocol RIP is one of the oldest distance vector routing prot...

Страница 70: ...Configuration The following items are displayed on this page Key Chain Name Enter the name of key chain Click the Index in the entry you want to modify If you want to delete the entry select it and c...

Страница 71: ...to load the following page Figure 3 94 Configure UPnp The following items are displayed on this screen Enable UPnP Enable or disable the UPnP function globally Upstream Interface The network interfac...

Страница 72: ...e displayed on this screen Username Enter user name of this entry Password Enter password of this entry Access Right Select access right from pull down list Read or Read Write 2 USB Storage Scan the p...

Страница 73: ...eral Parameters of SIP Service The following items are displayed on this screen Primary Server Address Domain or IP of SIP server Primary Server Port Listening port of SIP server Enable Backup Server...

Страница 74: ...mer Enable or disable UAC UAS session refresh mode Enable SIP Retrans Timer When registration fails whether to initiate retransmission retransmission cycle and time with configuration User Agent Check...

Страница 75: ...the SIP server Click the Unregister button to start the un registering to the SIP server Click the User in the entry you want to modify to load the following page Figure 3 103Configure User The follo...

Страница 76: ...e 3 105Add or Modify Wildcard Group Configuration The following items are displayed on this screen Enable Group Register Enable or disable the group register function globally 3 5 3 Supplementary Choo...

Страница 77: ...d to 2 Cancel by keypad service system 41 Call Forwarding On Busy Enable or disable CFB function if enabled enter Call Number 1 Set by keypad service system 40 TN TN is the phone number to be redirect...

Страница 78: ...caller ID generation using Frequency Shift Keying FSK DTMF caller ID generation using DTMF signaling 2 Abbreviated Dialing allows you to store selected phone numbers for quick and easy dialing Each t...

Страница 79: ...e other side The smaller the value the more bandwidth usage The larger the value the more voice delay Choose the menu VOIP Service Codec Parameters to load the following page Figure 3 112Configure Pac...

Страница 80: ...fferer Priority Codec selection decision based on caller s priority Codec Priority If Use Answerer Priority is selected set the priority of codec 3 5 5 DSP Parameters Choose the menu VOIP Service DSP...

Страница 81: ...the digits is enough press pound key timeout expires or digitmap comparing If digits dialed partly matching with digitmap patterns continue waiting of number receiving If they match send the number i...

Страница 82: ...ap to load the following page Figure 3 116Configure Digitmap The following items are displayed on this screen Enable Enable or disable digit map function Short Timer Enter the time of Short Timer in s...

Страница 83: ...d busy tone frequency Busy Tone Frequency 1 Busy Tone Frequency 2 On Time Off Time Ring Back Tone User Define Enable Whether to use user defined ringback tone frequency Ring Back Tone Frequency 1 Ring...

Страница 84: ...etected after flash hold the active call and recover the call on hold Keep the hold call when onhook If selected when hanging up in this context the telephone rings to notify the user there is still a...

Страница 85: ...s reached both wrap around to the first number in the list again With a parallel hunt group all extensions in the list will ring at the same time To delete an exist entry select it and click the Del T...

Страница 86: ...Add button to add a new entry The following items are displayed on this screen Phone Prefix The prefix of this phone book Total Length The total length of number to wait before sending Prefix Mode Mo...

Страница 87: ...kday of DST range from Sunday to Saturday Start Day of Week Last in Month Specify the order of start weekday in the month from pull down list as following l First in Month l Second in Month l Third in...

Страница 88: ...are 2 steps to complete firmware updating 1 Choose menu System Upgrade then select the right firmware file click Upgrade wait a few minutes for firmware downloading and programming 2 Choose menu Syste...

Страница 89: ...on this screen Backup Current Configurations Save current parameters as customer default parameters Load Default Configurations To reset to customer default parameters Restore Factory Configurations...

Страница 90: ...face By selecting the interface only packets through this interface will be captured Protocol By selecting the protocol only packets of this protocol will be captured Tcpdump Enter some options of tcp...

Страница 91: ...oad the following page Figure 3 129 User Management The following items are displayed on this screen Username You can select the user with different permissions However you can not select the user who...

Страница 92: ...owing page Figure 3 131 Display System Log Click the Export button to export all the local logs as a file Click the Clear button to clear all the local logs from the device permanently not just from t...

Страница 93: ...ust periodically send CPE information to Server using the Inform method call Enter the duration in seconds of the interval if enabled Single Account Enable Whether or not the TR069 Account is enabled...

Страница 94: ...hoose the menu System SNMP to load the following page Figure 3 133 Configure SNMP The following items are displayed on this screen Register Enable Check this box to enable SNMP register Server Address...

Страница 95: ...is super you can see this web page On this page you can change the access right of the user to access the web pages Choose the menu System User Access Right to load the following page Figure 3 134 Vi...

Страница 96: ...ake effect after click the button of Apply Figure 3 136 Apply 3 8 Print Function The device supports to link printer port and provides share printing capabilities to other computers To use print funct...

Страница 97: ...Gigarouter UF72N User Manual Page 89 of 203 Figure 3 137 Add Printer 2 Connecting local printer Select Local printer attached to this computer...

Страница 98: ...f 203 Figure 3 138 Connecting local printer 3 Create a new port Select Create a new port and select Standard TCP IP Port Figure 3 139 Create a new port 4 Add print device Click Next and add IP devices...

Страница 99: ...Gigarouter UF72N User Manual Page 91 of 203 Figure 3 140 Add IP LAN devices 5 Configure printer port Select Custom click Settings to confirm the agreement as RAW R...

Страница 100: ...uer printer port 6 Add Printer Driver According to the printer manufacturer and printer type select the appropriate driver If the computer has not printer driver you need to install the printer driver...

Страница 101: ...Gigarouter UF72N User Manual Page 93 of 203 Figure 3 142 Add Printer Driver...

Страница 102: ...the CLI interface via either WAN port or LAN port Enter telnet with IP address and then press ENTER you can get access to the Login interface Such as IP address is 192 168 100 17 you can input telnet...

Страница 103: ...set language to set the CLI language Figure 4 3 Set CLI Language 4 2 Network 4 2 1 3G Modem The command show 3gmodem show the 3G modem information as below Figure 4 4 Show 3G Modem Information The co...

Страница 104: ...etwork dial numbers APN 3G network access APN PIN 3G networks need to use dial up PIN code if not can be set to empty Advanced Parameters Authentication 3G dial up authentication CHAP PAP Auto are pro...

Страница 105: ...disconnected 4 2 2 Port Management 4 2 2 1 Port Mirror The command show port mirror show the port mirror information as below Figure 4 7 Show Port Mirror Information The command set port mirror confi...

Страница 106: ...type configure the port media type parameters as below Figure 4 11 Configure Port Media Type Parameters The following items are displayed on this screen Media Type provides the following six modes to...

Страница 107: ...n show the WAN interface configuration as below Figure 4 12 Show Wan Parameter The wan interfaces include DATA VOICE MGMT OTHER1 and OTHER2 Input 1 to show DATA parameter as below Figure 4 13 Show DAT...

Страница 108: ...Gigarouter UF72N User Manual Page 100 of 203 Figure 4 14 Show VOICE Interface Parameter Input 3 to show MGMT parameter as below Figure 4 15 Show MGMT Interface Parameter...

Страница 109: ...Gigarouter UF72N User Manual Page 101 of 203 Input 4 to show OTHER1 parameter as below Figure 4 16 Show OTHER1 Interface Parameter Input 5 to show OTHER2 parameter as below...

Страница 110: ...ER2 Interface Parameter 4 2 3 2 Configure Wan Parameter The command set wan configure the wan interface parameter as below Figure 4 18 Configure WAN Parameter The wan interfaces include DATA VOICE MGM...

Страница 111: ...ot allowed to access the Internet via domain name if the Primary DNS field is blank Secondary DNS Optional If a Secondary DNS Server address is available enter it Username Enter the Account Name provi...

Страница 112: ...rity Level Optional VLAN Priority Level of this WAN interface Primary DNS Enter the IP address of your ISP s Primary DNS Domain Name Server If you are not clear please consult your ISP It s not allowe...

Страница 113: ...f your ISP s Primary DNS Domain Name Server manually If you are not clear please consult your ISP It s not allowed to access the Internet via domain name if the Primary DNS field is blank Secondary DN...

Страница 114: ...are not clear please consult your ISP It s not allowed to access the Internet via domain name if the Primary DNS field is blank Secondary DNS Optional If a Secondary DNS Server address is available en...

Страница 115: ...onal Manufacture Name Optional Device Class Optional Device Type Optional Device Version Optional Input 5 to configure OTHER2 parameter as below Figure 4 23 Configure OTHER2 Interface Parameter The fo...

Страница 116: ...dress If Static IP is selected configure the IP address of WAN port Netmask If Static IP is selected configure the subnet mask of WAN port Gateway Optional If Static IP is selected configure the defau...

Страница 117: ...Gigarouter UF72N User Manual Page 109 of 203 Figure 4 25 Show Static IP Parameter Input 2 to show binding IP configuration as below Figure 4 26 Show Binding IP Parameter...

Страница 118: ...elow Figure 4 27 Show Port Mode Parameter Input 4 to show advanced parameters as below Figure 4 28 Show Advanced Parameter 4 2 4 2 Configure Lan Parameter The command set lan configure the LAN paramet...

Страница 119: ...e or disable DHCP server on this LAN interface Start IP If Enable DHCP Server is selected enter the Start IP address to define a range for the DHCP server to assign dynamic IP addresses This address s...

Страница 120: ...ase Time Second If Enable DHCP Server is selected specify the length of time the DHCP server will reserve the IP address for each client After the IP address expired the client will be automatically a...

Страница 121: ...cal LAN port The following four modes are provided Route route to WAN Transparent bridge not modify the packets Tagged bridge LAN untagged WAN tagged only 1 VID supported Promisc Mode Tagged packets i...

Страница 122: ...ID Vendor class identifier List DHCP 60 option support at most two vendor IDs IPAddress IP address of interface for STB data service Netmask Subnet mask of interface for STB data service VID VID of IP...

Страница 123: ...Gigarouter UF72N User Manual Page 115 of 203 Figure 4 35 Show Basic Settings Input 2 to show security configuration as below Figure 4 36 Show Security Parameter...

Страница 124: ...nced settings as below Figure 4 37 Show Advanced Settings Input 4 to show client information as below Figure 4 38 Show Client Information Input 5 to show WPS configuration as below Figure 4 39 Show WP...

Страница 125: ...age 117 of 203 Figure 4 40 Show MAC Filtering Parameter 4 2 5 2 Configure WLAN Parameter The command set wlan configure the WLAN parameter as below Figure 4 41 Configure WLAN Parameter Input 1 to conf...

Страница 126: ...ing a mix of 802 11b 11g and 11n wireless clients Channel Width Select any channel width from the drop down list The default setting is automatic which can automatically adjust the channel width for y...

Страница 127: ...t Input 2 to configure security parameter as below Figure 4 43 Configure Security Parameter The following items are displayed on this part SSID The SSID enabled in WLAN Basic Settings page Read only A...

Страница 128: ...larger than the specified RTS Threshold size the device will send RTS frames to a particular receiving station and negotiate the sending of a data frame The default value is 2347 Transmit Power Here...

Страница 129: ...Gigarouter UF72N User Manual Page 121 of 203 Input 4 to configure MAC filtering parameter as below...

Страница 130: ...access Deny deny the stations specified by entries in the list to access 4 3 Data Service 4 3 1 DHCP Server 4 3 1 1 Static Address Assign The command show dhcp server static ip assign shows the stati...

Страница 131: ...re 4 48 Configure Static IP Assign The command will configure static ip assign The following items are displayed on this screen IP The IP address reserved Mask The subnet mask of IP address reserved M...

Страница 132: ...ng items are displayed on this screen Enable DHCP Relay Enable or disable DHCP Relay Client Interface The interface to listen for DHCP client requests Up to four interfaces can be selected Server Inte...

Страница 133: ...to specify the maximum segment size of the TCP protocol 4 3 2 2 PAT Settings The command show pat shows the PAT information as below Figure 4 53 Show PAT Information The command set pat configures th...

Страница 134: ...le The following items are displayed on this screen Enable Enable or disable this PAT entry Internet Port Enter the service port provided for accessing external network All the requests from internet...

Страница 135: ...y the interface to receive requests from the internet for the entry 4 3 2 3 DMZ Settings The command show dmz shows the DMZ information as below Figure 4 56 Show DMZ Information The command set dmz co...

Страница 136: ...displayed on this screen Public IP The public IP address for this DMZ entry Private IP The private IP address for this DMZ entry 4 3 2 4 ALG Settings The command show alg shows the ALG information as...

Страница 137: ...across NAT if selected Enable FTP Allow FTP clients and servers to transfer data across NAT if selected Enable PPTP Enable or disable PPTP ALG Enable RTSP Enable or disable RTSP ALG 4 3 3 Firewall Con...

Страница 138: ...m a host to any port that is open and listening If the packet is programmed to have the same destination and source IP address when it is sent to a machine via IP spoofing the transmission can fool th...

Страница 139: ...st to a computer network using an IP Broadcast address Check the box to enable Smurf Defense 4 3 3 2 Service Type The command show service type shows the service type information as below Figure 4 63...

Страница 140: ...ame of this entry it will be list in Internet Access Ctrl page Protocol Select the protocol for this entry Four types are provided TCP UDP ICMP and ALL Port Range Configure the port range for this ent...

Страница 141: ...isable access control from WAN Policy Default policy of access control Allow or Deny If Allow is selected all packets will be allowed except the entries list on this page If Deny is selected all packe...

Страница 142: ...Gigarouter UF72N User Manual Page 134 of 203...

Страница 143: ...me Specify the time range for the entry to take effect Active Day Specify the day range for the entry to take effect 4 3 3 3 2 User Authentication The command show user authentication shows the user a...

Страница 144: ...igures the user authentication list as below Enter 0 to add a new entry Enter 2 and choose the entry you want to modify If you want to delete the entry enter 1 and choose the corresponding entry Figur...

Страница 145: ...computer to access the Internet using this account Allow Special IP Access Allowing only specified IP computer uses this account to access the Internet Allow Special MAC Access Allowing only specified...

Страница 146: ...cifies the IPv4 address range that is only allowed to access to the device from the Internet via WEB IPv6 Range If IP Limit enabled specifies the IPv6 address range that is only allowed to access to t...

Страница 147: ...vice from the Internet via telnet IP Range If IP Limit enabled specifies the IPv4 address range that only allow access to the device from the Internet via telnet IPv6 Range If IP Limit enabled specifi...

Страница 148: ...Parameters The following items are displayed on this screen Port Port when using SSH tools access device Internet SSH Access Allow Access If enabled allow access to the device from the Internet via SS...

Страница 149: ...range that only allow access to the device from the Intranet via SSH 4 3 3 5 Filter Strategy 4 3 3 5 1 Keyword Filter The command show keyword filter shows the keyword filter information as below Fig...

Страница 150: ...s screen Keyword Filter If enabled packet filtering is enabled by keyword Policy The policy for filtering web page Deny and Allow 4 3 3 5 2 IP Filter The command show ip filter shows the IP filter inf...

Страница 151: ...ow Enter 0 to add a new entry Enter 2 and choose the entry you want to modify If you want to delete the entry enter 1 and choose the corresponding entry Figure 4 82 Configure IP Filter List The follow...

Страница 152: ...Filter Information The command set mac filter configures the MAC filter parameters as below Figure 4 84 Configure IP Filter Parameters The command set mac filter list configures the MAC filter list as...

Страница 153: ...een MAC Filter If enabled packet filtering is enabled by MAC Policy The policy for MAC list Deny and Allow 4 3 4 QoS 4 3 4 1 Basic Settings The command show qos basic settings shows the QoS basic sett...

Страница 154: ...ng scheme Qos Priority DSCP and 802 1P depending on the value of priority classification into different queues Upstream Bandwidth Configure the bandwidth of upstream Downstream Bandwidth Configure the...

Страница 155: ...are displayed on this screen Port Physical LAN port Enable Enable or disable rate limit function Incoming Rate Limit Enter incoming maximum rate which must is times of 32Kbsp Limit Packet Type Select...

Страница 156: ...90 Show Flow Rate Limit Information The command set qos flow limit configures the flow rate limit as below Enter 0 add a new entry Enter 2 and choose the entry you want to modify If you want to delete...

Страница 157: ...Gigarouter UF72N User Manual Page 149 of 203...

Страница 158: ...ch means that all time are in active Active Day If not configured which means that all time in active Direction Up Check the frame from the direction of the LAN port to the WAN port and match the sour...

Страница 159: ...ice Information The command set qos service configures the QoS service as below Figure 4 93 Configure QoS Service The following items are displayed on this screen Name Service name Read only Remap Que...

Страница 160: ...Rule The following items are displayed on this screen Rule Name The custom name Physical Port Rule s source port Rule Type Type of rule L2 data or L3 data Src IP Netmask The source IP address and netm...

Страница 161: ...f packets matched with the rule Remark DSCP Change the DSCP of packets matched with the rule Priority Change the scheduling queue of packets matched with the rule Maximal Bandwidth Limit the bandwidth...

Страница 162: ...pull dwon list DYNDNS For dyndns org FREEDNS For freedns afraid org ZONE For zoneedit com NOIP For no ip com 3322 For 3322 org CUSTOM For custom self defined DDNS server type Server Name If CUSTOM is...

Страница 163: ...art and the end IP address for IP Pool The start IP address should not exceed the end address and the IP ranges must not overlap Enable Authentication Specify whether to enable authentication for the...

Страница 164: ...ame of PPTP tunnel It should be configured identically on server and client Password Enter the password of PPTP tunnel It should be configured identically on server and client Binding IP Enter the IP...

Страница 165: ...er IP Address Pool Range Specify the start and the end IP address for IP Pool The start IP address should not exceed the end address and the IP ranges must not overlap Enable Authentication Specify wh...

Страница 166: ...ed on this screen Username Enter the account name of L2TP tunnel It should be configured identically on server and client Password Enter the password of L2TP tunnel It should be configured identically...

Страница 167: ...roposal shows the IKE Proposal information as below Figure 4 105 Show IKE Proposal Information The command set ike proposal configures the IKE Proposal as below Enter 0 to add a new entry Enter 2 and...

Страница 168: ...ain text with 168 bit key AES Uses the AES algorithm for encryption Auth Algorithm Select the authentication algorithm for IKE negotiation Options include MD5 MD5 Message Digest Algorithm takes a mess...

Страница 169: ...gure 4 107 Show IKE Policy Information The command set ike policy configures the IKE Policy as below Enter 0 add a new entry Enter 2 and choose the entry you want to modify If you want to delete the e...

Страница 170: ...re the remote VPN peer uses the same mode Main Main mode provides identity protection and exchanges more information which applies to the scenarios with higher requirement for identity protection Chal...

Страница 171: ...ce Enable Safety Proposal Select the Proposal for IKE negotiation phase 1 Up to four proposals can be selected 4 3 6 3 3 IPSEC Safety Proposal The command show ipsec proposal shows the IPSEC Proposal...

Страница 172: ...urity protocol Encryption Algorithm Select the algorithm used to encrypt the data for ESP encryption Options include DES DES Data Encryption Standard encrypts a 64 bit block of plain text with a 56 bi...

Страница 173: ...4 111 Show IPSEC Policy Information The command set ipsec policy configures the IPSEC Policy as below Enter 0 to add a new entry Enter 2 and choose the entry you want to modify If you want to delete t...

Страница 174: ...is Policy VPN Mode Select the network mode for IPSEC policy Options include Site To Site Select this option when the client is a network PC to Site Select this option when the client is a host Local S...

Страница 175: ...ute ipv4 configures the IPv4 static route as below Figure 4 114 Configure IPv4 Static Route The following items are displayed on this screen Enable Select it to add and modify the current route Conver...

Страница 176: ...set static route ipv6 configures the IPv6 static route as below Figure 4 116 Configure IPv6 Static Route The configuration options of Ipv6 is similar to Ipv4 the prefix length is equal to mask of Ipv...

Страница 177: ...4 117 Show Policy Route Information The command set policy route configure thes policy route as below Enter 0 to add a new entry Enter 2 and choose the entry you want to modify If you want to delete t...

Страница 178: ...Gigarouter UF72N User Manual Page 170 of 203...

Страница 179: ...op for the entry Description Give description for the entry Protocol Specify the protocol TCP UDP or ALL Source IP Enter IP address or IP range of source in the rule entry Destination IP Enter IP addr...

Страница 180: ...The command set rip switch configures the RIP switch as below Figure 4 120 Configure RIP Switch The following items are displayed on this page Enable RIP Service Enable or disable RIP service functio...

Страница 181: ...the entry Send RIP Version Specify sending RIP version for the entry Authorization Enable Check the box to enable authorization Key Mode Specify the encryption mode of key TEXT plaintext MD5 cipertext...

Страница 182: ...Gigarouter UF72N User Manual Page 174 of 203...

Страница 183: ...of the entry 4 3 8 Advanced Parameters 4 3 8 1 UPnP Parameter The command show upnp shows the UPnP information as below Figure 4 123 Show UPnP Information The command set upnp configures the UPnP par...

Страница 184: ...125 Show Multicast Information The command set multicast configures the multicast parameters as below Figure 4 126 Configure Multicast Parameters The following items are displayed on this screen Enab...

Страница 185: ...ckup SIP server Backup Register Server Port Listening port of backup SIP server Enable Proxy Server or not Enable or disable Proxy server Proxy Server domain name or IP Domain or IP of proxy server Pr...

Страница 186: ...Gigarouter UF72N User Manual Page 178 of 203 Figure 4 129 Show Adavance Sip Information The command set sipadvance configures the advanced SIP information as below...

Страница 187: ...e signaling packets with User Agent field SDP Mode When Call holding Select the SIP signal format of call hold Enable Next Nonce Enable SIP packets with nonce count field information incremented each...

Страница 188: ...p user Parameter The command set sipuser configures the sip parameter as below Figure 4 132 Configure sip user Parameter The following items are displayed on this screen Register Account Account name...

Страница 189: ...up The command show groupregister show wildcard group as below Figure 4 133 Show Wildcard Group Parameter The command set groupregister sets wildcard group as below Figure 4 134 Configure Wildcard Gro...

Страница 190: ...Gigarouter UF72N User Manual Page 182 of 203 Figure 4 135 Show User Supplementary The command set extended server configures the user supplementary parameter as below...

Страница 191: ...flash Switch Release Call If the digit specified is detected after flash terminate the active call and recover the call on hold Three Party Call If the digit specified is detected after flash enter th...

Страница 192: ...d to 2 Cancel by keypad service system 40 Hotline Number Enter number to hotline function empty expressed disable 1 Set delay hotline number by Keypad service system 52 TN TN is the hotline number 2 C...

Страница 193: ...abbr dial sets the abbreviated number of the user as below Figure 4 138 Configure Abbreviated Number The following items are displayed on this screen 0 add 1 delete 2 modify Input 0 to add new abbrev...

Страница 194: ...mber The abbreviated number Phone Number The Actual phone number The command show whiteblack list shows the white list and the black list of the user as below Figure 4 139 Show White Black List The co...

Страница 195: ...ems are displayed on this screen List Type Choose type of Black White List four types are provided Incoming Blacklist Incoming Whitelist Outgoing Blacklist Outgoing Whitelist Phone Number the phone nu...

Страница 196: ...TP packetization period of G 723 codec G 729 Packet Period RTP packetization period of G 729 codec Fax Mode Choose fax mode three types are provided Transparent T38 VBD Codec Answer Strategy Two modes...

Страница 197: ...Parameters The following items are displayed on this screen Echo Cancellation Enable or disable echo cancellation Silence Detection Suppression Enable or disable silence detection and silence suppres...

Страница 198: ...T38 Data Redundancy Configure the redundancy of T38 data Ring Frequency Choose the ring frequency 20Hz 25Hz Impedance Type Choose the impedance type 600 China Standard Switzerland Standard 4 4 6 Digit...

Страница 199: ...Gigarouter UF72N User Manual Page 191 of 203 Figure 4 147 Show Signal Tone Parameter The command set tone configures signa l tone parameters as below...

Страница 200: ...pe of signal tone Dial Tone User Define Enable Whether to use user defined dial tone frequency Dial Tone Frequency 1 Dial Tone Frequency 2 Busy Tone User Define Enable Whether to use user defined busy...

Страница 201: ...cadence for the FXS port In these fields you specify the on and off pulses for the ring The ring cadence that should be configured differs between internal call and external call 4 4 8 Centrex The com...

Страница 202: ...entrex Whether to enable centrex function globally Group Number The phone number of this ring group Ringing Policy Phone ringing policy Alternate Ordinal Parallel Ring Time Ring time of each member Te...

Страница 203: ...ow Figure 4 152 Configure Phone Book Parameter The following items are displayed on this screen Phone Prefix The prefix of this phone book Total Length The total length of number to wait before sendin...

Страница 204: ...eter will take effect after save and reload commands Figure 4 153Save and Reload Parameter 4 5 System 4 5 1 Time Management The command show time management show the time management information as bel...

Страница 205: ...DST DST Offset Enter the offset of DST Month Specify the month of DST range from 1 to 12 in one year Weekday Specify the weekday of DST range from Sunday to Saturday Order of Weekday in Month Specify...

Страница 206: ...Restore Configurations 4 5 4 Diagnostic 4 5 4 1 Ping The command ping can used to check connectivity of your network in the following screen Figure 4 157 PING Diagnostic Ping Enter the IP Address or D...

Страница 207: ...how System Log Information The command set syslog configure the system log parameters as below Figure 4 159 Configure System Log Parameters The following items are displayed on this screen 4 5 6 TR069...

Страница 208: ...Information The command set tr069 configure the tr069 parameters as below Figure 4 161 Configure TR069 Parameters The following items are displayed on this screen Serial Number The serial number of d...

Страница 209: ...nnection to the ACS Connection Request Auth Whether to authenticate an ACS making a Connection Request to the CPE Connection Request Username Username used to authenticate an ACS making a Connection R...

Страница 210: ...egister server Server Port Enter the port of Register Server TRAP Message Interval Set the sending interval between TRAP messages Regional Identity Set the identity of regional Device Identifier Set t...

Отзывы: