background image

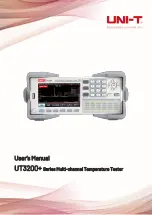
User’s Manual                                                                                                                                                           Series 

Instruments.uni-trend.com                                                                                                                                                                                 


15

 / 

40


rotate as shown in the following figure.   

Figure 5-1 Original Position                          Figure 5-2 Test Position


Figure 5-3 Remove Handle                                Figure 5-4 Lift Position   


6. 

Measurement Preparation 

6.1 Power On 

Connecting standard power line to make sure that the instrument is power on normally. 

Power supply switch in the lower left on the panel, it is a slight electronic switch. Indicator 

is yellow, indicating that the power of the instrument is enabled. 

After confirming that the instrument is powered on, please turn off the power button. At this time, the 

power indicator will appear red. 


  Warning: Please make sure that the power voltage is matched with supply voltage. 

Otherwise, the instrument may burnout. 

  The main power plug must connect to the power socket with protective grounding. 

Do not use the wire board without protective grounding. 


Содержание UT3200+ Series

Страница 1: ...User s Manual UT3200 Series Multi channel Temperature Tester...

Страница 2: ...oduct is proved to be defective within the warranty period UNI T reserves the rights to either repair the defective product without charging of parts and labor or exchange the defected product to a wo...

Страница 3: ...vide the following services a Any repair damage caused by the installation repair or maintenance of the product by non UNI T service representatives b Any repair damage caused by improper use or conne...

Страница 4: ...safety conditions In addition user should also follow the common safety procedures Safety Precautions Warning Please follow the following guidelines to avoid possible electric shock and risk to person...

Страница 5: ...t indicates possible danger which may cause damage to this device or other equipment if you fail to follow a certain procedure or condition If the Caution sign is present all conditions must be met be...

Страница 6: ...emark of UK Certification ETL indicates a registered trademark of Intertek Waste This product complies with the marking requirements of WEEE Directive 2002 96 EC This additional label indicates that t...

Страница 7: ...e the input output ports provided by this device in a properly manner Do not load any input signal at the output port of this device Do not load any signal that does not reach the rated value at the i...

Страница 8: ...ies multi channel temperature tester includes six models UT3208 UT3216 UT3224 UT3232 UT3240 and UT3248 which respectively corresponding to 8 16 24 32 40 and 48 channels User can purchase the temperatu...

Страница 9: ...ock key Print screen key Storage FAT user can creat the file with the suffixal csv and save the data of each channel into USB not support mobile hard disk Interface RS232C communication interface LAN...

Страница 10: ...ject to the standard of manufacturer Sensor Model Temperature Accuracy Type T thermocouple 150 0 1 0 0 400 0 8 Type K thermocouple 100 0 1 2 0 1350 0 8 Type J thermocouple 100 0 1 0 0 1200 0 7 Type N...

Страница 11: ...lue reading histogram and curve chart display mode Cold junction compensation 8G USB and USB HOST interface USB storage File management can keep the current setup of the instrument The instrument is e...

Страница 12: ...ypad is used to input numerical value The add subtract delete key is used to add subtract and delete 6 Test key is used to display the test result Setup key is used to set the measurement parameter Lo...

Страница 13: ...ument 3 RS232C communication interface 4 DC 24V power supply interface 5 LAN communication interface 5 Inspection and Installation 5 1 Packing List Before using the instrument 1 Check the appearance w...

Страница 14: ...ctric shock please make sure that the power line is securely connect to the ground 5 3 Operation Environment UT3200 series multi channel temperature tester can only be used under the environmental con...

Страница 15: ...upply switch in the lower left on the panel it is a slight electronic switch Indicator is yellow indicating that the power of the instrument is enabled After confirming that the instrument is powered...

Страница 16: ...Figure 6 1 8 channel Test Module Note Please make sure that the temperature of DUT is within the range of the test line before connecting the test probe to DUT Test module UT3208 16 24 32 40 48 is re...

Страница 17: ...ure tester take UT3232 as an example Data acquisition module in the first row on the left it corresponds to CH01 CH02 CH03 CH08 from down to up Data acquisition module in the second row on the left it...

Страница 18: ...n 4 5 It is recommended to use brand USB to avoid the problem of incompatible identification The format and capacity of the USB can be referred to FAT FAT32 and EXFAT with the maximum capacity of 128G...

Страница 19: ...e test surface to avoid effect the value precision User can use the channel identification sticker to distinguish different test lines Starting to test DUT after cloth point of each part is all fixed...

Страница 20: ...read one or more channel values at some point Press Start key the instrument will start data acquisition A green flashing cursor at the top of the screen indicates that the data is being collected tes...

Страница 21: ...in Figure 7 2 Figure 7 2 Curve Chart Figure 7 2 curve chart is an example of the temperature changing with time of CH01 CH0 The horizontal axis represents time and the vertical axis represents tempera...

Страница 22: ...sinvalid and exits It should be re enter If DUT temperature range is20 40 then the low temp can be set to 20 and the high temp sets to 40 3 Set the data display cycle the range can be set 500ms 2mins...

Страница 23: ...sampling cycle of temperature 0 5s can not be set when in low speed Page Shift The current page can only display the curve of 8 channels press this key to switch to show the curve of other channels M...

Страница 24: ...sitive or negative temperature value of the channel If the test module is not connected it will not be displayed 7 4 USB Data Record USB recording function is only valid in Test Histogram and Curve Ch...

Страница 25: ...th UT3224 RECORD UT_20230210 csv The data format is floating number and separate by Figure 7 7 Screenshot of Data Record 7 5 Print Sc Print Sc can be used to capature screenshot when USB inserts into...

Страница 26: ...ear on the screen indicating the comparator function is enabled Step 3 Step 4 Move cursorto Beep field press OK key toturnon or off beep If it selectsON the beep will be sound when the measured value...

Страница 27: ...hen press OK to complete the setting 4 Use functional key at the bottom of the screen to set the function as the following table User can set it by your own needs Functional Key Description Reset Rest...

Страница 28: ...8 4 Alarm for Over Lower Limit If the comparator function has been turned on the instrument will immediately give an alarm when the measured value exceeds the upper or lower limit To disable the alar...

Страница 29: ...Turn on or off comparator beep Key Beep ON OFF ON Turn on or off key beep Rate Slow fast Slow Fast sampling period is 0 5s Slow sampling period is1s Unit K Temperature unit AutoStart ON OFF OFF Auto...

Страница 30: ...omatic segmentation create a new file and save Delay 1s 2s 5s 10s 15s 20s 30s 1min 2min 5min 10min 20min 30min 1hour OFF Time interval of data record 9 1 1 Set Rate of Data Acquisition The rate can be...

Страница 31: ...rt Setup steps Press Setup quick key to enter Function Setup main page Use Arrow key to move cursor to Auto start field press OK key to select Functional Key Description ON Turn on auto start OFF Turn...

Страница 32: ...t the function as shown in the following table Functional Key Description Input cal Input the calibrated temperature value into the selected channel by using numeric keypad and press OK to complete th...

Страница 33: ...uments supports Chinese and English Setup steps 1 In System config page use Arrow key to move cursor to LANGUAGE field 2 Use OK and Arrow key to select the language 10 1 2 Date Time The instrument ado...

Страница 34: ...sor type channel number software version and the serial number of the instrument 10 3 Bottom Setup Functional Key Description File Refer to chapter 8 Channel Set Channel data set Guest Cal Cal data se...

Страница 35: ...he third line as shown in Figure 11 2 and press Save key at the bottom of the screen to save the default filename DEFAULT_2 Seven functional keys at the bottom of the screen Functional Key Description...

Страница 36: ...input iscompleted pove cursor to IN key at the end of the keyboard and press OK key to confirm the modified file name Press Esc key to cancel the modification 11 1 2 File Delete Figure11 3 File Delete...

Страница 37: ...rnal USB Other instrument can read the setting parameter from USB USB supports up to 20 external files Figure11 4 USB Failure Press Save to USB key at the bottom of the screen to complete the setting...

Страница 38: ...11 2 1 Save to Local In order to facilitate the customer to quickly set the instrument in batches the instrument supports external USB save to the instrument Other instrument can read the setting para...

Страница 39: ...t Stop bit 1 bit Check bit none Baud rate It is recommend to use 115200 12 2 SCPI RS 232 interface uses SCPI language and fully supports SCPI The detailes refer to UT3200 Series Multi channel Temperat...

Страница 40: ...thinthis period UNI T willrepair or replace the product inaccordance with the detailed provisions of the warranty To arrange for repair or acquire warranty form please contact the nearest UNI T sales...

Отзывы: