Installation
3-6
ULVAC CRYOGENICS INCORPORATED
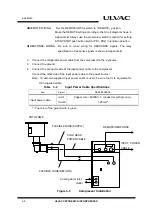
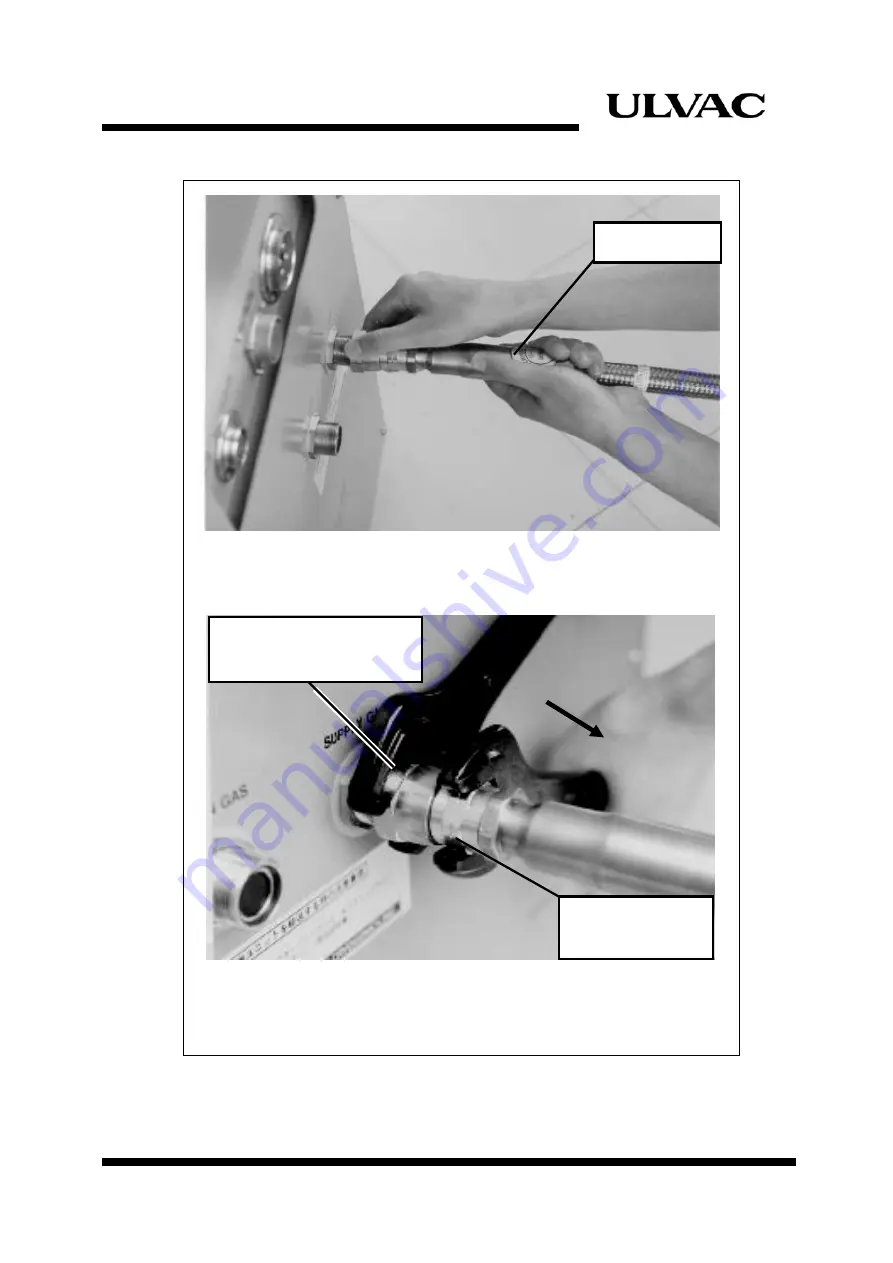
①
Hold the coupling connection and the braid support straight and tighten
by hand.
②
Tighten the self-sealing coupling using two wrenches until the fittings are
firmly sealed. When using torque wrench, torque the connection to 20N
・
m.
Figure 3-4
Connecting Flexible Hose
Braid Support
Hold here with a
wrench.
Tighten self-sealing coupling
with a wrench.
Содержание C15T
Страница 2: ......
Страница 8: ...F 6 ULVAC CRYOGENICS INCORPORATED This page intentionally left blank...
Страница 14: ...S 4 ULVAC CRYOGENICS INCORPORATED This page intentionally left blank...
Страница 16: ...IW 2 ULVAC CRYOGENICS INCORPORATED This page intentionally left blank...
Страница 22: ...Compressor Unit Description 1 6 ULVAC CRYOGENICS INCORPORATED This page intentionally left blank...
Страница 34: ...Operation 4 2 ULVAC CRYOGENICS INCORPORATED This page intentionally left blank...
Страница 38: ...Disconnection and Storage 5 4 ULVAC CRYOGENICS INCORPORATED This page intentionally left blank...
Страница 46: ...Maintenance 6 8 ULVAC CRYOGENICS INCORPORATED This page intentionally left blank...
Страница 50: ...Troubleshooting A 4 ULVAC CRYOGENICS INCORPORATED This page intentionally left blank...
Страница 54: ...Circuit Diagram B 4 ULVAC CRYOGENICS INCORPORATED This page intentionally left blank...
Страница 57: ...Flexible Hose C 2 ULVAC CRYOGENICS INCORPORATED This page intentionally left blank...
Страница 61: ...CS 2 ULVAC CRYOGENICS INCORPORATED This page intentionally left blank...
Страница 63: ...Revisions R 2 ULVAC CRYOGENICS INCORPORATED This page intentionally left blank...


