TURBOLOCK TL114 9
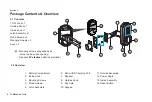
Part 2 - Installing the Latch
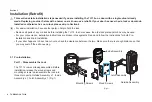
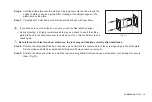
KEEP DOOR OPEN AT ALL TIMES SHORTLY BEFORE, DURING AND SHORTLY AFTER INSTALLATION. If the lock is
incomplete or improperly installed, the lock and/or door may become stuck.
After finishing installation, be sure to use the door at least once to make sure all parts of the lock function correctly.
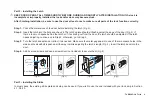
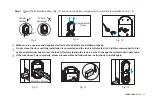
Step 1.
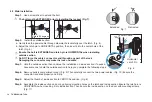
Check the dimensions of the door before installing the latch (Fig. 2).
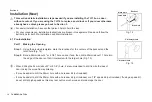
Step 2.
Insert the latch into the hole and check it. The latch’s plate should sit flush against the edge of the door (Fig. 3). If
there’s too much space behind the latch or if it’s sticking out from the door, the latch should be adjusted. If the latch
needs adjusting, continue on to Step 3; otherwise, go to Step 4.
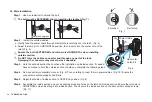
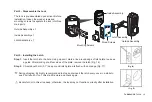
Step 3.
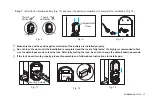
Turn the latch and extend or retract it as needed. Make sure the metal peg pops into one of the two square holes in the
side and the deadbolt is pushed all the way in while adjusting the latch’s length (Fig. 4). Insert the latch back into the
door.
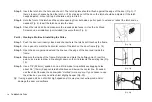
Step 4.
Add 2x wood screws and use a screwdriver (not included) to secure them (Fig. 5).
2
3/4” (70mm)
Or
2
3/8” (60mm)
2
1/8” (54mm)
Hole
1
” (25mm)
Door Edge
2
3/4
” 2
3/8
”
(Fig. 2)
(Fig. 3)
(Fig. 4)
(Fig. 5)
2
3/4
” 2
3/8
”
2
3/4
” 2
3/8
”
Part 3 - Installing the Strike
In most cases, the existing strike plate and setup can be used. If you wish to use the one included with your lock, skip to Section
4.1, Part 3.


