TSI Incorporated 8587A Скачать руководство пользователя страница 49

Maintenance and Service 

5-3 

C h a n g i n g   S a m p l e   F l o w  

The Laser Photometer sample flow is set at the factory for a flow of 2 L/min 
(0.07 cfm) by adjusting the fine flow control needle valve placed in parallel 
with an orifice. Refer to Figures 3-3 and 3-5. Both orifice and valve are 
identified in the schematic and photograph. At the factory the flow is set 
while operating at a critical flow, the pump pulls a vacuum greater than 55 
kPa (8 psi).  
 
To set the sample you will need a TSI Model 4140 Flowmeter which can be 
obtained on the TSI website at 

www.tsi.com


1.  Unplug the instrument. 

2.  Remove the cover by loosening the four screws at the base of the 

chassis and remove the four screws at the top of the instrument cover. 

3.  To calibrate the instrument you will need to supply power. High voltage 

is present at the power cord connection at the back of the instrument 
and in wires running from the power connection to the power supply, 
see item 9, in Figure 3-5. Take care 

not

 to touch exposed wiring or 

circuit boards with tools to avoid shock or possible damage to the 
electronics.  


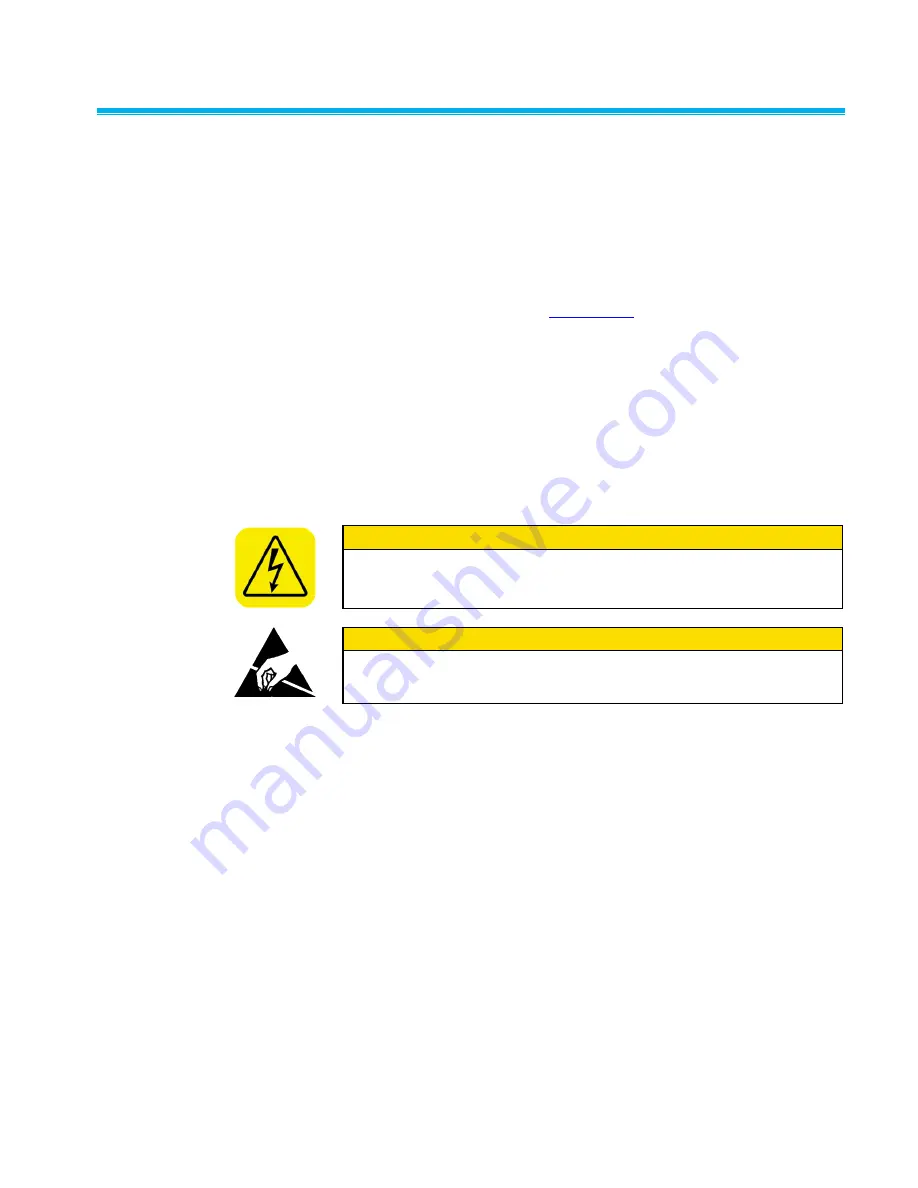
W A R N I N G


To avoid electrical shock, keep hands and tools away from electrical 
wiring. High voltage is present at the back of the instrument, at the 
power connection. 


C a u t i o n


To avoid damaging sensitive static components, avoid touching electrical 
boards. If possible employ proper ESD precautions including using a 
grounding strap. 


4.  Plug the power cord back into the instrument and turn the TSI Model 

4140 Flowmeter on.  

5.  Connect your flowmeter to the UPSTREAM port. 

6.  Connect the high vacuum pump to the VACUUM port at the back of the 

instrument and turn the pump on. 

7.  Find the small adjustable needle valve, item 8 in Figure 3-5. Use a 

screwdriver to adjust the needle valve. The soft red material used to 
prevent screw movement will yield when the screw is turned.  

8.  Adjust until the desired flow is achieved.  

9.  Unplug the instrument and replace the cover. 

Содержание 8587A

Страница 1: ...LASER PHOTOMETER MODEL 8587A OPERATION AND SERVICE MANUAL P N 1980538 REVISION D JULY 2015 ...

Страница 2: ......

Страница 3: ...ASER PHOTOMETER MODEL 8587A OPERATION AND SERVICE MANUAL Introduction 1 Unpacking and Setting Up the Laser Photometer 2 Technical Description 3 Instrument Operation 4 Maintenance and Service 5 Appendixes ...

Страница 4: ...iv Manual History The following is a history of the Model 8587A Laser Photometer Operation and Service Manual Part Number 1980538 Revision Date A December 2005 B April 2008 C March 2009 D July 2015 ...

Страница 5: ...ty is VOID if the product has been misused neglected subjected to accidental or intentional damage or is not properly installed maintained or cleaned according to the requirements of the manual Unless specifically authorized in a separate writing by Seller Seller makes no warranty with respect to and shall have no liability in connection with goods which are incorporated into other products or equ...

Страница 6: ...ended modified or its terms waived except by writing signed by an Officer of Seller Service Policy Knowing that inoperative or defective instruments are as detrimental to TSI as they are to our customers our service policy is designed to give prompt attention to any problems If any mal function is discovered please contact your nearest sales office or representative or call TSI s Customer Service ...

Страница 7: ...ake these precautions Do not remove any parts from the Laser Photometer unless you are specifically told to do so in this manual Do not remove the Laser Photometer housings or covers while power is supplied to the instrument W A R N I N G The use of controls adjustments or procedures other than those specified in this manual may result in exposure to hazardous optical radiation W A R N I N G Altho...

Страница 8: ...ous injury to you or cause irrevocable damage to the instrument Follow the procedures prescribed in this manual to use the instrument safely Caution or Warning Symbols The following symbols may accompany cautions and warnings to indicate the nature and consequences of hazards Warns you that uninsulated voltage within the instrument may have sufficient magnitude to cause electric shock Therefore it...

Страница 9: ... attached to the outside of the Laser Photometer housing and to the optics on the inside of the instrument Labels for the Model 8587A Laser Photometer are described below 1 Serial Number Label back panel 2 Laser Radiation Label located internally on the optics housing ...

Страница 10: ...x Model 8587A Laser Photometer This page intentionally left blank ...

Страница 11: ...r Connection 2 1 Vacuum Pump and Connection 2 2 Flow Check 2 2 Connecting the Sample Lines 2 3 CHAPTER 3 Technical Description 3 1 Cabinet 3 1 Front Panel 3 1 Keypad and LCD Display 3 1 Status Lights 3 2 Back Panel 3 3 Upstream and Downstream Sample Ports 3 4 Vacuum Port 3 4 Analog Output BNC Connector 3 4 Serial Communications Port 3 5 USB Communication Port 3 5 Data Acquisition and Instrument Co...

Страница 12: ...r Testing Aerosol 4 6 Performing a Filter Test 4 7 CHAPTER 5 Maintenance and Service 5 1 Filter Replacement 5 1 Filter Replacement Instructions 5 2 Sensor Contamination 5 2 Changing Sample Flow 5 3 Technical Contacts 5 4 Returning the Laser Photometer for Service 5 5 APPENDIX A Specifications A 1 APPENDIX B Laser Photometer CD B 1 Accessing the Laser Photometer CD B 1 USB Terminal Emulator Program...

Страница 13: ... Model 8587A Laser Photometer 1 2 3 1 Back Panel of the Model 8587A Laser Photometer 3 3 3 2 Serial Communications Port 3 5 3 3 Flow Schematic Model 8587A Laser Photometer 3 10 3 4 Sheath Air Flow System 3 12 3 5 General Location of Internal Components of the Model 8587A Laser Photometer 3 14 B 1 Introduction Screen B 2 B 2 TSI USB Device Driver InstallShield Wizard Screen B 3 B 3 License Agreemen...

Страница 14: ...e Screen B 13 T a b l e s 2 1 Model 8587A Laser Photometer Packing List 2 1 3 1 Pin Function for Serial Communications Port 3 5 3 2 Laser Photometer ASCII Command Strings 3 7 4 1 Example Fit Test Sequence 4 6 5 1 Filter Replacement Schedule 5 1 A 1 Model 8587A Laser Photometer Specifications A 1 ...

Страница 15: ...pecifications Provides instrument specifications Appendix B Laser Photometer CD Provides useful information and describes the software programs for expanding the functionality of the instrument Appendix C Technical Information for Program Development Using USB Communications Describes the software development library found on the Model 8587A Laser Photometer CD ROM supplied with the instrument S u...

Страница 16: ...xvi Model 8587A Laser Photometer This page intentionally left blank ...

Страница 17: ...used to sample aerosol from within the mask For filter efficiency testing the UPSTREAM port samples aerosol before it passes through the filter the challenge aerosol The DOWNSTREAM port is used to sample the aerosol concentration after passing through the filter The Model 8587A Laser Photometer sensor has special features which make it unique from older light scattering devices using white light a...

Страница 18: ...Scattered light is collected by a photosensitive detector and a voltage signal is produced This signal minus a small voltage offset is proportional to the aerosol mass concentration The Laser Photometer transmits signal voltage readings to the front panel LCD display in scientific notation Voltages can be accessed by a computer too connected to the RS 232 Serial or USB connectors using a communica...

Страница 19: ...g List Qty Description Part No 1 Operation manual 1980538 1 Power cord 110 120V 1303053 220 224V 1303075 1 Exhaust filter 1602230 1 Purge air filter 1602094 1 Sheath air filter 1602051 1 9 pin serial interface cable 6 foot 962002 1 6 foot USB interface cable 1303740 1 CD with USB terminal program 1031502 A C P o w e r C o n n e c t i o n The Laser Photometer uses an on board power supply capable o...

Страница 20: ...rument be operated with a vacuum greater than 55 kPa 8 0 psi At a vacuum of greater than 55 kPa 8 0 psi an internal critical orifice limits and stabilizes the sample airflow to 2 0 L min 0 07 cfm Repeatable test results will ONLY be obtained with stable sample airflows When the vacuum is greater than 30 kPa 4 4 psi the FLOW STATUS light on the front panel turns ON An illuminated FLOW STATUS light ...

Страница 21: ...cted at the back of each Laser Photometer Tube stubs for tubing connections are labeled accordingly UPSTREAM and DOWNSTREAM Clear ID 4 8 mm 3 16 in vinyl tubing is recommended for the sample lines The tubing must be pushed completely over each tube stub A touch of silicone grease applied to the outside of the tube stub will simplify the connection ...

Страница 22: ...2 4 Model 8587A Laser Photometer This page intentionally left blank ...

Страница 23: ...play and are used to select the sampling mode indicated on the button face UPSTREAM DOWNSTREAM and PURGE When sampling upstream or downstream the instrument draws sample from the respective sample port at the back of the Laser Photometer see the following section When the photometer is in the PURGE mode particle free air is drawn at a high airflow rate into the photometer s laser optics chamber an...

Страница 24: ...ration The FLOW STATUS light is illuminated during the UPSTREAM and DOWNSTREAM sampling modes if more than 30 kPa 4 4 psi of vacuum is being supplied to the respective sample port 30 kPa 4 4 psi is the minimum vacuum needed to obtain the sample airflow for proper measurements BLINKING A blinking FLOW STATUS light indicates the UPSTREAM or DOWNSTREAM vacuum is less than what is required to obtain p...

Страница 25: ... serial port connection the USB connection the cabinet cooling fan and the analog output BNC connector The back panel is shown below Figure 3 1 Back Panel of the Model 8587A Laser Photometer 1 Upstream and downstream sample ports 4 9 PIN D type female serial connector 2 Port for external vacuum pump connection 5 USB type B connector 3 Power connection 6 Analog voltage BNC connector ...

Страница 26: ...the back panel using flexible tubing pushed over the tube stub Tubing must be sufficiently rigid so it does not collapse under the vacuum load The instrument is designed for a vacuum of 55 kPa 8 psi which results in a very stable sample airflow of 2 L min 0 071 cfm TSI strongly recommends operation with a vacuum greater than 55 kPa 8 0 psi in order to obtain repeatable test results The instrument ...

Страница 27: ...kwise Pin function is identified in Table 3 1 For detailed information on communications refer to the section Serial Communications Protocol found later in this chapter Figure 3 2 Serial Communications Port Table 3 1 Pin Function for Serial Communications Port Pin Number RS 232 Signal 1 GND 2 Transmit 3 Receive 4 Reserved 5 GND 6 7 8 9 USB Communication Port USB communications is provided for plug...

Страница 28: ...conds Use the Downstream key to select the baud rate Save and exit using the Purge key USB Communications Note Do not plug your device Laser Photometer USB cable into your computer before the USB driver program is installed Before USB communications can be used a TSI USB driver program must be installed on your computer Install the program using the CD supplied with your instrument Refer to Append...

Страница 29: ...E NONE V2N VALVE 2 ON NONE NONE V3N VALVE 3 ON NONE NONE V1F VALVE 1 OFF NONE NONE V2F VALVE 2 OFF NONE NONE V3F VALVE 3 OFF NONE NONE R RESET RUNNING AVERAGE NONE NONE D SEND HEX DATA RESET AVG See Hex Data Retrieval Section below See Hex Data Retrieval Section below K SEND DECIMAL DATA RESET AVG See Decimal Data Retrieval Section below See Decimal Data Retrieval Section below S SEND VALVE STATUS...

Страница 30: ...h is returned after the D command is sent represents a continuous average since the last time the voltage was read or since the last reset R string was sent to the Laser Photometer A D command also resets the average after data is sent Decimal Data Retrieval When a K command is passed to the Laser Photometer the signal voltage data is returned as a string of 8 ASCII characters in scientific notati...

Страница 31: ... functions V1 selects whether the instrument samples from the sampling ports UPSTREAM or DOWNSTREAM or the PURGE port V2 selects the sample port UPSTREAM or DOWNSTREAM V3 selects the whether the pump pulls flow through the restricted orifice the sample flow or the unrestricted flow the purge flow The solenoid valves are a common three way type operated at 24 VDC The valves must be switched correct...

Страница 32: ...l critical orifice limits and stabilizes the sample airflow to 2 0 L min 0 07 cfm Repeatable test results will ONLY be obtained with stable sample airflows For the PURGE mode the pump must provide a free flow of between 12 to 30 L min 0 43 to 1 1 cfm The vacuum pump is connected to the port labeled VACUUM on the back panel Refer to the Chapter 4 Instrument Operation for more information on pump re...

Страница 33: ...nge The photometer assembly is extremely reliable MTBF 85000 hours due to the solid state laser diode and PIN photodiode detector These devices are inherently stable and rugged As a means of improving photometer reliability a special sheath air flow system is designed into the scattering chamber Figure 3 4 The sheath air system works by isolating the aerosol stream with a surrounding clean air str...

Страница 34: ...3 12 Model 8587A Laser Photometer Figure 3 4 Sheath Air Flow System ...

Страница 35: ...otodetector PC board having the photodetector circuitry the laser driver circuit and the instrument motherboard providing instrument control communications and display functions The motherboard contains a microprocessor and other circuitry which performs the following functions 1 Read the photodetector signal from the photodetector board 2 Automatically adjust the photodetector signal gain over 6 ...

Страница 36: ...re 3 5 and are described on the following pages Figure 3 5 General Location of Internal Components of the Model 8587A Laser Photometer 1 Sensor assembly 6 Flow valve 2 Sheath filter 7 Gray fixed orifice sample flow 3 Exhaust filter 8 Adjustable orifice sample flow 4 Purge filter 9 Power supply 5 Sample mode valves 9 2 1 7 8 6 5 4 3 ...

Страница 37: ...r Scattering Chamber Filters Three filters are used with the Laser Photometer and identified in Figure 3 5 The purge filter is used during purge mode to remove particle from the sensor scattering chamber The sheath air filter is a part of the sensor assembly and helps provide a clean sheath of air around the particle stream confining particles and keeping them from depositing on the internal surfa...

Страница 38: ... causing the flow status light to blink Electronics Boards Four electronics boards are used in the Model 8587A The boards include Main PC board laser board detector board communication connector board The main board has the microprocessor and performs all intelligent functionality controlling valves and reading inputs and performing basic calculations The laser and detector boards power the laser ...

Страница 39: ...shows the voltage level K e y p a d P u s h b u t t o n s Depress the labeled keypad to perform the indicated functions UPSTREAM Instrument samples from the UPSTREAM port used for chamber concentration for fit testing and challenge aerosol concentrations for filter testing PURGE Instrument samples at high airflow through a high efficiency filter when obtaining a zero detector background level and ...

Страница 40: ... is not repeatable N o t e Stable airflows are extremely important in obtaining repeatable test results TSI strongly suggests the instrument be operated with a vacuum greater than 55 kPa 8 0 psi At a vacuum of greater than 55 kPa 8 0 psi an internal critical orifice limits and stabilizes the sample airflow to 2 0 L min 0 07 cfm Repeatable test results will ONLY be obtained with stable sample airfl...

Страница 41: ... high vacuum pump and critical orifice PURGE flow is not controlled with an orifice but should be in the range of 12 to 30 L min 0 43 to 1 1 cfm This depends on the pump used Pump requirements are discussed in an earlier section of this chapter and in Chapter 2 There is no special adjustment needed for flow setup however sample flow can be adjusted or changed for special applications as described ...

Страница 42: ...he operator must fully understand their own requirements and develop appropriate protocols for their measurements Manual Test To complete a manual respirator fit test using the UPSTREAM DOWNSTREAM and PURGE buttons on the front of the Laser Photometer follow these steps 1 Connect the vacuum and sample lines to the Laser Photometer as described in Chapter 2 Unpacking and Setting Up The Downstream s...

Страница 43: ...am Average voltage Zero voltage Upstream factor fit Average Fit Test Under Computer Control The following is an example sequence for performing fit tests using a computer program for control and data acquisition Delay and sample times are presented as examples Actual delays and sample times should be determined based on lengths of tubing and other characteristics or limitations of the test system ...

Страница 44: ...to stabilize SEND R Reset running average Delay 60 seconds DOWNSTREAM mask signal data averaged over 60 second interval since reset SEND D or K Request averaged data as HEX D or Decimal K RECEIVE 8 char Receive voltage data Convert Convert DOWNSTREAM mask data to decimal long integer Calculate average fit factor see discussion above voltage ZERO mask voltage avg DOWNSTREAM voltage ZERO chamber vol...

Страница 45: ...REAM sample is drawn from the filter holder providing the challenge aerosol The DOWNSTREAM sample is taken after the filter Filter efficiency is calculated as a percent from the following equation n Penetratio 100 Efficiency voltage Zero voltage Upstream voltage Zero voltage Downstream n Penetratio 100 voltage Zero voltage Upstream voltage Zero voltage Downstream n Penetratio ...

Страница 46: ...4 8 Model 8587A Laser Photometer This page intentionally left blank ...

Страница 47: ...ter The filters are shown and identified in Figure 3 5 A filter replacement schedule is presented below A filter replacement kit part number 1083636 can be ordered from TSI TSI Incorporated 500 Cardigan Road Shoreview Minnesota 55126 USA FAX 651 490 3868 Phone 1 800 874 2811 USA or 651 490 2811 E mail Address particle tsi com Table 5 1 Filter Replacement Schedule TSI Filter Replacement Kit Replace...

Страница 48: ...s removed with the filter rather than staying in the valve separate it from the filter and apply pipe compound and replace it in the valve Discard the used filter and select the new one Apply a small amount of pipe compound to the interior threads of the filter and replace it The exhaust filter is found on the bottom of the cabinet S e n s o r C o n t a m i n a t i o n Over time the photometer opt...

Страница 49: ...and in wires running from the power connection to the power supply see item 9 in Figure 3 5 Take care not to touch exposed wiring or circuit boards with tools to avoid shock or possible damage to the electronics W A R N I N G To avoid electrical shock keep hands and tools away from electrical wiring High voltage is present at the back of the instrument at the power connection C a u t i o n To avoi...

Страница 50: ...r service visit our website at http service tsi com or contact TSI at TSI Incorporated 500 Cardigan Road Shoreview MN 55126 USA Phone 1 800 874 2811 USA or 1 651 490 2811 E mail technical service tsi com or particle tsi com TSI GmbH Neuköllner Strasse 4 52068 Aachen GERMANY Telephone 49 241 52303 0 E mail tsigmbh tsi com Fax 49 241 52303 49 Web www tsiinc de TSI Instruments Ltd Stirling Road Cress...

Страница 51: ...is information when you call The instrument model number The instrument serial number A purchase order number unless under warranty A billing address A shipping address Use the original packing material to return the instrument to TSI If you no longer have the original packing material seal off the sampling inlet to prevent debris from entering the instrument and ensure that the indicator lights a...

Страница 52: ...5 6 Model 8587A Laser Photometer This page intentionally left blank ...

Страница 53: ...nual or software Pump User supplied vacuum source see requirements below Optics and Laser Light source 30 mW laser diode 780 nm wavelength Collection angle 45 degrees Lens protection Sheath air prevents aerosol from contacting optics Flow Rate Sample 2 0 L min controlled with critical orifice and valve Purge Approx 20 L min uncontrolled Instrument Control Manual Front panel buttons Remote Computer...

Страница 54: ... port 0 25 diameter Vacuum port 0 25 diameter Analog 0 5 VDC output BNC female connector RS 232 Com port DB9F connector for RS 232 USB Port USB Type B female connector Specifications are subject to change without notice The purge flow is the determining factor when selecting a vacuum pump Most vacuum pumps that can provide the needed purge flow at atmospheric pressure will have no difficulty provi...

Страница 55: ...ivers are not needed to communicate via the RS 232 serial port For RS 232 terminal emulation use HyperTerminal software that is included with Microsoft Windows A c c e s s i n g t h e L a s e r P h o t o m e t e r C D With the computer on and Windows running insert the Model 8587A CD ROM in your CD drive If AutoPlay is enabled on your PC the setup program begins automatically and the introduction ...

Страница 56: ...o a computer via the USB port Figure 3 1 The USB Terminal Emulator program TerminalUSB exe communicates using commands from the defined set described in the section Command Strings for Instrument Control and Data Acquisition The commands are shown in Table 3 2 Installing the USB Terminal Emulator N o t e The USB cable MUST NOT be connected to the Photometer or computer during the installation of t...

Страница 57: ... as shown in Figure B 2 Note Installing the USB Terminal Emulator will automatically cause the USB drivers to be installed first It is not necessary to install the USB driver separately by clicking Install USB Driver unless you want to install the driver without also installing the terminal emulator Figure B 2 TSI USB Device Driver InstallShield Wizard Screen ...

Страница 58: ...B 4 Model 8587A Laser Photometer 3 Continue by pressing Next Figure B 3 License Agreement Screen 4 Accept the license agreement and press Next Figure B 4 Choose Destination Location Screen ...

Страница 59: ... B 5 5 Click Next to install the program into the folder shown To specify a different location click Change Figure B 5 Begin Installation Screen 6 Click Install to begin the install process Figure B 6 Setup Status Screen ...

Страница 60: ...eld Wizard Complete Screen 8 Remove and store the CD ROM in a safe place for later use if needed After the installation of the USB Driver and USB Terminal Emulator programs are complete a shortcut icon appears on the desktop for starting and running the USB Terminal Emulator program Figure B 8 TSI USB Terminal Shortcut Icon To connect the USB follow the instructions in the next section Connecting ...

Страница 61: ...ecessary to repeat this procedure 1 Make sure the USB Driver and USB Terminal Emulation programs have been installed as described in the previous section 2 Start up the computer 3 Turn on the Laser Photometer 4 Plug the USB cable into the USB port on the back panel of the Laser Photometer and into a free USB port on the computer 5 The computer will not initially recognize the Laser Photometer The ...

Страница 62: ... Wizard Installing Software 7 The unsigned driver warning will be displayed Select the Continue Anyway button to proceed with the installation Figure B 11 Unsigned Driver Warning Screen 8 The Please Wait dialog will display until the process is completed ...

Страница 63: ...Laser Photometer CD B 9 Figure B 12 Please Wait While Wizard Installs Software Screen 9 Select the Finish button from the screen below Figure B 13 Completing the Found New Hardware Wizard Screen ...

Страница 64: ...nstall the device from the computer use the device manager 1 Plug in the Laser Photometer 2 Open device manager through the Hardware tab of the system properties wizard 3 The device is present in the Universal Serial Bus Controller section of the device manager Right click on the device and select Uninstall 4 Run the USB Device Driver InstallShield program to remove the TsiUsb inf TsiUsb sys and T...

Страница 65: ...Laser photometer is not connected to the computer find the supplied USB interface cable and connect it now Refer to Figure 3 1 to locate the USB connector at the back of the instrument To find available USB devices attached to the computer click the List Devices button in the main window USB devices can also be displayed by selecting List Devices from the Devices menu The available attached device...

Страница 66: ...n the Instrument Output panel right side Disconnecting Click the Disconnect button A message will appear in the OUTPUT window Saving Input and Output The text in the Operator Input and Instrument Output panels can be saved to a file for future reference To save the text in the Operator Input panel select the File menu and choose Save Input To save the text in the Instrument Output panel select Fil...

Страница 67: ...n choose Timeout A dialog box will appear and the desired timeout period can be entered into the text box Figure B 16 Set Device Timeout Screen Setting the Buffer Size The size of the internal buffer that is used when receiving data from the attached device can be adjusted From the Polling menu select Buffer Size In the dialog box that appears enter the desired buffer size in bytes Figure B 17 Set...

Страница 68: ...B 14 Model 8587A Laser Photometer This page intentionally left blank ...

Страница 69: ...this appendix does not apply The information presented is pertinent for program development using Microsoft Visual C 6 0 Information presented in this appendix is designed for experienced program developers This appendix includes information on the following topics Locating the header file Locating the library file Locating the dynamic link library file Using the library Error values and interpret...

Страница 70: ... method or by using the pragma define For example pragma comment lib tsiusbapi The TSIUSBApi dll dynamic link library file should be placed in the working directory of the application executable The TSIUSB driver installation file is TSIUSB inf The TSIUSB driver executable file is TSIUSB sys E r r o r V a l u e s a n d I n t e r p r e t a t i o n With the exception of DeviceClose each call to TsiU...

Страница 71: ...ned when a request of the device has timed out and the current operation has been cancelled A non successful return value of ERROR_INVALID_HANDLE is the value returned upon a request of the device that has been closed or the handle returned from DeviceOpen is not valid Check your connections device power and check that the device is available and functioning properly through Windows Device Manager...

Страница 72: ...and the TsiUsbApi DLL the normal device communication operation is as follows 1 Use ListDevices to determine the number and symbolic links of TSI USB devices attached to the system The symbolic link is the unique USB device name 2 Use DeviceOpen sending the symbolic link attained from ListDevices to open a connection to the device 3 Using the set of functions described in the following section lab...

Страница 73: ...SB_STATUS_BUSY is returned The default value is 5 ms TransferTimeout This value is in seconds This value specifies the number of seconds to wait for a device to complete a command request The default value is 2 seconds C o n n e c t i n g t o t h e A t t a c h e d D e v i c e ListDevices Use the ListDevices method to determine the number of available devices attached UINT ListDevices LPCTSTR m_tsi...

Страница 74: ... Win32 error code returned from the Windows API A successful DeviceOpen returns ERROR_SUCCESS 0x0000 Long Pointer to a DWORD bTerminal The size in bytes of the data being transferred to the device This value should be set to TRUE when opening a connection to a Model 8587A Laser Photometer BOOLEAN Return value This method returns a handle to the open device A successful DeviceOpen returns a handle ...

Страница 75: ... allow matching a response to a request This is defaulted to 0x80 and only necessary for asynchronous requests and responses WORD or Unsigned short pStatus A pointer to the status returned from the device PULONG or pointer to an unsigned long lpNumberOfBytesWritten A pointer to the number of bytes written to the device LPDWORD or pointer to an unsigned long wEndpoint The index of the device endpoi...

Страница 76: ...f length dwLength dwErrorCode TsiUsbTerminalTransmit m_hComm VOID pBufOut dwLength nTransID ULONG status lpBytesXmit return dwErrorCode TsiUsbTerminalReceive The TsiUsbTerminalReceive methodreads data from the device DWORD TsiUsbTerminalReceive IN HANDLE hDevice IN OUT LPVOID pRecvBuff IN DWORD recvBuffSize IN OUT LPWORD pTransID IN OUT LPWORD pLevelID IN OUT PULONG pStatus IN OUT LPDWORD lpNumber...

Страница 77: ...D or pointer to an unsigned long pStatus A pointer to the status returned from the device PULONG or pointer to an unsigned long lpNumberOfBytesRead A pointer to the number of bytes read from the device LPDWORD or pointer to an unsigned long wEndpoint The index of the device endpoint to read from Unless this is documented as different use the default endpoint WORD Return value A successful return W...

Страница 78: ...WORD bytesRead return dwErrorCode R e t r i e v i n g E r r o r S t r i n g s TsiUsbGetStatusString The TsiUsbGetStatusString method returns a device defined status string that describes the device condition that corresponds to the device command status VOID TsiUsbGetStatusString IN HANDLE hDevice IN ULONG ulStatus IN OUT LPCTSTR pStatusString Parameter Description Type hDevice Handle returned fro...

Страница 79: ...om DeviceOpen HANDLE dwWin32Err The error code returned from the DLL DWORD or an unsigned long pWin32ErrStr The returned string describing the win32 error that occurred LPCTSTR The return value is void C l o s i n g t h e C o n n e c t i o n DeviceClose This method closes the connection to the USB Device VOID DeviceClose HANDLE hDevice Parameter Description Type hDevice Handle returned from Device...

Страница 80: ...C 12 Model 8587A Laser Photometer This page intentionally left blank ...

Страница 81: ...forming manually 4 4 test control 4 4 fit test chamber 4 3 fit test sequence 4 6 fit testing aerosol 4 6 flow check 2 2 flow schematic 3 10 flow setup 4 3 flow status light 2 2 flow system 3 9 front panel 3 1 H hex data retrieval 3 8 how it works 1 2 HyperTerminal 3 6 Hyperterminal software 7 1 I J identification label ix InstallShield wizard 7 3 instrument description 3 1 instrument operation 4 1...

Страница 82: ...tions A 1 status lights 3 2 submitting comments xv T technical contacts 5 4 technical information for program development using USB communications 8 1 TSI USB terminal shortcut icon 7 6 tsiusbapi 8 2 TSIUSBApi dll 8 2 tsiusbapi h 8 2 TSIUSBApi h 8 1 TSIUSBApi lib 8 2 TsiUsbGetStatusString 8 10 TsiUsbGetWin32String 8 3 TsiUsbTerminalReceive 8 8 TsiUsbTerminalTransmit 8 7 turning on laser photometer...

Страница 83: ...e following features Good Adequate Poor Readability Accuracy Completeness is everything there Organization finding what you need Quality and number of illustrations Quality and number of examples Comments ____________________________________________________________________________ _____________________________________________________________________________________ ________________________________...

Страница 84: ......

Страница 85: ... more information USA Tel 1 800 874 2811 UK Tel 44 149 4 459200 France Tel 33 1 41 19 21 99 Germany Tel 49 241 523030 India Tel 91 80 67877200 China Tel 86 10 8219 7688 Singapore Tel 65 6595 6388 P N 1980538 Rev D 2015 TSI Incorporated Printed in U S A ...

Отзывы: