10
Section A
Setting Up Your Treadmill
Treadmill Assembly
Pedestal Positioning (Continued)
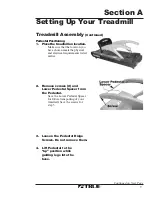
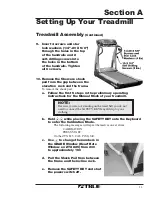
5.
Insert 2 screws (3/8”-16 X 4”)
and lock washers on each side
of the Pedestal. Tighten all
4 screws with the Allen
Wrench provided.
Use the 2 screws removed from
the Lower Pedestal Spacer and the
2 screws and 4 washers from the
hardware package. When inserting and
tightening screws, make sure that they go in straight, through the holes in the
Pedestal and thread into the threaded portion of the base.
NOTE:
Do not operate unless all 4 screws are securely tightened to
insure that they do not work themselves loose.
6.
Tighten the Pedestal Hinge Screws with the Allen wrench
provided.
Handrail Assembly
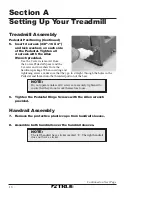
7.
Remove the protective plastic caps from handrail sleeves.
8.
Assemble both handrails over the handrail sleeves.
NOTE:
The left handrail has a sticker marked “L”. The right handrail
does not have a sticker.
Continued on Next Page
Содержание ZTX 825
Страница 3: ...i ZTX 825 825P 825HRC Commercial Treadmill Owner s Manual Save These Instructions Rev A April 2002 ...
Страница 19: ...5 Section A Setting Up Your Treadmill ...
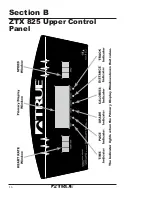
Страница 30: ...Section B 16 ZTX 825 Upper Control Panel The Indicator lights when the Primary Display Window shows that value ...
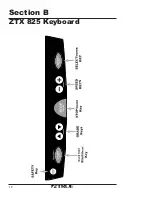
Страница 32: ...Section B 18 ZTX 825 Keyboard S ...
Страница 38: ...Section B 24 ...
Страница 40: ...Section C 26 ZTX 825P Upper Control Panel MESSAGE CENTER DOT MATRIX EXPRESS PACE ...
Страница 44: ...Section C 30 Key Key s NUMERIC s ZTX 825P Upper Control Panel ...
Страница 58: ...Section C 44 ...
Страница 60: ...Section D 46 ZTX 825HRC Upper Control Panel EXPRESS DOT MATRIX MESSAGE CENTER PREPROGRAM EXPRESS ...
Страница 64: ...Section D 50 Key Key s NUMERIC s ZTX 825HRC Keyboard ...
Страница 106: ...Section D 92 ...

