20
7. Installation
7.3.4 Multi-Display Installation
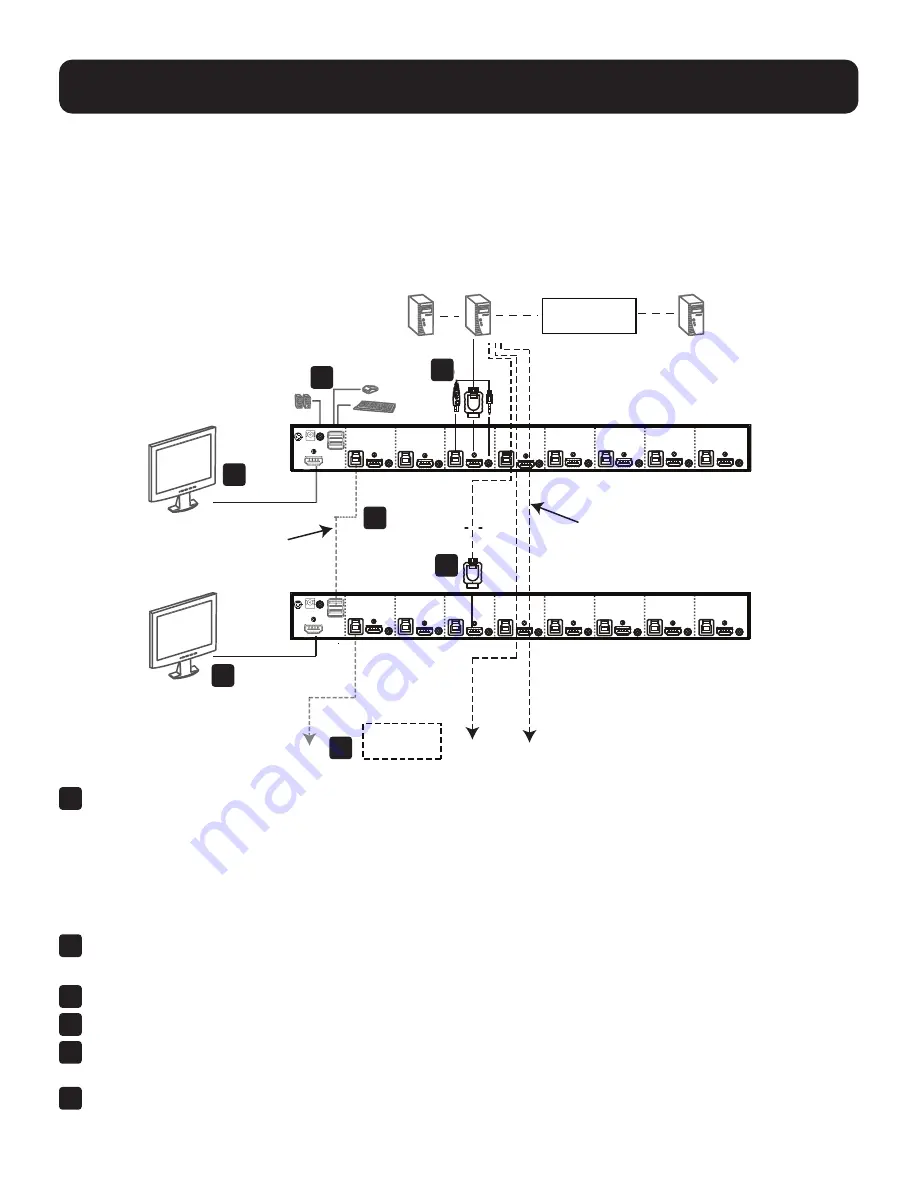
The B024-H4U08 and B024-H4U16 multi-display feature allows you to stack up to 8 units in a dual/triple/quad-display/
multi-display installation to control up to seven (B024-H4U08) or fifteen (B024-H4U16) computers at once. This
installation requires slightly different cabling than the standard cascade and offers an extra level of switching flexibility for
multiple-monitor installations where each computer is equipped with multiple video cards.
Note:
In a multi-display installation, the B024-H4U08 can only be connected to B024-H4U08 units, and the B024-H4U16 can only be
connected to B024-H4U16 units.
5
Computers with
2/3/4 video inputs
First Switch
5
HDMI cables
5
1
USB Type B to
Type A cable
Second Switch
3
Third / Fourth
Stage Units
4
2
1
Use a standard USB Type-A to USB Type-B cable to connect the Port 8 USB Type-B port on the First-Stage unit to
the USB Type-A port in the Console Ports Section of the second switch.
Notes:
• Port 8 is reserved to connect the units in a multi-display installation. Up to seven (B024-H4U08) or fifteen (B024-H4U16)
computers can be attached, using KVM ports 1–7 (B024-H4U08) or ports 1–7/9–16 (B024-H4U08).
• Plug the USB Type-A connector into the lower USB (keyboard) Port in the Console Port Section. Both USB Ports are marked
with a similar icon to remind you of the correct USB port.
2
Use HDMI cables to connect the KVM’s DisplayPort on the second unit to the second video-in port on the computers.
Note:
Only DisplayPort video cables are necessary–all other ports in the KVM section are not required in this installation.
3
Connect a display to the console section of the second switch.
4
Repeat steps 1-3 for any additional units for a total of up to a total of 8 switches.
5
Connect the cables for the first switch (see section
7.3.1 Single-Stage Installation
for details). All video, audio and
peripheral devices must be connected to the first switch.
6
Power up the KVM units, starting with the first switch, then power on the computers.
Note:
Make sure the computers and devices connected to the KVMs are also properly grounded.
5
5
1
5
2
3
4


