background image

Visionary - Hardware Installation and Configuration Manual

8

Conventions Used in this Manual

This manual has several standard conventions for presenting information:

Connections, menus, menu options, and user-entered text and commands appear in 

bold

.

Section names, web and e-mail addresses appear in 

italics

.

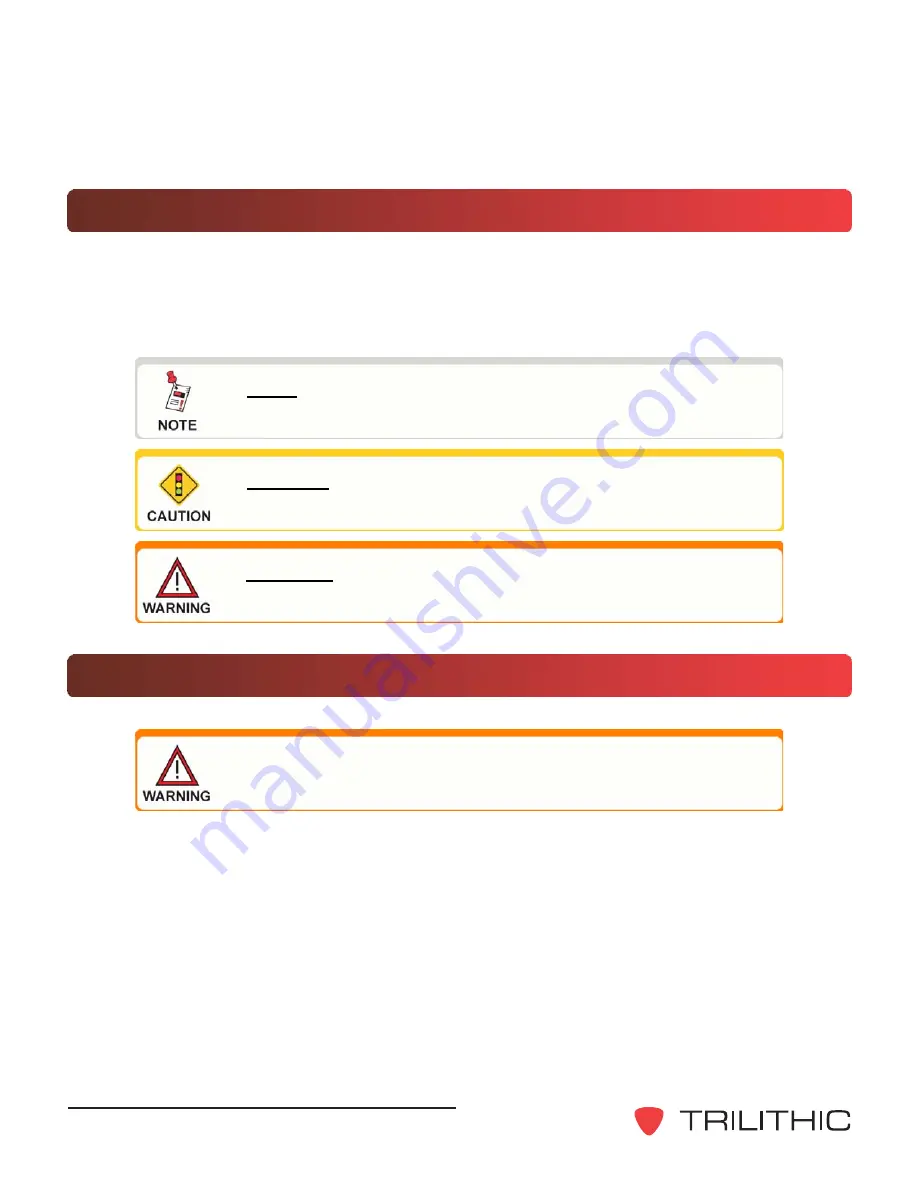
A NOTE is information that will be of assistance to you related
to the current step or procedure.

A CAUTION alerts you to any condition that could cause a
mechanical failure or potential loss of data.

A WARNING alerts you to any condition that could cause
personal injury.

Precautions

Do not use the Visionary HD/SD Overlay System in any manner
not recommended by the manufacturer.

Содержание Visionary HD/SD Overlay System

Страница 1: ...Visionary HD SD Overlay System Hardware Installation and Configuration Manual ...

Страница 2: ......

Страница 3: ...tive expertise in engineering and custom assembly Trilithic is dedicated to providing quality products services and communications solutions that exceed customer expectations Trilithic is comprised of five major divisions Broadband Instruments and Systems Offers test analysis and quality management solutions for the major cable television systems worldwide RF Microwave Components Provides componen...

Страница 4: ...AS Activation 10 Overview of the Visionary HD SD Overlay System 11 Front Panel View 11 Rear Panel View 12 Rear Panel Details 13 3 Installing and Wiring the Visionary 17 Overview 17 Wiring Recommendations 17 EASyCAST and Visionary Integration Sample 18 4 Configuring the Visionary 19 Overview 19 Computer System Requirements 19 Installing the Configuration Software 19 Configuration Procedure 24 Gener...

Страница 5: ...ware Installation and Configuration Manual 3 5 Specifications 42 Technical Specifications 43 Chassis 43 Serial Digital Video 43 Audio 43 Character Graphics Generation 44 Command and Control 44 Warranty Information 45 ...

Страница 6: ...Visionary Hardware Installation and Configuration Manual 4 THIS PAGE INTENTIONALLY LEFT BLANK ...

Страница 7: ...tion damage immediately file a claim with the transportation company or if insured separately with the insurance company Each Visionary will arrive in its own shipping container The container will at a minimum include the following components 1 CD which contains the Windows based configuration program 1 CD which contains the Visionary Editor software 1 null MODEM 9 pin serial data cable 1 AC power...

Страница 8: ...sending e mail please provide the following information Your name and your company name The technical point of contact name phone number e mail The serial number of the Visionary HD SD Overlay System A detailed description of the problem you are having including any error or information messages Before any Trilithic Visionary can be returned for repair Trilithic will issue a return material author...

Страница 9: ...tructured Chapter 2 Understanding the Visionary introduces the Visionary HD SD Overlay System and describes what it does The chapter discusses the practical application of the Visionary and explains the Visionary s indictors and connection terminals Chapter 3 Installing and Wiring the Visionary describes the steps to install and connect the Visionary Chapter 4 Configuring the Visionary describes t...

Страница 10: ... bold Section names web and e mail addresses appear in italics A NOTE is information that will be of assistance to you related to the current step or procedure A CAUTION alerts you to any condition that could cause a mechanical failure or potential loss of data A WARNING alerts you to any condition that could cause personal injury Precautions Do not use the Visionary HD SD Overlay System in any ma...

Страница 11: ...to display maintenance messages even from a remote location the message can be presented on the broadcast channel using the Visionary system Non EAS messaging is generally handled using a PC and the Visionary Editor software The Visionary connects to the EASyCAST encoder decoder via an Ethernet connection Asingle encoder decoder can communicate with multiple Visionary devices on a network Broadcas...

Страница 12: ...images can be placed on the screen with independent control over location transparency and fade in out for each graphic How the Visionary System Functions in an EAS Activation During normal broadcasting video is routed through the Visionary SDI input and output Audio is routed through the Visionary embedded in the SDI or through the baseband audio or AES EBU inputs and outputs During EAS activatio...

Страница 13: ...iew 2 1 1 Power LED Indicates whether the Visionary is powered on or off 2 Status LED Indicates whether the Visionary control firmware has been initialized and is running The status LED will not illuminate until the firmware has been fully initialized After the firmware has been initialized the LED will blink on and off ...

Страница 14: ...ndicator lamps or alarms for studio personnel 5 AES audio inputs Normal program audio is routed to these inputs for replacement during EAS activations 6 AES audio outputs These outputs provide normal program audio except during EAS activations at which time they contain EAS audio 7 SDI output This output provides normal program video with embedded audio except during overlay operations at which ti...

Страница 15: ...l purpose inputs Contact closure inputs for controlling the output of the Visionary including EAS message timing activation or hold off control G Ground for general purpose input 1 1 Abort message in progress When closed causes the message currently being played to stop and the next message in queue to be played G Ground for general purpose input 2 2 Trigger EAS message Starts playback of the firs...

Страница 16: ...received but is waiting for an activation trigger C Common contact NC Normally closed contact NO Normally open contact Contact closure 2 message active This contact closure is closed whenever a video overlay or audio playback is in progress It can be used to control indicator lights or external switching routing equipment C Common contact NC Normally closed contact NO Normally open contact Contact...

Страница 17: ...IN signal is lost SDI OUT continues to provide video at the last sampled input rate On power failure the SDI IN signal is routed to the SDI OUT connection using a fail safe relay SDI IN 75 Ω BNC serial digital interface input compliant with SMPTE 259M 292M and 274M standards Audio outputs 600 Ω balanced audio stereo pair provides the program audio input signal during normal operation During EAS or...

Страница 18: ...Visionary Hardware Installation and Configuration Manual 16 THIS PAGE INTENTIONALLY LEFT BLANK ...

Страница 19: ...e station s network The Visionary must be configured for a valid IP address subnet and gateway Routers and firewalls may need to be configured to allow communications between the EASyCAST EAS encoder the Visionary and any PCs used for configuration or control over the Visionary If possible one of the audio outputs from the EASyCAST EAS encoder should be connected to the EAS audio input on the Visi...

Страница 20: ...Visionary Hardware Installation and Configuration Manual 18 EASyCAST and Visionary Integration Sample ...

Страница 21: ...ts Computer equipment required to install the Visionary configuration software Windows XP operating system or newer or Windows Server 2003 operating system or newer May require an Ethernet connection or RS 232 communication port User account must allow permission to install new software and to edit TCP IP settings Installing the Configuration Software Installation of the configuration software on ...

Страница 22: ...License Agreement screen appears Select the radio button which corresponds to the acceptance of the license agreement then click the Next button 3 The Welcome to the InstallShield Wizard dialog box appears Select the Next button to initialize the InstallShield Wizard ...

Страница 23: ...e Next button to continue with the installation procedure 6 The Destination Folder window appears The default location for the Visionary configuration software is displayed To change the installation path click the Change button and specify the new file path To accept the default file path click the Next button ...

Страница 24: ... Installation and Configuration Manual 22 8 The Installing Trilithic Visionary window briefly appears 7 The Ready to Install the Program window appears Click the Install button to continue with the installation procedure ...

Страница 25: ...n installed Click the Finish button to close the installation wizard without opening the Visionary configuration software To open the configuration software select the Launch Trilithic Visionary check box prior to clicking the Finish button To start the configuration software use the Visionary icons located on the desktop or in the Windows Start menu under Programs Trilithic Visionary ...

Страница 26: ... to the Visionary using the RS 232 serial cable that was shipped with the Visionary Connect the Visionary to your local network switch or router using the Ethernet cable that was shipped with the Visionary 2 Power up the Visionary After 30 seconds the Visionary will have completed its boot up cycle and the green status light will be blinking 3 Start the Visionary configuration software by selectin...

Страница 27: ...ator The gateway is used to access IP addresses outside of the subnet non local addresses The default gateway is not required if the Visionary will not communicate with hardware outside of the subnet but should be set to an unused IP address within the subnet 9 From the Video Format pull down menu select the default video format for the Visionary When the Visionary is powered on if no video input ...

Страница 28: ...strator On the Main tab of the Visionary configuration software enter the new IP address in the Visionary IP Address text box The Visionary configuration software should be installed on the computer which will ultimately have long term control of the Visionary s operation Note that the controlling computer is not necessarily the same computer as was used in the initial network configuration proced...

Страница 29: ...gured then click the Export Settings button to save the configuration to a file Before changing the configuration on a Visionary click the Import Settings button to retrieve the previous configuration then make any configuration changes Once the changes have been programmed using the Program Settings button save the changes to the host computer s hard drive by clicking the Export Settings button a...

Страница 30: ... the Set Time button on the General tab The Visionary s time is synchronized to the system time on the configuration software s host computer It may be necessary to periodically repeat this process to ensure the Visionary s internal time remains accurate SNTP Synchronization The Visionary s time configuration can be managed through a connection to a Network Time Protocol NTP server Once configured...

Страница 31: ...verlay screen which is displayed periodically The purpose of the station identification page is to display the broadcast station s channel number call letters and logo to meet federal broadcast regulations The configuration utility allows operators to set the appearance of the page as well as schedule when it will appear 2 3 4 5 6 7 8 1 10 11 12 13 14 15 9 1 Add Box Click the Add Box button to pla...

Страница 32: ...age or text string from the screen After selecting the Delete button click the object to be deleted 5 Properties Select the Properties button to edit the properties of a box image or text string that has been placed on the screen After selecting the properties button click the object to be edited The respective Edit Properties window will appear for the selected object After editing the object pro...

Страница 33: ...e Display Time 1 through 4 for when the station identification page will be displayed Each display time is set in minutes after the top of the hour Select the check boxes corresponding to Time 2 Time 3 and Time 4 for each additional scheduled time if desired 11 Load Click the Load button to load a station identification page that had been previously created and saved The Load Visionary Message fro...

Страница 34: ...d Image button to place an image such as a station logo photograph or any other graphic on the screen Click the mouse where the top left corner of the image should be placed The Load Image window will appear Select the image Click the Open button to load the image click the Cancel button to abort the operation 2 3 4 5 6 7 8 1 10 11 12 13 14 9 Trigger Page The trigger page is a static screen which ...

Страница 35: ...eration 6 Edit Click the Edit button to edit a text string After selecting the Edit button select the text string to be edited After editing the text string click the Edit button again to complete editing 7 Move Click the Move button to move a box image or text string that has been placed on the screen After selecting the Move button click the object to be moved and drag it to a new location on th...

Страница 36: ... button to abort the operation 11 Save Click the Save button to save a trigger page that has been created Type a name in the File Name text box and click the Save button in the pop up window 12 Close Click the Close button to close the Visionary Editor window and return to the Visionary configuration window 13 Upload Page Click the Upload Page button to send the displayed trigger page to the Visio...

Страница 37: ...el Select the Enable AES EBU Audio check box to allow the Visionary to replace program audio with EAS audio for AES EBU AES 3 channel 1 Select the check boxes corresponding to Replace Channel 2 Audio and Replace Channel 3 Audio to replace program audio with EAS audio on AES EBU channels 2 and 3 The Master Out Volume control adjusts theAES EBU and baseband output volume during the playback of digit...

Страница 38: ...edure 1 In the Files tab on the Manage Images Resident Within the Visionary panel click the Browse button The Load Image dialog box will open 2 Navigate to the file to be uploaded select the file then click the Open button 3 On the Manage Images Resident Within the Visionary panel in the Image Type drop down list select the EAS event for the image or station logo if applicable 4 Click the Upload b...

Страница 39: ...odate bold italics etc type face treatments Make sure that all the required font files are loaded into the Visionary Upload a Font to the Visionary 1 On the Files tab of the Visionary configuration software click the Browse button in the Manage Visionary Custom Fonts panel The Load Font File window will open 2 Locate and select the font file to be uploaded then click the OK button 3 Select the fon...

Страница 40: ...e used for display purposes during message editing Each font file should be installed in the Windows fonts folder to be correctly displayed in the Visionary Editor software The font files installed on the Visionary must have been legally obtained or purchased 4 Click the Refresh button to update the Resident Fonts list and display the fonts that have been loaded to the Visionary ...

Страница 41: ...g procedure 1 Drag and drop the font file to the Windows Fonts folder in the following location C Windows System Fonts Windows will automatically install the font or fonts as they are dragged to the Fonts window Delete a Font from the Visionary 1 Select the font to be deleted from the Resident Fonts pull down menu 2 Click the Delete button to remove the font file from the Visionary This will not r...

Страница 42: ...st computer on which the Visionary configuration software is installed and the Visionary refer to Chapter 4 Configuring the Visionary Configuration Procedure General Communication Configuration and Visionary Configuration sections 2 On the Main tab click the Upgrade Firmware button 3 Click the Continue button to begin the firmware upgrade procedure To abort the upgrade procedure click the Cancel b...

Страница 43: ...e files for the firmware upgrade are being sent to the Visionary the status light on the front of the Visionary will not be blinking it will be constant on or constant off 6 When the configuration utility indicates that the update is complete wait for a steady blink from the Visionary status light then power off the Visionary 7 Wait five seconds then power on the Visionary The Visionary should be ...

Страница 44: ...eAdd or Remove Programs utility by clicking the Windows Start button then the Control Panel button From the Control Panel click the Add or Remove Programs link 2 In the program list scroll to find Trilithic Visionary To remove the program select the program by clicking once on the entry then click the Remove button 3 Apop up window will appear confirming your decision to remove the Visionary confi...

Страница 45: ...9 97 Hz High Definition 1080p 1080p 29 97 Hz High Definition 1080i 1080i 59 94 Hz Audio 6 channels ofAES EBU audio inputs unbalanced three 75 Ω BNC connectors 6 channels ofAES EBU audio outputs unbalanced three 75 Ω BNC connectors 8 channels of embedded audio Balanced stereo analog audio switch Analog to digital convertor for analog to AES EBU and embedded audio Audio file storage and playback ins...

Страница 46: ...000 characters Text properties include position font size color background color transparency speed and repeats Images can be positioned on the screen with a maximum of 8 images per page transparency supported Compatible with PNG graphic files with transparency All graphic objects text boxes images can be faded on and off the screen Message queue handles multiple messages Command and Control 1 10 ...

Страница 47: ...o the Buyer under this Warranty and in no event shall Trilithic Inc be liable for incidental or consequential damages for any alleged breach of this Warranty This Warranty shall not apply to any part of the product which without fault of Trilithic Inc has been subject to alteration failure caused by a part not supplied by Trilithic Inc accident fire or other casualty negligence or misuse or to any...

Страница 48: ...Visionary Hardware Installation and Configuration Manual 46 THIS PAGE INTENTIONALLY LEFT BLANK ...

Страница 49: ...Visionary Hardware Installation and Configuration Manual 47 THIS PAGE INTENTIONALLY LEFT BLANK ...

Страница 50: ...Visionary Hardware Installation and Configuration Manual 48 THIS PAGE INTENTIONALLY LEFT BLANK ...

Страница 51: ......

Страница 52: ...9710 Park Davis Drive Indianapolis IN 46235 317 895 3600 www trilithic com P N 0010210030 08 09 Made in U S A ...

Отзывы: