


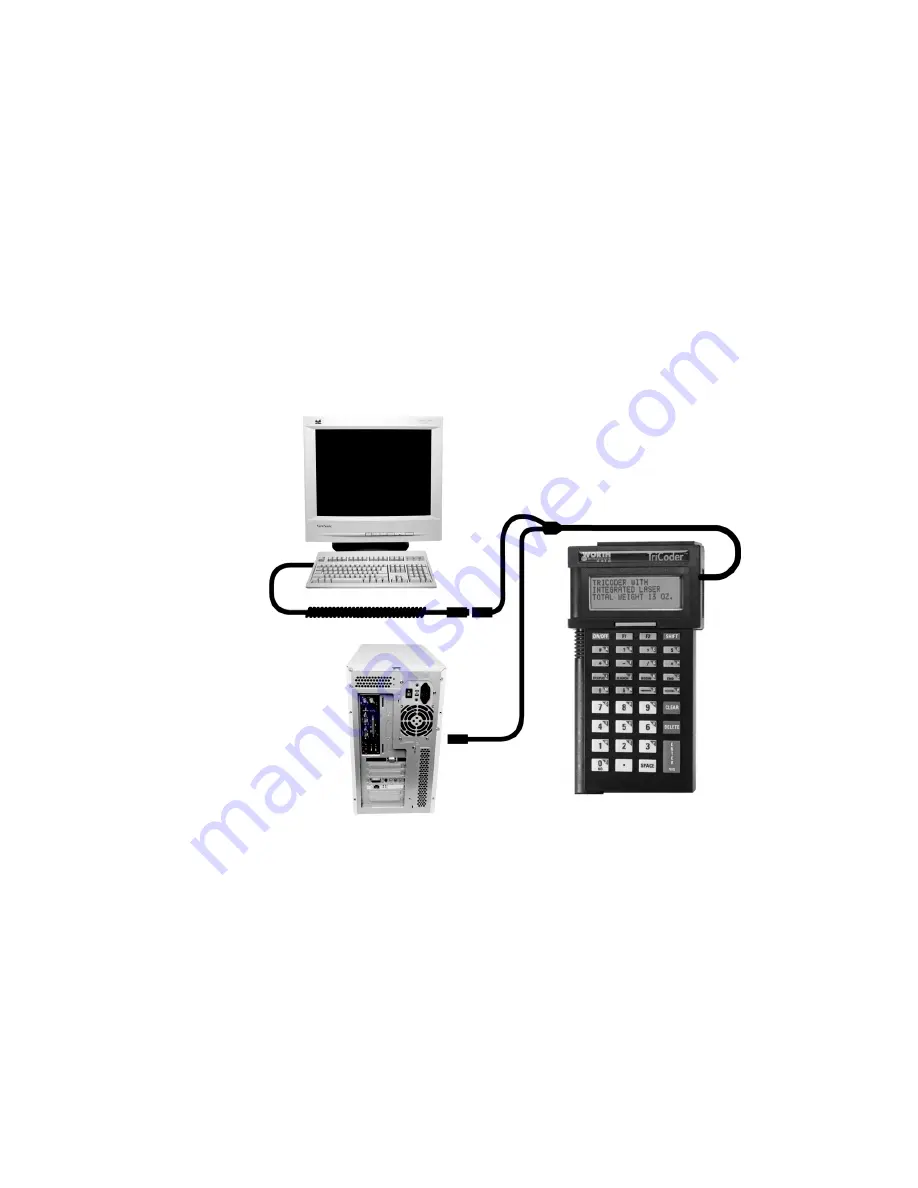
5-7
and the keyboard – do not plug the Splitter cable into a mouse port
or any port other than the keyboard port. Take the 3
rd
end of the
Splitter cable with the modular (telephone style) connector and
plug it into the port on the TriCoder labeled COMPUTER.
3. Plug the 5-volt power adapter (included with the TriCoder) into the
port labeled PWR at the bottom of the TriCoder. Turn the TriCoder
on by pressing the ON/OFF key. Now turn on the computer. The
TriCoder ships with a small black plastic block with a female
modular connector in it called a Jumper Block. When removing the
TriCoder from the cable for portable operation, place the Jumper
Block on the now free end of the Splitter cable. This allows your
keyboard to function even though the TriCoder is not attached.
PC Keyboard Wedge Installation
Configuring the TriCoder for Keyboard Wedge
Once the hardware is connected, the next step is to configure the TriCoder
and test your communication.
The TriCoder setup allows the user to configure the TriCoder for different
Computer Interfaces, and the reading of different bar code types, as well as
configuring some of the more advanced features of the TriCoder. If you
have a PC with a T64 or LT64 TriCoder, the default Computer Interface is
1- PC Keyboard. If you have a T54 or LT54 TriCoder you will need to do a
jumper change - See Appendix F, and change the Computer Interface to 1.
Содержание Portable Bar Code Reader
Страница 14: ......
Страница 20: ......
Страница 48: ......
Страница 116: ......
Страница 125: ......
Страница 143: ......
Страница 174: ......
Страница 186: ......
Страница 200: ......
Страница 208: ......
Страница 212: ......
Страница 218: ......
Страница 222: ......
Страница 224: ......
Страница 226: ......


