4
Basics
Labels
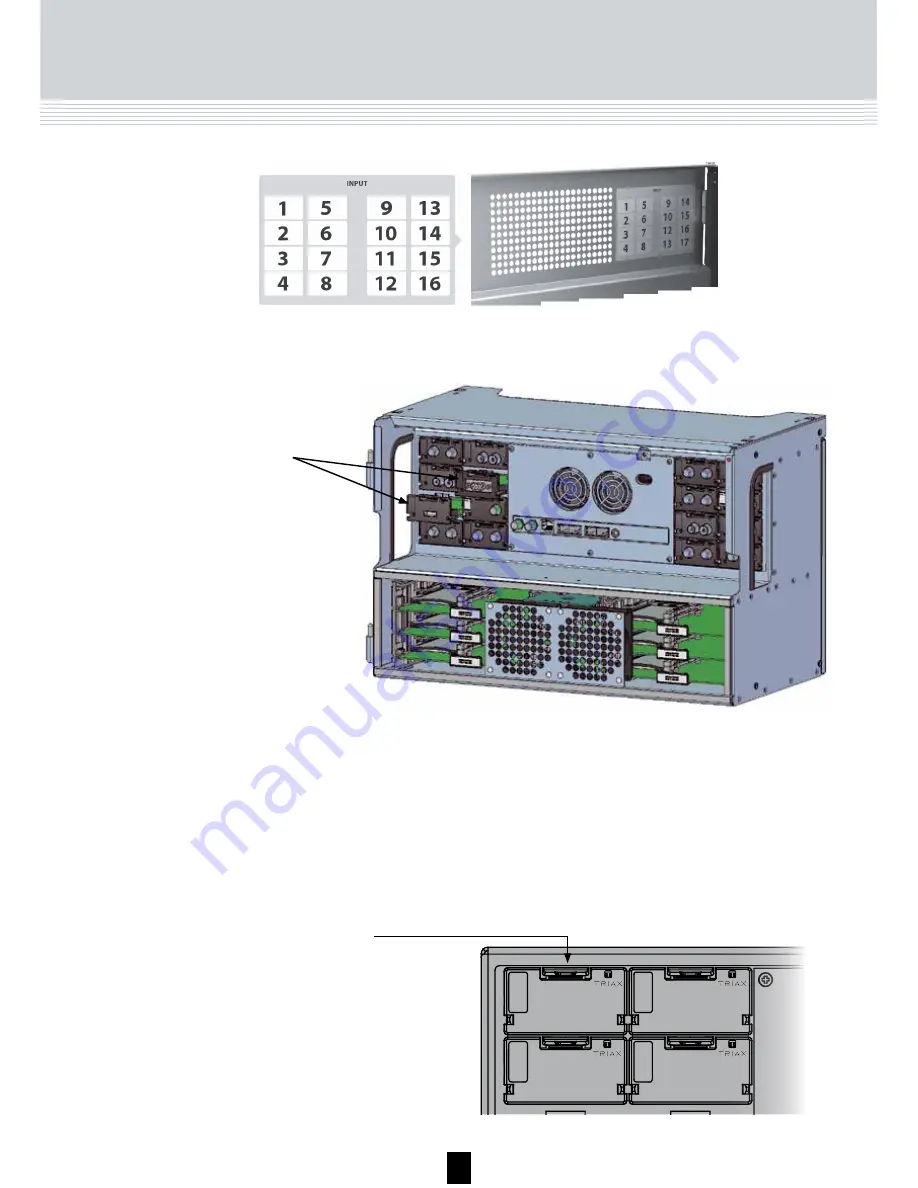
Before you can install a module in the input section you have to remove the
cover that protects the module slot.
Cover removal
Module
installation
It is optional in which slots you place the individual input modules in the
input section. For convenience each slot has been given a number, and
an overview of the slot numbers has been placed on the inside of the
door of each unit.
Note
Slot no. 1 is placed in the top left-hand corner of the input
section when you face the front of the unit.
A label is placed on the front of the input module where you can write the
information regarding the configuration of the module.
Besides the information that you write on the label, the module type and
part number are also displayed on the label.
Note
The coloured part at the top of the label informs you of the module
type. Each type of module is allocated a unique coloured label.
On the bottom of the module you will find a label with the bar code and a
serial number printed on it.
HDMI
492030
Label with
user added
information
A/V
492080
9
6
You do not need tools to remove the covers, just use your fingers.
For EMC and cooling reasons only remove covers from the module
slots that you want to insert modules into.
1. Press the fastener
downwards
2. Pull the cover
outwards to
remove it
5
1) Press the fastener downwards
2) Pull the module out-
wards to remove it
from the module slot
Basics
You install an input module by sliding the module into a module slot in the
input section of the headend unit and push it till the module clicks into place.
It is possible to remove an input module from a module slot without using
any tools, just use your fingers to press the fastener downwards and then
pull the module outwards to remove it from the module slot.
Module removal
A/V
492080
1 Slide the module
into a slot
2 Push the module
untill the fastener
clicks into place
Note
You can use hot swapping when you insert an input module into
or remove an input module from the TDX system.


