background image

4

Basics

Labels

Before you can install a module in the input section you have to remove the 

cover that protects the module slot.

Cover removal

Module  

installation

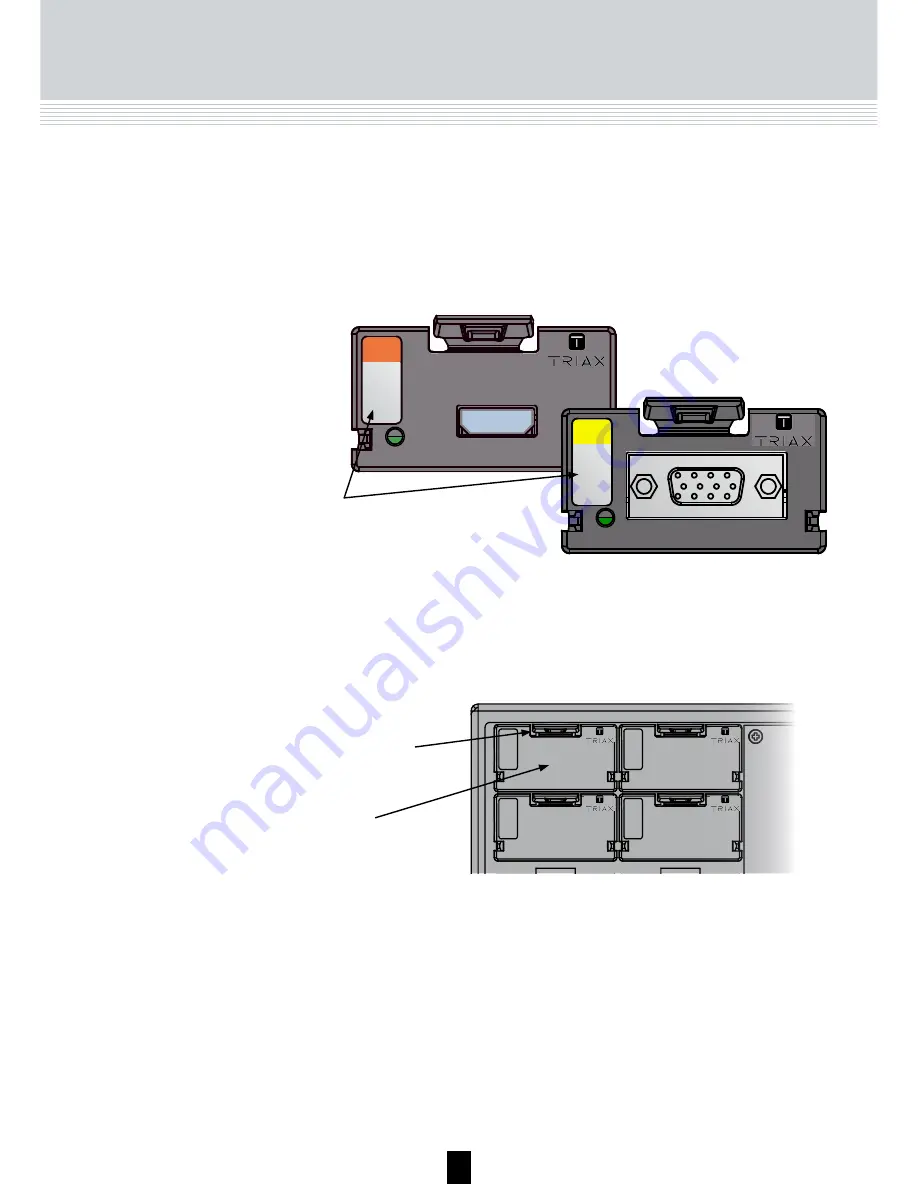
It is optional in which slots you place the individual input modules in the  

input section. For convenience each slot has been given a number, and  

an overview of the slot numbers has been placed on the inside of the  

door of each unit.

Note

Slot no. 1 is placed in the top left-hand corner of the input 
section when you face the front of the unit.

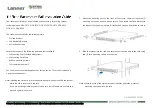
A label is placed on the front of the input module where you can write the  

information regarding the configuration of the module. 
Besides the information that you write on the label, the module type and  

part number are also displayed on the label.

Note

The coloured part at the top of the label informs you of the module 

type. Each type of module is allocated a unique coloured label.

On the bottom of the module you will find a label with the bar code and a  

serial number printed on it.

HDMI

492030

Label with

user added

information

A/V

492080

9

6

You do not need tools to remove the covers, just use your fingers.

For EMC and cooling reasons only remove covers from the module  

slots that you want to insert modules into.

1. Press the fastener 

downwards

2. Pull the cover 

outwards to 

remove it

5

1) Press the fastener downwards

2) Pull the module out-

wards to remove it 

from the module slot

Basics

You install an input module by sliding the module into a module slot in the  

input section of the headend unit and push it till the module clicks into place.

It is possible to remove an input module from a module slot without using 

any tools, just use your fingers to press the fastener downwards and then 

pull the module outwards to remove it from the module slot.

Module removal

A/V

492080

1  Slide the module 

into a slot 

2  Push the module 

untill the fastener 

clicks into place

Note

You can use hot swapping when you insert an input module into 

or remove an input module from the TDX system.

Содержание AV module 492080

Страница 1: ...Model Item no HDMI module 492030 AV module 492080 Version 891078C 10 2012 EN triax com User guide...

Страница 2: ...oval 4 Module installation 4 Module removal 5 Input cable installation 6 Status LED s 6 Log in 7 Input window 8 Configuration of HDMI input module 9 Status information 12 Delete setup 13 HDMI configur...

Страница 3: ...u receive it Included in the box is a user guide instructing you how to use the TDX Ser vice Tool to configure the module The HDMI and AV modules are some of the input modules that you can install in...

Страница 4: ...ule where you can write the information regarding the configuration of the module Besides the information that you write on the label the module type and part number are also displayed on the label No...

Страница 5: ...clicks into place It is possible to remove an input module from a module slot without using any tools just use your fingers to press the fastener downwards and then pull the module outwards to remove...

Страница 6: ...o tighten the screws connecting the AV plug to the connector HDMI 492030 Status LED A V 492080 9 6 There is a status LED on the front of each module The LED indicates whether the module has locked on...

Страница 7: ...he Log in button the System window is displayed When you update the software of a module the status LED provides you with information about the updating process Orange Boot loader state Temporary off...

Страница 8: ...to display the Input window TDX Service Tool You have to configure the input modules individually To display the Configuration window click the Setup button of the HDMI and AV input module you want to...

Страница 9: ...with the bitrates you can choose from Select the bitrate that matches the type of service you want to route to the TDX pool Video codec To select the required video codec click the arrow to the right...

Страница 10: ...at the top of the list or select the service by clicking the square to the right of the service TDX Service Tool HDMI or AV module Note The name of the service listed in the service list area does no...

Страница 11: ...indow for an input module that has been configured all fields are filled in and services have been selected If you want to change the existing bitrate and video codec just follow the same procedure as...

Страница 12: ...ludes the status of the module and revision of software Status Informs you whether the input module is locked or not SW revision Displays the software version of the input module TDX Service Tool Sett...

Страница 13: ...line at the bottom of the Configuration window 1 No source 2 Not a valid resolution e g 1080p 1 No source 2 To high resolution for MPEG 2 encoding Note The HDMI module complies with the HDCP standard...

Страница 14: ...f the input module you want to remove A message window is displayed asking you to confirm that you want to remove the input module Delete setup When you return to the Input window the configuration of...

Страница 15: ...ation of the headend system is the Apply button placed in the upper right hand corner of the TDX Service Tool window Apply Save configuration Whenever you have made changes in your configuration Apply...

Страница 16: ...the slot in the TDX unit while power is on The colour of the LED on the input module indicates how the update process is progressing Red fast flashing The MPEG encoder module is now being updated Gree...

Страница 17: ...17 TDX Service Tool The illustration below displays the error message you will receive if the TDX system needs to be updated after the MPEG encoder module has been updated...

Страница 18: ...mat type 2 AC3 pass thru Output Output format MPEG transport stream LVDS Connector Edge connector for PCIe x1 Video Coding option 1 GUI MPEG 2 Embedded audio type 1 Video Coding option 2 GUI MPEG 4 Em...

Страница 19: ...ndards PAL Secam NTSC VBI data slicer Teletext Input aspect ratio 4 3 16 9 Audio input Audio input level Vpp 2 4 Audio impedance kOhm 10 1 S N ratio dB 55 Input frequency range 3 dB Hz 50 20 000 Max h...

Страница 20: ...in the event that your expert dealer is unable to help you please contact us at Triax A S Bj rnk rvej 3 8783 Hornsyld Denmark Tel 45 76 82 22 00 mail triax triax dk web www triax dk DECLARATION OF CO...

Отзывы: