© Copyright 2019 TRENDnet. All Rights Reserved.
16
TRENDnet User’s Guide
TWG-431BR
Virtual LANs (VLANs)
System> VLAN Setup
Your router supports 802.1Q tagged VLANs as well inter-VLAN routing. VLANs can be
assigned different IP address interfaces in which the router can route between VLAN IP
subnets. The router supports up to 7 802.1Q tagged VLANs.
Note:
The default VLAN must be assigned as Native to access the router management
interface.
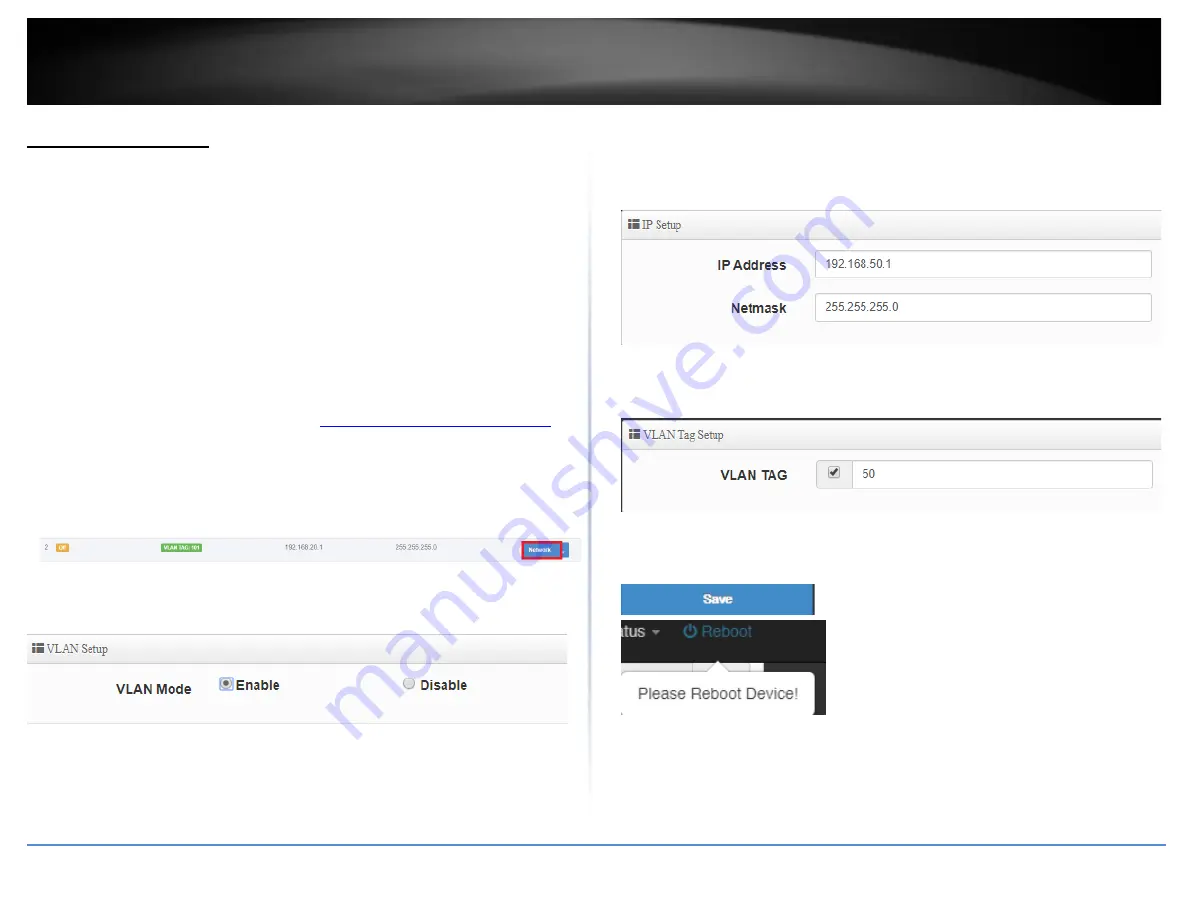
Enable an 802.1Q tagged VLAN
Your router supports 802.1Q VLAN tagging/trunking to other 802.1Q VLAN devices such
as managed switches.
1. Log into your router management page (see “
Access your router management page
on page 7).
2. Click on
System
and click
VLAN Setup
.
3. Under VLAN #2, click
Network
.
4. For the VLAN Mode, select
Enable.
5. Under IP Setup, enter the
IP Address
and
Subnet Mask
for the new VLAN.
Ex: We will enter the interface IP address as 192.168.50.1 and subnet mask
255.255.255.0.
6. Under VLAN Tag Setup, enter the VLAN tag/VID of the new VLAN.
Ex: We will enter the tag/VID 50 for the new VLAN.
7. Click
Save
at the bottom. Then click
Reboot
at the top right
to commit the changes.
Note:
If using multiple WAN mode, under Specify WAN Port, you can select which WAN
to direct the outbound traffic for the VLAN.
Содержание TWG-431BR
Страница 1: ......
Страница 8: ...Copyright 2019 TRENDnet All Rights Reserved TRENDnet User s Guide TWG 431BR 5 Applications...
Страница 93: ......


