


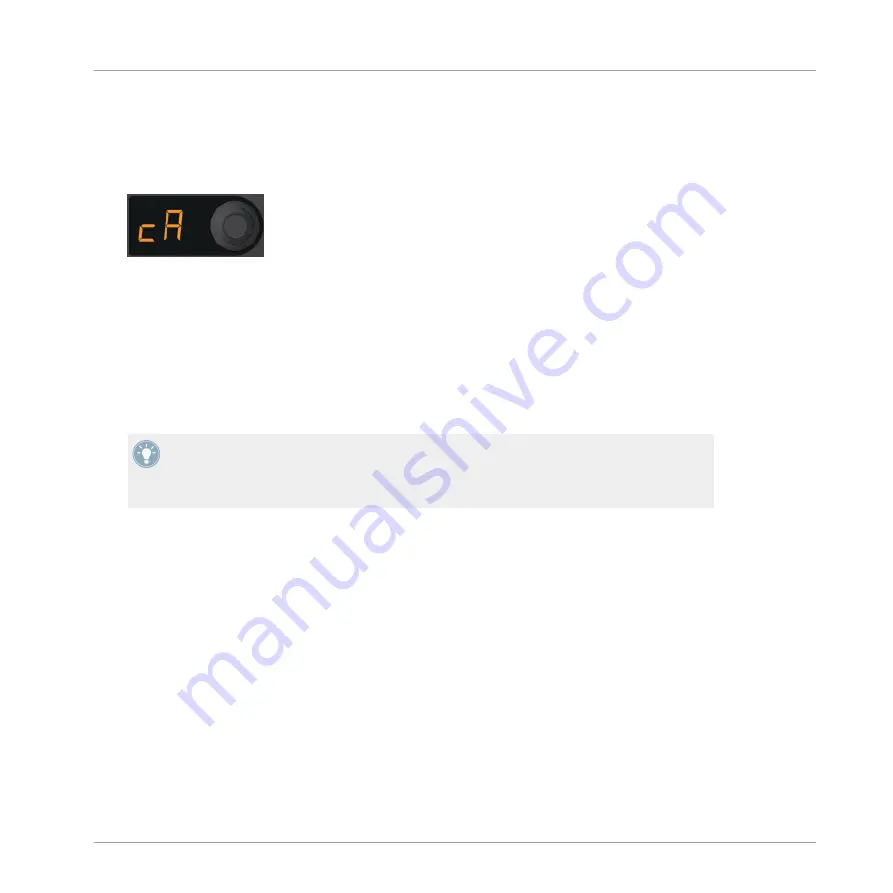
2.
While continuing to hold the CAPTURE (DELETE) button, rotate the encoder knob. You
will see a Pad Matrix animation that will graphically indicate which of the four decks (or
the Loop Recorder) will be the focus. At the same time, the display indicates the source
names as well ("cA" for capture Deck A, "cB" for capture Deck B, and "cL" for capture
Loop Recorder). Make sure the display reads "cA."
3.
When releasing the CAPTURE (DELETE) button, the controller remains in Capture mode.
You can now set the capture length as explained in the next section.
Determining the Capture Length
Notice the number in the display.
►
Turn the encoder knob until you see "4." This means that four beats will later be captured
from the capture source Deck.
When pressing the encoder knob at this point, a loop of the specified length will be activat-
ed in the capture source Deck. Pressing the encoder knob again will deactivate the loop.
Activating a loop inside the Track Deck before capturing can be handy for transitions be-
tween elements of a Remix, or between track transitions in your mix.
Capturing into a Pad
If you want the Sample start to snap to the capture source Deck's Beatgrid, make sure the
Snap function (
S
) is active in the software's Main section. We recommend to have the Snap
function always active when capturing Samples.
Tutorials and Workflows
Making Your Own Remix Set
TRAKTOR KONTROL F1 - Manual - 51


