


BENDING THE ELEVATOR PUSHROD
❍
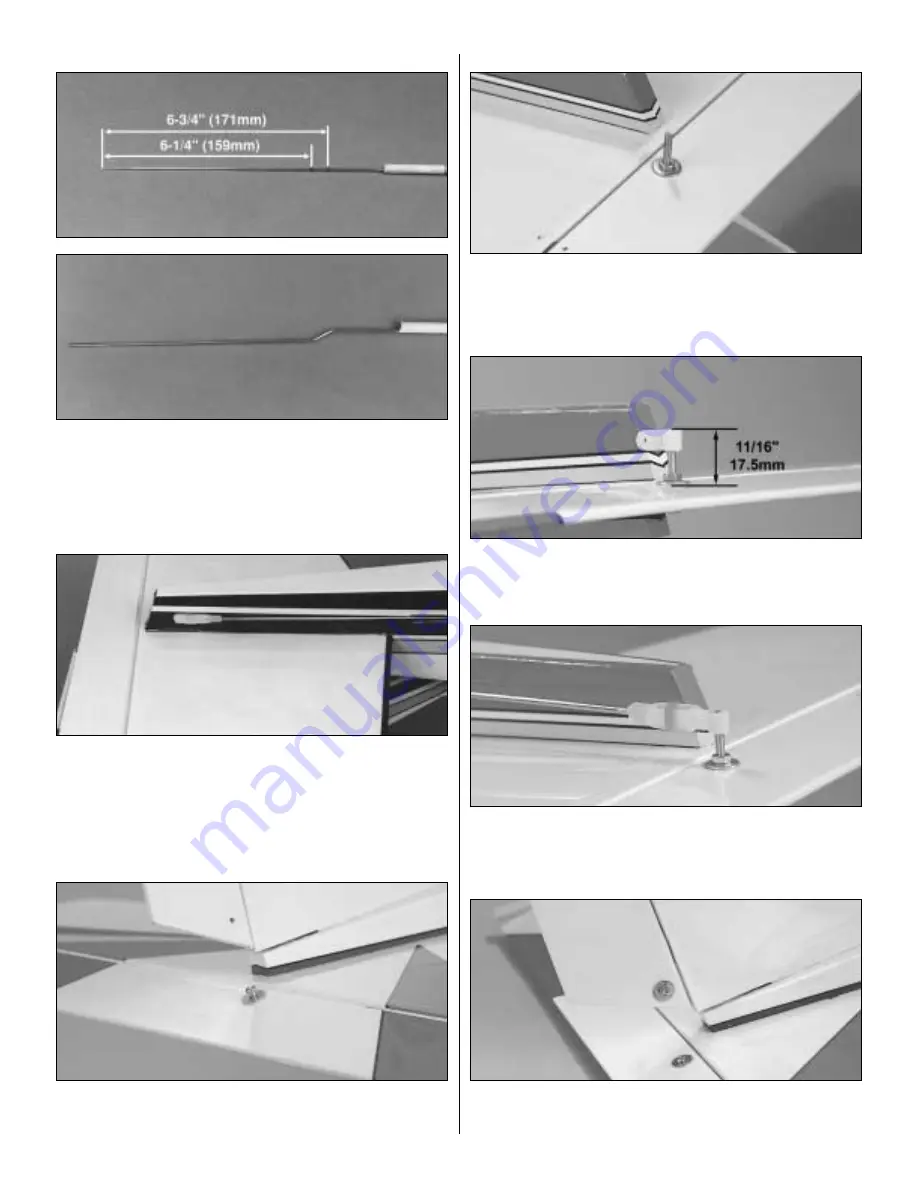
5. Make two marks that are 6-1/4" (159mm) and 6-3/4" (171mm)
from the threaded end of the pushrod wire. Make two 45° bends at
the marks as shown in the photo.
INSTALL THE ELEVATOR PUSHROD
❍
6. Insert the elevator pushrod from the radio compartment back,
threaded end first. Pass the rod through the opening in the fuse side
previously cut for this purpose. Thread one of the plastic clevises onto
the rod until the rod is flush with the plastic between the clevis forks.
INSTALL THE ELEVATOR CONTROL SCREW
❍
7. Locate a 3mm x 25mm machine screw and a 3mm washer. Slide
the washer onto the screw. Pass the screw through the elevator from
the top.
SECURE THE ELEVATOR CONTROL SCREW
❍
8. Slide a 3mm washer onto the screw from the bottom. Thread a
3mm nut onto the screw. Tighten the screw, but not too tight as to crush
the underlying wood. Use threadlock on the nut to prevent loosening.
INSTALL THE ELEVATOR CONTROL HORN
❍
9. Thread the elevator control horn onto the screw until it is
positioned 1/16" [17.5mm] above the bottom of the elevator.
CONNECT THE ELEVATOR PUSHROD
❍
10. Attach a clevis to a pushrod. Attach the clevis to the elevator
control horn.
INSTALL THE RUDDER CONTROL SCREW
❍
11. Locate a 3mm x 25mm machine screw and a 3mm washer.
Slide the washer onto the screw. Pass the screw through the rudder
from the left.
14


