


No.
Part name
P
rocedure
s
Remarks
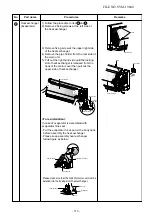
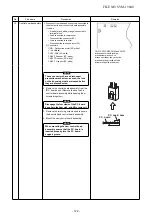
Screw
Unit display
Drain pan
assembly
Center arm
of drain pan
Back body
Drain pan
Louver motor
connector
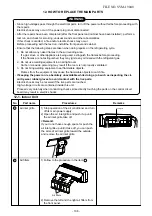
1) Follow the procedure item 3 .
2) Remove screw holding the electric part cover.
3) Disconnect the louver motor connector (5P)
from P.C. board assembly.
4) Remove fixing screws of the unit display
and remove unit display.
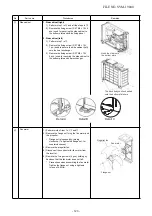
7
5) Remove the drain pan from the back body.
Electric part cover
Screw
Connectors
Louver motor
connector
P.C.board
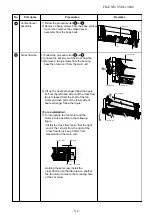
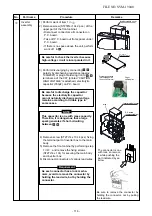
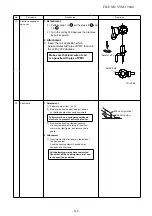
<To re-installation>
- Press the drain pan into the back body
- Please make sure ribs of drain pan in left
and right side must be install to lock position.
- Press the center arm of drain pan to back
body.
Center arm
of drain pan
Back body
Drain pan
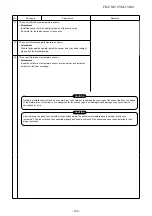
Back body
Back body
Drain pan
Drain pan
Rib of drain pan
Rib of drain pan
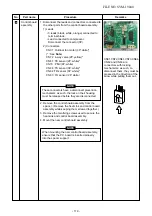
FILE NO. SVM-19040
- 111 -
Содержание RAS-16TAVG-EE
Страница 19: ...4 2 Outdoor Unit RAS 05 07 10 13TAVG EE C L C L 280 400 Unit mm 280 300 FILE NO SVM 19040 19 ...
Страница 22: ...RAS 16TKVG EE RAS 16TAVG EE FILE NO SVM 19040 22 ...
Страница 23: ...RAS 18TKVG EE RAS 18TAVG EE FILE NO SVM 19040 23 ...
Страница 135: ...144 9 MOO 5 BANGKADI INDUSTRIAL PARK TIVANON ROAD TAMBOL BANGKADI AMPHUR MUANG PATHUMTHANI 12000 THAILAND ...


