background image

32

EN

32

EN

TUNER SETTINGS

1

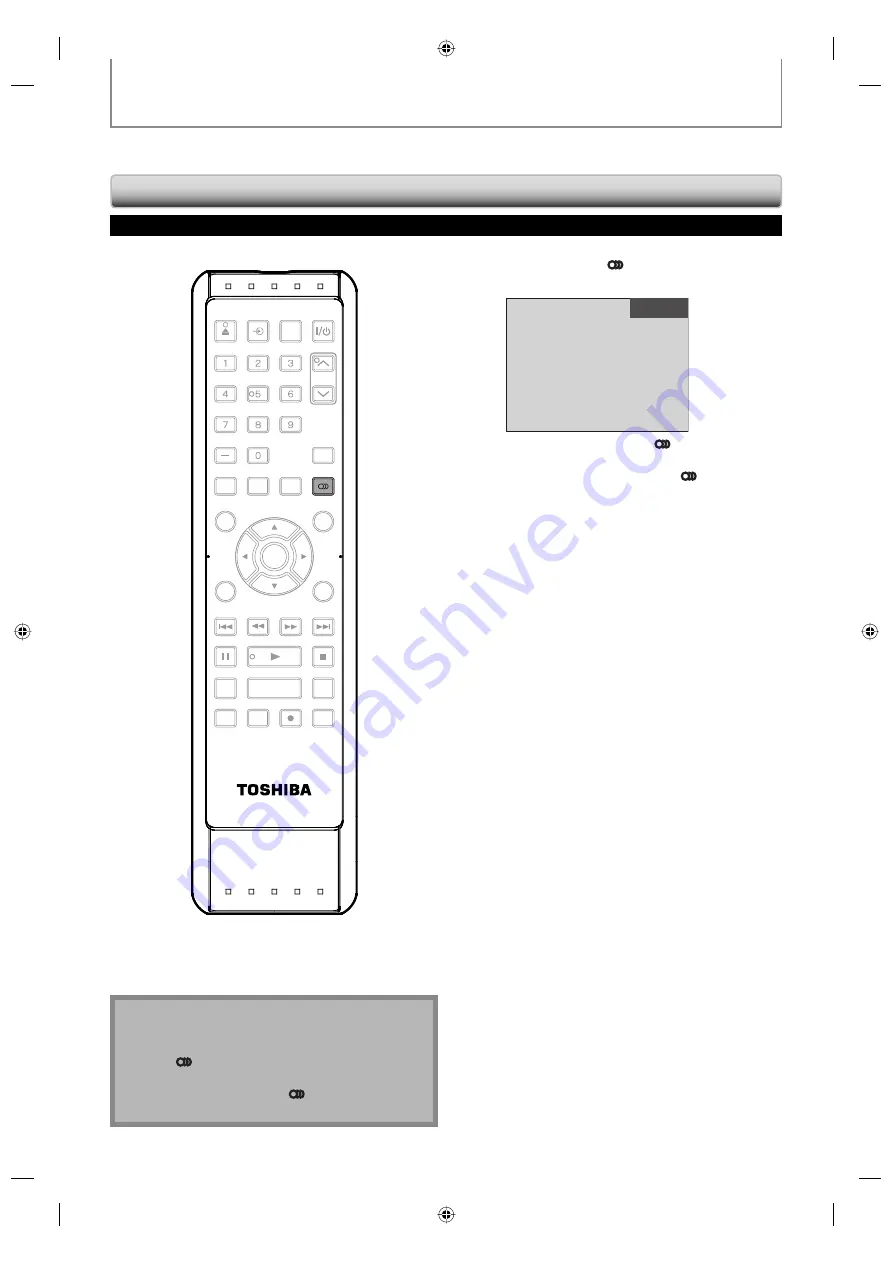
 Press [AUDIO  ] to cycle through 

available audio languages.

English 1/2

•  When you press 

[AUDIO 

]

, selected 

language will be displayed on the TV screen.

•  Every time you press 

[AUDIO 

]

, the language 

will be switched.
e.g.) English 1/3 

 Spanish 2/3 

 Other 3/3

•  Available languages differ depending on the 

broadcast.

•  The information display will automatically 

disappear.

•  When you record digital TV broadcasting, the 

audio language you have selected will be 
recorded.

Note

•  The timer recording for digital TV cannot record any 

audio language other than English.

• 

[AUDIO 

]

 does not control external device audio.

•  When there is only one audio channel on the 

broadcast, pressing 

[AUDIO 

]

 does not display 

anything.

Selecting TV Audio

Digital TV

This section describes how to switch the TV audio.
When you record a TV program, only output sound channel will be recorded.

SE-R0264

OPEN/

CLOSE

INPUT

SELECT

HDMI

.@/:

ABC

GHI

PQRS

TUV

SPACE

SETUP

DISPLAY

AUDIO

TIMER
PROG.

DTV/TV

TOP MENU

CLEAR

RETURN

MENU/LIST

WXYZ

JKL

MNO

DEF

CH

ENTER

SKIP

REV

PLAY

REC MODE

ZOOM

REC

REPEAT

PAUSE

TIME SLIP

1.3x / 0.8x PLAY

INSTANT SKIP

STOP

FWD

SKIP

AUDIO

E7M70UD_D-R560KU_EN.indd   32

E7M70UD_D-R560KU_EN.indd   32

2007/12/17   11:11:47

2007/12/17   11:11:47

Содержание D-R560 - DVD Recorder With TV Tuner

Страница 1: ...der Record these numbers in the spaces below Refer to these numbers whenever you communicate with your Toshiba dealer about this DVD Recorder Model number Serial number D R560KU DVD VIDEO RECORDER OWNER S MANUAL Disc Management Recording Playback Introduction Connections Basic Setup Editing Function Setup Others E7M70UD_D R560KU_cover indd 2 3 E7M70UD_D R560KU_cover indd 2 3 2007 12 19 21 38 30 20...

Страница 2: ...not occur in a particular installation If this equipment does cause harmful interference to radio or television reception which can be determined by turning the equipment off and on the user is encouraged to try to correct the interference by one or more of the following measures 1 Reorient or relocate the receiving antenna 2 Increase the separation between the equipment and receiver 3 Connect the...

Страница 3: ...he apparatus on amplifiers or equipment that may produce heat 20 Never block or cover the slots or openings in the unit Never place the unit on a bed sofa rug or similar surface too close to drapes curtains or walls or in a confined space such as a bookcase built in cabinet or any other place with poor ventilation The slots and openings are provided to protect the unit from overheating and to help...

Страница 4: ... the standard definition output If there are questions regarding your TV set compatibility with this 480p DVD recorder please contact Toshiba Customer Service For safety and optimum performance of this unit Install the unit in a horizontal and stable position Do not place anything directly on top of the unit Do not place the unit directly on top of the TV Shield it from direct sunlight and keep it...

Страница 5: ...ance If the remote control does not work properly you can test if the remote control sends out the infrared signal with AM radio or a digital camera including built in camera of cellular phone It will help to define the cause of malfunction With an AM radio Tune an AM radio to a station with no broadcasting Press a button on remote control toward the radio Sound will be fluttering when you press a...

Страница 6: ...Selection 31 Selecting TV Audio 32 DTV Closed Caption 34 Closed Caption Style 35 Disc Management FORMATTING A DISC 37 Choosing the Recording Format of a Brand New DVD RW 37 Reformatting a Disc Manually 38 SETTING A DISC TO PROTECT 39 PLAYING THE DISCS IN OTHER DVD PLAYERS 40 Auto Finalizing 40 Finalizing a Disc 41 Recording INFORMATION ON DVD RECORDING 43 Recording Mode 43 Restrictions on Recordin...

Страница 7: ... Program Playback 74 Slide Show 74 SELECTING THE FORMAT OF AUDIO AND VIDEO 75 Switching Subtitles 75 Switching Audio Soundtrack 75 Switching Virtual Surround System 76 Switching Camera Angles 76 Reducing Block Noise 76 Adjusting Black Level 77 Editing INFORMATION ON DISC EDITING 78 Guide to a Title List 78 Editing Discs 78 DELETING TITLES 79 CREATING DELETING PLAYLIST 81 Adding Titles to a Playlis...

Страница 8: ...with Dolby Digital or DTS you can experience the theater surround sound from discs with surround sound system Quick search for what you want to watch You can easily find the part you want to watch using the search function Search for a desired point on a disc by title chapter track or time Virtual surround system You can enjoy stereophonic space through your existing 2 channel stereo system Playin...

Страница 9: ...ation necessary title menu will be created Playable only on VR mode compatible unit Finalization recommended Playable on most DVD players Finalization necessary title menu will be created Playable on DVD RW compatible players Finalization recommended title menu will be created Playable on most DVD players Finalization recommended title menu will be created Available Features Recording Features Rec...

Страница 10: ...e the globe refers to region of the world A DVD labeled for a specific region can only play back on the unit with the same region code Toshiba is not liable for any damage or loss caused directly or indirectly by the malfunction of this recorder including without limitation any one of the following Failure to record contents intended to be recorded by the consumer Failure to edit contents as inten...

Страница 11: ...o start a recording Press repeatedly to start one touch timer recording 14 B PLAY button Press to start or resume playback 15 C STOP button Press to stop playback or recording 1080p REC PLAY STOP SKIP 1080i 720p 480p DVD RW R RW R RECORDING I y OPEN CLOSE ON STANDBY S VIDEO VIDEO L R DV IN L2 1 2 3 5 6 9 10 11 12 15 14 13 4 7 8 Rear Panel IN IN OUT OUT Y PR CR PB CB L R L R VIDEO IN VIDEO OUT S VI...

Страница 12: ...eet 7m Either side of the center approx 23 feet 7m within 30 Install the batteries AAx2 matching the polarity indicated inside battery compartment of the remote control Caution Never throw batteries into a fire Note Be sure to use AA size batteries Dispose of batteries in a designated disposal area Batteries should always be disposed of with the environment in mind Always dispose of batteries in a...

Страница 13: ... 14 TIME SLIP button Press once to start recording the TV program you are watching Press again to watch the content being recorded from the beginning while recording continues VR mode DVD RW with the recording mode of LP EP or SLP only 15 REPEAT button Press to display the repeat menu 16 REC MODE button Press to switch the recording mode 17 HDMI button Press to set the HDMI connector s video signa...

Страница 14: ...ATION 1 INFORMATION 2 INFORMATION 3 INFORMATION 4 INFORMATION 5 INFORMATION 6 90 TV PG ENGLISH 1 2 3 4 5 6 7 8 1 Program title max 2 lines displayed 2 Closed Caption Indicates that the program being broadcast is available with closed captioning 3 Signal strength Indicates the signal strength of the current channel 4 Program guide max 6 lines displayed 5 Channel number 6 Broadcast station 7 Audio l...

Страница 15: ...le will be displayed MP3 WMA Tag Information Video Info 480p YCbCr Audio Info Bitstream 2 1 3 4 3 1 Indicates the resolution of the HDMI output image 2 Indicates the HDMI video format 3 Indicates the HDMI audio format 4 Indicates current disc status will be displayed when it does not have any information HDMI Information GUIDE TO ON SCREEN DISPLAYS AND MENUS Title name information Title Name My Ti...

Страница 16: ...tting To go to general setting menu 2 Timer Programming To program a timer recording 3 Title List To call up the title list 4 DVD Menu To set up the DVD setting 5 CD Playback Mode To set up the CD playback setting CD Playback Mode is available only when an audio CD a CD RW R with MP3 WMA JPEG files is inserted into the unit Setup Timer Programming Title List DVD Menu CD Playback Mode General Setti...

Страница 17: ...inished Appears during recording process Flashes when a recording pauses Appears when a disc is in this unit 5 Displays the following Elapsed playback time Current title chapter track number Recording time remaining time Clock Channel number Remaining time for one touch timer recording Selected HDMI output mode Appears when data is being recorded on a disc Appears when a disc is loaded on the disc...

Страница 18: ...connect 1 1 1 2 IN OUT ANTENNA IN IN OUT Y PR CR PB CB L R L R VIDEO IN VIDEO OUT S VIDEO AUDIO IN L1 AUDIOOUT ANTENNA COMPONENT VIDEO OUT DIGITAL AUDIO OUTPUT PCM BITSTREAM rear of this unit AUDIO IN L VIDEO IN ANT IN VHF UHF antenna RF coaxial cable RF coaxial cable or rear of your TV RCA audio cable cable TV company L R VIDEO OUT AUDIOOUT RCA video cable R L HDMI OUT O OUTPUT TREAM rear of this...

Страница 19: ...w the instructions below 1 Disconnect the power cords of the devices from the AC outlet 2 Make the connection as illustrated below 3 Set your RF modulator s channel 3 4 switch to either 3 or 4 whichever the TV channel is least used in your area If your RF modulator has a Modulator Antenna switch set it according to the manual supplied with the RF modulator 4 Plug in the power cords of the devices ...

Страница 20: ...DEO IN VIDEO OUT S VIDEO AUDIO IN L1 S VIDEO AUDIOOUT ANTENNA HDMI OUT COMPONENT VIDEO OUT COAXIAL DIGITAL AUDIO OUTPUT PCM BITSTREAM S VIDEO OUT RF OUT ANT IN IN OUT ANTENNA AUDIO IN R VIDEO IN L ANT IN AUDIO OUT L VIDEO OUT R IN OUT Y PR CR PB CB L R L R VIDEO IN VIDEO OUT S VIDEO AUDIO IN L1 S VIDEO AUDIOOUT COMPONENT VIDEO OUT RCA video cable RCA audio cable RCA video cable RF coaxial cable RF...

Страница 21: ... Progressive signal does not output from the VIDEO OUT or S VIDEO OUT jack After you have completed the connections Switch the input selector on your TV to an appropriate external input channel Press a button on the TV s original remote control that selects an external input channel until the DVD recorder s opening picture appears Check your TV owner s manual for details To set progressive scan mo...

Страница 22: ...d Front Panel Display HDMI Indicator Video Output Signal 480p 480 Progressive Press HDMI 720p 720 Progressive Press HDMI 1080i 1080 interlaced Press HDMI 1080p 1080 Progressive Press HDMI The HDMI mode that is not supported by display device will be skipped Cables not included Please purchase the necessary cables at your local store When connecting with an HDMI cable the audio signal will be outpu...

Страница 23: ...els and bit length maybe limited by the device that is connected Among the monitors that support HDMI some do not support audio output for example projectors In connections with device such as this unit audio signals are not output from the HDMI output connector When this unit s HDMI connector is connected to a DVI D compatible monitor HDCP compatible with an HDMI DVI converter cable the signals a...

Страница 24: ...oded audio connect to a DTS decoder PCM ON If output is encoded audio for both Dolby Digital and DTS connect to the decoder which encodes multiple audio sources Stream ON Connecting to an MD deck or DAT deck PCM OFF If not connected to any external devices PCM OFF To complete these settings refer to page 98 this unit Note The audio source on a disc in a Dolby Digital multi channel surround format ...

Страница 25: ...ed in TV and DTV are automatically scanned and memorized Only the receivable channels in the area where this TV is used will be memorized Cable When using basic cable The channels broadcasted in CATV are automatically scanned and memorized Auto Presetting Now CH 1 4 Press ENTER to activate Clock Setting Initial Setting Clock Setting 5 Proceed to step 5 in Manual Clock Setting on page 30 If a PBS p...

Страница 26: ...log CATV are automatically scanned and memorized Cable Extended Scan When using basic cable The channels broadcasted in analog CATV and digital CATV are automatically scanned and memorized To cancel the auto channel preset during scanning Press RETURN or SETUP to cancel 5 When scanning is over press SETUP to exit To cycle through only the memorized channels use CH To select a channel directly incl...

Страница 27: ... on page 28 to continue Adding Deleting Channels CHANNEL SETTING You may want to add or delete TV channels if your channel lineup changes or if you no longer watch some channels Adding channels is only available for the analog TV channels Make sure You perform Auto Channel Scan before adding or deleting the channels Instructions continue on the next page SE R0264 OPEN CLOSE INPUT SELECT HDMI ABC G...

Страница 28: ...r to delete Only the major channel is displayed in Manual Preset menu The channel number displayed in the parenthesis is a virtual channel number Use CH to cycle through only the memorized channels You cannot use B for the digital TV channel selection Use the Number buttons to select a channel directly When an unmemorized channel is selected Delete is checked and highlighted as a default 6 Use K L...

Страница 29: ... search for the time only when the power is off Leave it off for several minutes to give this unit time to set the clock Auto Clock Setting This unit can set the time and date automatically by referring to a PBS station Make sure The antenna cable TV connections are correct Channels are set Refer to pages 26 28 If this unit is connected to a cable satellite box select the local PBS station on them...

Страница 30: ...g then press ENTER 2 Use K L to select Clock then press ENTER Clock menu will appear 3 Use K L to select Clock Setting then press ENTER 4 Use K L to select calendar or time then press ENTER General Setting Playback Display Video Recording Clock Channel DivX HDMI Reset All Clock Setting Auto Clock Setting Daylight Saving Time Clock Setting JAN 01 2008 TUE 12 00 AM 5 Use B to select an item to set a...

Страница 31: ...major and minor channel number with the Number buttons to select a channel you want to watch For 1 digit number e g 2 2 ch major channel 0 2 or 2 minor channel 0 2 2 or 2 leave it for 2 seconds For 2 digit number e g 35 16ch major channel 3 5 minor channel 1 6 If you enter 1 digit for major channel and leave it for 2 seconds the number will be taken as the major channel and lowest minor channel of...

Страница 32: ...l TV cannot record any audio language other than English AUDIO does not control external device audio When there is only one audio channel on the broadcast pressing AUDIO does not display anything Selecting TV Audio Digital TV This section describes how to switch the TV audio When you record a TV program only output sound channel will be recorded SE R0264 OPEN CLOSE INPUT SELECT HDMI ABC GHI PQRS ...

Страница 33: ...audio When you record an analog TV program available in second audio or stereo you have to select either Stereo or SAP in Channel menu beforehand Refer to the following table to check an appropriate setting Selected audio Broadcast audio Disc recording Audio output Stereo STEREO SAP STEREO STEREO STEREO STEREO STEREO MONO SAP MONO MONO MONO MONO MONO SAP STEREO SAP SAP SAP STEREO STEREO STEREO MON...

Страница 34: ... Saver FL Dimmer DTV CC CC Style V Chip DTV CC Caption Service Recording Caption Service OFF Service1 Service2 Service3 Service4 Service5 Service6 OFF Select if you do not want DTV CC This is the default Service 1 to Service 6 Select one of these before changing any other item in the closed caption menu Choose Service 1 under normal circumstances 6 Press SETUP to exit TUNER SETTINGS DTV Closed Cap...

Страница 35: ... Edge Color Back Opacity Back Color 5 Use K L to select ON then press ENTER General Setting Playback Display Video Recording Clock Channel DivX HDMI Reset All OSD Language Screen Saver FL Dimmer DTV CC CC Style V Chip CC Style User Setting Font Size Font Style Font Opacity Font Color Edge Type Edge Color Back Opacity Back Color User Setting ON OFF TUNER SETTINGS Closed Caption Style Digital TV Dig...

Страница 36: ...or Edge Type Edge Color Back Opacity Back Color Font Color White Black Red Green Blue Yellow Magenta Cyan Edge Type Edge type of the displayed caption can be switched as below General Setting Playback Display Video Recording Clock Channel DivX HDMI Reset All OSD Language Screen Saver FL Dimmer DTV CC CC Style V Chip CC Style User Setting Font Size Font Style Font Opacity Font Color Edge Type Edge ...

Страница 37: ...Menu Format Finalize 4 Use K L to select Format Mode then press ENTER DVD Menu Format Finalize Start Format Mode 5 Use K L to select Video mode or VR mode then press ENTER 6 Press SETUP to exit 7 Insert a brand new disc Formatting will start Formatting 90 8 Formatting is completed 100 is indicated Note The recording format setting is effective only for DVD RW You cannot change the recording format...

Страница 38: ...you to confirm For DVD RW use K L to select Yes then press ENTER 5 Use K L to select Yes then press ENTER Formatting will start If you want to cancel formatting select No DVD Menu Format Finalize Disc Protect OFF ON Delete All Playlists Start Format Mode Are you sure Yes No 6 Formatting is completed 100 is indicated Formatting 100 Note When you reformat the disc the contents of the disc are erased...

Страница 39: ...accidental recording editing or erasing the titles you can protect them from DVD Menu menu Note To cancel the disc protect When you insert a disc protected with this unit Disc Protect ON OFF will appear instead of OFF ON DVD Menu Format Finalize Disc Protect ON OFF Delete All Playlists To release the protection for the disc select Disc Protect ON OFF at step 3 then follow rest of the procedures SE...

Страница 40: ...t Ratio Video mode Make Recording Compatible Auto Finalize Disc Full End of Timer Rec Disc Full ON OFF General Setting Playback Display Video Recording Clock Channel DivX HDMI Reset All Auto Chapter Recording Audio Select XP Auto Finalize Aspect Ratio Video mode Make Recording Compatible Auto Finalize Disc Full End of Timer Rec End of Timer Rec ON OFF Your setting will be activated 6 Press SETUP t...

Страница 41: ...inalizing is completed You will need to finalize discs to play back on other DVD players Finalizing may take several minutes up to an hour Since the process of the finalization fills empty space of the disc a shorter recording period on the disc will require a longer time period for finalization Do not unplug the power cord during finalization SE R0264 OPEN CLOSE INPUT SELECT HDMI ABC GHI PQRS TUV...

Страница 42: ...ll up the title menu by pressing MENU LIST Even after DVD RW is finalized you can still record or edit After you finalize DVD RW R or DVD R you cannot edit or record anything else on that disc If you insert a DVD RW finalized with this unit Undo Finalization will appear instead of Finalize at step 3 To release the finalization of the DVD RW disc select Undo Finalization at step 3 DVD Menu Format U...

Страница 43: ...CPRM com patible DVD RW formatted in VR mode and CPRM recordings can only be played back on DVD players that are specifically compatible with CPRM Making discs playable in other DVD players Finalize For DVD RW R it is necessary to finalize the disc after recording in order to play back the disc on other DVD players Refer to pages 40 42 For DVD RW R it is recommended to finalize the disc in order t...

Страница 44: ...lect a desired time option then press ENTER General Setting Playback Display Video Recording Clock Channel DivX HDMI Reset All Auto Chapter Recording Audio Select XP Auto Finalize Aspect Ratio Video mode Make Recording Compatible Auto Chapter OFF 5 minutes 10 minutes 15 minutes 30 minutes 60 minutes 5 Press SETUP to exit Note The interval for auto chapter may be up to two minutes different from th...

Страница 45: ...ng 1 Follow step 1 to 2 on Recording Audio Select XP 2 Use K L to select Aspect Ratio Video mode then press ENTER 3 Use K L to select your desired setting then press ENTER General Setting Playback Display Video Recording Clock Channel DivX HDMI Reset All Auto Chapter Recording Audio Select XP Auto Finalize Aspect Ratio Video mode Make Recording Compatible Aspect Ratio Video mode Auto 4 3 16 9 Auto...

Страница 46: ...o select a recording mode Refer to Recording Mode on page 43 SP 1 53 5 Press DTV TV to select analog TV or digital TV then use CH or the Number buttons and for digital TV channels to select a desired channel to record Refer to Switching Analog Mode Digital Mode and Channel Selection on page 31 CH 12 Follow the steps to record TV programs SE R0264 OPEN CLOSE INPUT SELECT HDMI ABC GHI PQRS TUV SPACE...

Страница 47: ...you stop recording When the unit clock has not been set the space for a date and time of title names will be blank When you record a TV program onto DVD RW DVD R or DVD RW R you have to select the TV channel audio beforehand Only the selected channel audio will be recorded Refer to Selecting TV Audio on pages 32 33 for more details You cannot change the recording mode during the recording pause mo...

Страница 48: ...r is on programs registered for recording in timer recording will be automatically cleared after the end time and date have passed You cannot make a program whose recording time exceeds 12 hours Guide to Timer Programming Display Timer Programming 1 1 TUE JAN 01 10 00AM SP 1 00 JAN 2 08 12 00 AM 125 01 SP Date Start End CH JAN 02 12 00AM 1 00AM DTV 125 1 New Program 1 5 3 4 2 1 Title of a Timer Pr...

Страница 49: ... DTV125 1 Mode SP SP 1 00 Start 12 00AM End 1 00AM Refer to Recording Mode on page 43 You can check the remaining recordable space of the disc when you select the recording mode Date JAN 02 CH DTV125 1 Mode SP SP 1 00 Start 12 00AM End 1 00AM Auto recording mode select When Auto is selected as a recording mode the unit calculates how much time is available on the disc and determines the appropriat...

Страница 50: ...TV For channel number 1 13 press B or to decide the channels For other channels 14 135 the channel will be decided as soon as you enter the channel number minor channels For channel number 1 9 press B or to decide the channels For other channels 10 99 the channel will be decided as soon as you enter the channel number Hint You can decide the 1 digit channel number by pressing 0 first then enter de...

Страница 51: ...ording error other than below E40 Some portion has not been recorded because of program overlapping Recording did not start at the start time E23 24 Unrecordable disc E25 28 Copy prohibited program E29 Disc protected E41 Power failed E30 Disc full E42 No disc when recording E31 32 Already 99 titles recorded E43 Already 49 titles recorded E33 Already 999 chapters recorded E44 Already 254 chapters r...

Страница 52: ...en all the timer recording is completed flashes To play back or eject the recorded disc press I y ON STANDBY first then select the recorded title and press PLAY B or OPEN CLOSE A to remove the disc During timer recording or timer standby mode will appear any operations on the unit will not be available To make these operations available press C STOP on the front panel to cancel the timer recording...

Страница 53: ... audio video cables for this connection When connecting a DVC digital video camcorder use DV IN jack of L3 Front instead of S VIDEO IN or VIDEO IN jack Connection to an External Device 1 Press SETUP 2 Use K L to select General Setting then press ENTER 3 Use K L to select Video then press ENTER Supplied cables used in this connection are as follows RCA audio cable L R x 1 RCA video cable x 1 Please...

Страница 54: ...CH You can also select L1 or L2 by using the Number buttons For L1 press 0 0 1 For L2 press 0 0 2 5 Press REC MODE to select a recording mode Refer to Recording Mode on page 43 XP 1Hr SP 2Hr LP 4Hr EP 6Hr SLP 8Hr 6 Press I REC on the unit to start recording 7 Start playback on the external device to record from 8 Press C STOP on the unit to stop recording This operation may take awhile to be compl...

Страница 55: ...g function When the unit is ready for dubbing Start Rec will appear When the unit is in dubbing Pause Rec will appear 5 Channel position When you select DV by using INPUT SELECT or CH DV will appear DV AB 1234 0 12 34 1 1 1 1 SP 1 00 RW VR ORG Control DVD DV Audio Stereo1 Start Rec DV AB 1234 0 12 34 1 1 1 1 SP 1 00 RW VR ORG 2 3 1 4 5 7 6 The menu changes according to what mode of DVC Switch the ...

Страница 56: ...1234 0 12 34 1 1 1 1 XP 1 00 RW VR ORG Control DVD DV Audio Stereo1 Start Rec Before recording from DVC see page 53 for connection instructions SE R0264 OPEN CLOSE INPUT SELECT HDMI ABC GHI PQRS TUV SPACE SETUP DISPLAY AUDIO TIMER PROG DTV TV TOP MENU CLEAR RETURN MENU LIST WXYZ JKL MNO DEF CH ENTER SKIP REV PLAY REC MODE ZOOM REC REPEAT PAUSE TIME SLIP 1 3x 0 8x PLAY INSTANTSKIP STOP FWD SKIP CH ...

Страница 57: ... other unit Do not connect more than 1 DVC The unit can only accept DVC Other DV device such as cable satellite box or D VHS VCR cannot be recognized If no video signal is detected from the DVC during DVC to DVD dubbing the recording will be paused and I will flash on the TV screen The recording will resume when the unit detects the video signal again When the DVC is in camera mode refer to Guide ...

Страница 58: ... folder 1 folder 2 file 1 file 2 file 3 file 4 file 5 Title Divided contents of a DVD video Roughly corresponds to a story title in short stories Chapter Divided contents of a title This corresponds to a chapter in a story Track Divided contents of an audio CD Folder Divided contents of a MP3 WMA JPEG DivX data disc Consists of number of files Each title chapter or track folder or file is assigned...

Страница 59: ...disc completely 4 Press PLAY B to start playback If you are playing back a DVD video a menu may appear Refer to Using the Title Disc Menu on page 65 5 Press STOP C once to stop playback temporarily Refer to Resume Playback on page 66 Note Some discs may start playback automatically SE R0264 OPEN CLOSE INPUT SELECT HDMI ABC GHI PQRS TUV SPACE SETUP DISPLAY AUDIO TIMER PROG DTV TV TOP MENU CLEAR RET...

Страница 60: ...nstead of ENTER at step 5 on page 61 At step 4 you can press SKIP G or press B when the title on the lower right of the title list is highlighted to display the next page and press SKIP H or press when the title on the upper left of the title list is highlighted to display the previous page Playback from the Title List SE R0264 OPEN CLOSE INPUT SELECT HDMI ABC GHI PQRS TUV SPACE SETUP DISPLAY AUDI...

Страница 61: ...elect Play From Start then press ENTER Title List 1 6 JAN 1 08 12 00AM CH10 SP 12 00AM 0 12 00 JAN 1 08 CH10 SP 4 5 6 1 3 2 ORG Play From Start Edit Title Delete Add To Playlist Playback will start 6 Press STOP C once to stop playback temporarily Refer to Resume Playback on page 66 To eject the disc press OPEN CLOSE A to open the disc tray then remove the disc before turning off the unit BASIC PLA...

Страница 62: ...MP3 files are shown by 3 WMA files are shown by W JPEG files are shown by The system can recognize up to 255 folders and up to 99 tracks 999 files Letters of a file folder name overflowing the given space will be displayed as If there are no files in the folder No Files will be displayed It is recommended that files to be played back in this unit are recorded under the following specifications MP3...

Страница 63: ...move back to the previous hierarchy DivX subtitle The subtitle created by the user can be displayed during DivX playback 1 After selecting the DivX file the Subtitle List menu will appear when DivX Subtitle is set to anything other than OFF Refer to page 104 2 Use K L to select the extension you want to display then press ENTER Subtitle List DivX File1 OFF SMI SRT SUB ASS SSA TXT DivX with the sub...

Страница 64: ...in stop mode If you select Audio Picture instead of Video on the playback media selection screen this unit can play back MP3 WMA JPEG files Some DivX files cannot be played back on this unit due to the configuration and characteristics of the disc or due to the condition of recording and authoring software You cannot play back the DivX VOD files obtained with different registration codes on this u...

Страница 65: ...TER to enable your selection 3 Press STOP C to exit the disc menu 1 During playback press PAUSE F Playback will be paused and sound will be muted F 2 Press PLAY B to return to the normal playback Note You can select a numbered menu with the Number buttons also Menus vary among discs Refer to the information accompanying the disc for details MENU LIST or TOP MENU will not always be effective for al...

Страница 66: ...nning press STOP C again while the playback is stopped Resume Playback Note For MP3 WMA JPEG files playback will resume from the beginning of the file at which playback was stopped Note Forward reverse speed will be indicated with icons as follows forward approx speed 2x 20x 40x reverse approx speed 5x 20x 40x 1 During playback press FWD D or REV E Every time you press FWD D or REV E approximate s...

Страница 67: ...be paused and sound will be muted 2 Press SKIP i repeatedly Playback will advance one frame at a time when you press SKIP i with the sound muted To play back step by step backward Press SKIP j repeatedly Every time you press the button the playback will go backward by one frame Press and hold SKIP j SKIP i to reverse advance continuously 3 Press PLAY B to return to the normal playback Note Only st...

Страница 68: ...select a desired zoom position then press ENTER Zoom playback will start This feature allows you to assign a specific point on a disc to be called back later For audio CD skip to step 2 1 During playback press DISPLAY 2 Use B to select then press ENTER within 1 second or wait for 1 second to display the marker list e g DVD video 1 5 1 5 DVD 0 01 00 1 23 45 Video 3 Use K L to select a desired marke...

Страница 69: ...ayback 1 5 1 5 0 01 00 1 23 45 RW VR ORG If you play back the fast forward playback and the playback reaches the scene recorded 1 minute before the forwarding playback will automatically return to the normal playback 2 Press STOP C once to stop playback The resume message will appear Screen for the current recording CH 10 5 5 1 23 45 LP 1 01 Resume ON RW VR ORG To stop recording press STOP C again...

Страница 70: ...e normal playback Simultaneous Playback and Recording SPECIAL PLAYBACK 3 Press STOP C once to stop playback The resume message will appear Screen for the current recording CH 10 3 1 1 30 25 LP 1 01 Resume ON RW VR ORG To stop recording press STOP C again To cancel the resume press STOP C again Note Playback image may freeze momentarily using this function However this does not affect the recording...

Страница 71: ... playback will start automatically Title Chapter Search Note In search mode display total numbers of each search contents title chapter time are shown as a denominator 1 5 1 5 0 01 00 1 23 45 DVD Video total number of titles total number of chapters total time of the title Using SKIP j SKIP i 1 During playback press SKIP i to skip the current track file and move to the next The track file will mov...

Страница 72: ...ted To move to the number next to press B When time search is not available and time counter are not displayed 3 Use K L B or the Number buttons to enter a desired time to search then press ENTER After the search playback will start automatically Note Time search is available only in the same track file or title Time Search SEARCH E7M70UD_D R560KU_EN indd 72 E7M70UD_D R560KU_EN indd 72 2007 12 17 ...

Страница 73: ... then press ENTER Random playback will start e g audio CD 1 5 0 00 15 0 05 00 Random CD Note To cancel random playback press STOP C twice during random playback OFF appears on the display menu Note Point B for the repeat A B playback should be set within the same title or track of point A To cancel the repeat playback select OFF at step 3 The repeat setting will also be canceled when you stop play...

Страница 74: ... Use K L to select Program Play then press ENTER 4 Use K L to select a desired track then press ENTER or B CD Playback Mode Program Play 0 00 00 Total Repeat this step until you program all the desired tracks 5 Press PLAY B CD Playback Mode Program Play 0 31 07 Total 09 04 10 06 Program playback will start Slide Show You can select the display time between 5 seconds and 10 seconds 1 Follow steps 1...

Страница 75: ...d next to the numbers You can select the format of audio and video as you prefer depending on the contents of the disc you are playing back When playing back a DVD video recorded with 2 or more soundtracks these are often in different languages you can switch them during playback When playing back audio CD you can switch L R stereo L left or R right 1 During playback press DISPLAY or AUDIO If you ...

Страница 76: ...select then press ENTER 1 5 1 5 DVD 0 01 00 1 23 45 Video Angle icon appears when a switching camera angle is available Angle will switch each time you press ENTER 1 During playback press DISPLAY 2 Use B to select then press ENTER within 1 second or wait for 1 second to display the selection menu e g DVD video 1 5 1 5 DVD 0 01 00 1 23 45 Video 3 Use K L to select Noise Reduction then press ENTER 1...

Страница 77: ...e K L to select Black Level then press ENTER 1 5 1 5 DVD 0 01 00 1 23 45 Noise Reduction OFF Black Level OFF Video 4 Use K L to select ON then press ENTER Your setting will be activated 1 5 1 5 DVD 0 01 00 1 23 45 OFF Video ON Note You can adjust black level setting only during playback The setting will be kept even when the unit is turned off The default setting is ON You cannot adjust the black ...

Страница 78: ...le Press RETURN to exit the title list Edit the recorded disc You will find editing discs is easy This unit offers convenient edit functions which are possible only with DVD RW R and DVD RW R You can edit the following from a title list Assigning a name to a title Dividing a title Combining titles Adding titles to a playlist Erasing all playlist Setting or releasing the title protection Adding or ...

Страница 79: ...record a new title You cannot record a new title You cannot record a new title You can record a new title Delete The Full Recorded disc The Full Recorded disc Delete The Full Recorded disc After the disc is fully recorded DVD RW DVD RW DVD R DVD R When a title is deleted from DVD RW in VR mode the recordable disc space will be increased When the last title is deleted from DVD RW in video mode or D...

Страница 80: ...H10 LP 12 00AM 2 00 00 JAN 1 08 CH10 LP Play From Start Edit Title Delete Add To Playlist 4 Use K L to select Yes then press ENTER Title List 1 2 4 5 6 3 ORG 1 2 JAN 1 08 12 00AM CH10 LP 12 00AM 2 00 00 JAN 1 08 CH10 LP Delete this title Yes No After that Are you sure will appear select Yes and then press ENTER Title will be deleted 5 Press RETURN or STOP C to exit Data will be written onto the di...

Страница 81: ...JAN 1 08 12 00AM CH10 LP 12 00AM 2 00 00 JAN 1 08 CH10 LP 4 5 6 1 3 2 ORG Create a Playlist Yes No The title is added to playlist 5 Press RETURN or STOP C to exit Data will be written onto the disc momentarily This operation may take awhile to be completed Note To delete a title from the playlist refer to DELETING TITLES on page 80 To delete all titles in the playlist refer to Erasing All Playlist...

Страница 82: ...ect Yes and then press ENTER DVD Menu Format Finalize Disc Protect OFF ON Delete All Playlist Delete entire play list Yes No Are you sure Yes No Playlist is deleted Data will be written onto the disc momentarily This operation may take awhile to be completed Note Deleting a playlist will not increase the available recording time on the disc SE R0264 OPEN CLOSE INPUT SELECT HDMI ABC GHI PQRS TUV SP...

Страница 83: ...mentarily This operation may take awhile to be completed You can put a name on the disc and change it from this menu 1 In stop mode press TOP MENU Title list original or playlist will appear For VR mode DVD RW press MENU LIST to switch between Original and Playlist 2 Use K L s B to select a desired title then press ENTER e g VR mode DVD RW original Title List 1 2 JAN 1 08 12 00AM CH10 LP 12 00AM 2...

Страница 84: ...Press and hold CLEAR to delete all letters Use s B to move the cursor to the left and right You can enter up to 30 letters Note Undefined letters in a title name are shown by If you delete them adjoining letters may change to or other Guide to Edit Title Name EDITING DISCS Putting Names on Titles cont d SE R0264 OPEN CLOSE INPUT SELECT HDMI ABC GHI PQRS TUV SPACE SETUP DISPLAY AUDIO TIMER PROG DTV...

Страница 85: ...s No JAN 1 08 12 00AM CH10 LP 1 Chapter 2 3 ORG 1 25 47 A new chapter mark will be added 6 Press RETURN 7 Press RETURN again and then RETURN or STOP C to exit Data will be written onto the disc momentarily This operation may take awhile to be completed You can put chapter marks in each title Once a chapter is marked you can use it for the chapter search feature Note Maximum numbers of chapter for ...

Страница 86: ...to select Hide Chapter then press ENTER Submenu will appear 5 Use SKIP H or SKIP G to decide the chapter to be hidden 6 Use K L to select Hidden then press ENTER Edit Hide Chapter Visible Hidden JAN 15 08 12 00AM CH10 LP 1 Chapter 2 3 Hidden VR 1 25 47 7 After this operation is completed press RETURN thrice to exit Data will be written onto the disc momentarily This operation may take awhile to be...

Страница 87: ...age SE R0264 OPEN CLOSE INPUT SELECT HDMI ABC GHI PQRS TUV SPACE SETUP DISPLAY AUDIO TIMER PROG DTV TV TOP MENU CLEAR RETURN MENU LIST WXYZ JKL MNO DEF CH ENTER SKIP REV PLAY REC MODE ZOOM REC REPEAT PAUSE TIME SLIP 1 3x 0 8x PLAY INSTANTSKIP STOP FWD SKIP ENTER FWD PAUSE PLAY REV SKIP SKIP RETURN STOP Note When a scene is deleted from an original the playlist related to the original will be delet...

Страница 88: ... E FWD D PLAY B and PAUSE F to find the start point then press ENTER Edit Scene Delete Start End Preview Delete JAN 1 08 12 00AM CH10 LP 1 PL 1 25 47 Then use SKIP H G REV E FWD D PLAY B and PAUSE F again to move to the end point and press ENTER Edit Scene Delete Start End Preview Delete JAN 1 08 12 00AM CH10 LP 1 PL 1 45 00 The cursor will move to Preview The bar at the bottom of the screen indic...

Страница 89: ...int at which you will divide the title 5 Use K L to select Title Dividing then press ENTER 6 Use K L to select Yes then press ENTER e g VR mode DVD RW playlist Edit Title Dividing Yes No JAN 1 08 12 00AM CH10 LP 1 PL 1 25 47 The title will be divided into two new titles Both title names are identical For DVD RW Data will be written onto the disc momentarily Writing to Disc 90 This operation may ta...

Страница 90: ...PM 0 30 00 JAN 31 08 CH13 LP Combine selected titles Yes No The two titles will combine into a single title Title List 1 6 PL 1 4 5 6 2 3 JAN 1 08 12 00AM CH10 LP 12 00AM 2 30 00 JAN 1 08 CH10 LP 5 Press RETURN or STOP C to exit Data will be written onto the disc momentarily This operation may take awhile to be completed Playlist You can combine two titles into a single title Note You cannot selec...

Страница 91: ...con will appear on the title in the original list 4 Press RETURN and then RETURN or STOP C to exit Data will be written onto the disc momentarily This operation may take awhile to be completed To protect a whole disc VR mode DVD RW DVD RW R only Select Disc Protect OFF ON from the DVD Menu then select Yes Refer to SETTING A DISC TO PROTECT on page 39 To prevent the accidental editing or erasing of...

Страница 92: ...ideo mode DVD you can set or edit chapter at every time interval You can clear the chapter mark too You can specify the interval of chapter marks for titles last more than 5 minutes Note You cannot select a chapter mark interval that exceeds the length of a title The length of chapters may slightly deviate from the one specified at the step 3 A chapter mark may be delayed depending on the recordin...

Страница 93: ...e for audio Subtitle Language page 99 OFF English French Spanish Other Set the language for subtitles Angle Icon page 99 ON OFF Set whether to display the angle icon or not Still Mode page 99 Auto Field Frame Set the type of still image in pausing playback Display OSD Language page 100 English Français Español Set the language for OSD on screen display Screen Saver page 100 OFF 5minutes 10minutes ...

Страница 94: ... displayed caption V Chip MPAA Rating page 101 X NC 17 R PG 13 PG G NR Set the viewing limitation according to MPAA rating TV Rating page 101 TV MA TV 14 TV PG TV G TV Y7 TV Y NR Set the viewing limitation according to TV rating Canadian French Rating page 101 18 ans 16 ans 13 ans 8 ans G E Set the viewing limitation according to Canadian French Rating Canadian English Rating page 102 18 14 PG G C...

Страница 95: ...Manual Set the clock automatically Daylight Saving Time page 30 ON MAR NOV ON APR OCT OFF Set the clock for the daylight saving time Channel Auto Preset page 26 Air Cable Cable Extended Scan Tune the channels automatically Manual Preset pages 27 28 Tune the channels manually TV Audio Select page 33 Stereo SAP Set the analog TV audio type for output and video mode or DVD RW R recording DivX DivX VO...

Страница 96: ...tle Language Angle Icon Still Mode Submenu will appear 4 Refer 1 to 7 on pages 97 to 99 and set the selected item 5 When you finish with the setting press SETUP to exit Playback SE R0264 OPEN CLOSE INPUT SELECT HDMI ABC GHI PQRS TUV SPACE SETUP DISPLAY AUDIO TIMER PROG DTV TV TOP MENU CLEAR RETURN MENU LIST WXYZ JKL MNO DEF CH ENTER SKIP REV PLAY REC MODE ZOOM REC REPEAT PAUSE TIME SLIP 1 3x 0 8x ...

Страница 97: ... Channel DivX HDMI Reset All Parental Lock Audio Out Disc Menu Language Audio Language Subtitle Language Angle Icon Still Mode Parental Lock OFF 8 Adult 7 NC 17 6 R 5 PG R 4 PG 13 3 PG 2 G 1 Kid Safe Change Password Yes No General Setting Playback Display Video Recording Clock Channel DivX HDMI Reset All Parental Lock Audio Out Disc Menu Language Audio Language Subtitle Language Angle Icon Still M...

Страница 98: ...er decoder is NOT compatible with 96kHz PCM select 48kHz 96kHz sound will be output in 48kHz 96kHz If your amplifier decoder is compatible with 96kHz PCM select 96kHz 96kHz sound will be output Note When playing back disc with copyright protection Even if you select 96kHz the sound will be down sampled at 48kHz C Settings for Dolby Digital Default Stream Use K L to select a setting then press ENTE...

Страница 99: ...ivated If Other is selected for 3 to 5 press 4 digit code using the Number buttons Code Input When you finish entering the code press ENTER Refer to the language code table on page 112 Note Only the languages supported by the disc can be selected Audio language setting may not be available to some discs You can also change or switch off the subtitles on a DVD from the disc menu if it is available ...

Страница 100: ...DivX HDMI Reset All OSD Language Screen Saver FL Dimmer DTV CC CC Style V Chip FL Dimmer Auto Bright Dark You can choose one from Auto Bright or Dark If Auto is selected the display gets dark when the power is off 4 DTV CC Refer to DTV Closed Caption and Recording the DTV Closed Caption on page 34 and 44 5 CC Style Refer to Closed Caption Style on pages 35 36 Press STOP C if you are playing back a...

Страница 101: ...imitation according to MPAA rating US movie ratings TV Rating US TV program ratings Canadian French Rating Canadian English Rating 1 Use K L to select the desired rating then press ENTER repeatedly to switch between view and block When it is blocked a key icon will appear e g MPAA rating General Setting Playback Display Video Recording Clock Channel DivX HDMI Reset All OSD Language Screen Saver FL...

Страница 102: ...ownloaded The ratings can be downloaded by the unit automatically if it is available in your area If the broadcasting signal does not have the downloadable rating information the message below will appear Downloadable Rating is currently not available This message will also appear when you try to access DOWNLOADABLE RATING after you have cleared the downloadable rating information and the new info...

Страница 103: ...ve setting will be OFF When selecting No or not pressing any buttons on the unit or remote control within 15 seconds at step 3 progressive scan remains to be OFF interlace scan 2 TV Aspect Default 4 3 Letter Box You can select the TV aspect ratio to match the formats of what you are playing back with the unit and your TV screen 4 3 standard or 16 9 widescreen TV Use K L to select a desired option ...

Страница 104: ...e from the internet For more information for DivX please visit http www divx com vod The registration code will be displayed in 8 characters consist of numbers between 0 to 9 and capital letters chosen randomly 2 DivX Subtitle Default OFF Set the DivX subtitle Use K L to select a setting then press ENTER General Setting Playback Display Video Recording Clock Channel DivX HDMI Reset All DivX R VOD ...

Страница 105: ...select the color space for HDMI output Set the appropriate color space for your display device Use K L to select a setting then press ENTER When the connected device is not compatible with the Y Cb Cr HDMI signal is output as RGB regardless of the setting General Setting Playback Display Video Recording Clock Channel DivX HDMI Reset All Format HDMI Audio RGB Range HDMI CEC Format RGB YCbCr Your se...

Страница 106: ...etting Playback Display Video Recording Clock Channel DivX HDMI Reset All Format HDMI Audio RGB Range HDMI CEC HDMI Control ON OFF Your setting will be activated Functions available for the HDMI Control One touch play When the operations with following buttons of this unit s remote control are performed the TV will automatically turned on and switch to appropriate input channel Buttons for one tou...

Страница 107: ...es No Are you sure will appear Select Yes using K L and then press ENTER Your setting will be initialized Reset All Note The settings listed below will remain unchanged even after resetting to the factory default Clock setting Channel setting OSD language setting Parental lock setting DivX VOD code V Chip setting Timer programs SE R0264 OPEN CLOSE INPUT SELECT HDMI ABC GHI PQRS TUV SPACE SETUP DIS...

Страница 108: ...am from the device connected through the unit is distorted If the playback picture output from a DVD player VCR or tuner goes through the unit before reaching your TV the copy protection signal applied to some programs could affect picture quality Disconnect the playback device in question and connect it directly to your TV No analog TV closed captions are output If you are using HDMI connection t...

Страница 109: ...not recorded being played back The DVD video prohibits the changing of the language for the sound track The subtitle language cannot be changed or turned off Multilingual subtitle are not recorded on the DVD video The angles cannot be changed Multi angles are not recorded on the DVD video being played back The angle change operation is whenever possible as long as the disc contains a multi angle p...

Страница 110: ...ports HDCP This unit will not output a video signal unless the other device supports HDCP Check the setting of HDMI Check whether the output format of this unit HDMI FORMAT matches the supported input format of other connected device If the unit is connected to the unauthorized display device with an HDMI cable the audio video signal may not be output when playing back a commercial DVD video There...

Страница 111: ...p to the maximum 99 Delete unnecessary titles page 80 Recording Error You cannot record more than 999 chapters on one disc The maximum is 999 You are trying to record onto the VR mode DVD RW on which the number of recording chapters comes up to the maximum 999 Delete unnecessary chapter marks page 85 Recording Error You cannot record more than 49 titles on one disc The maximum is 49 You are trying...

Страница 112: ...60 Korean 5761 Kurdish 5767 Laothian 5861 Latin 5847 Latvian Lettish 5868 Lingala 5860 Lithuanian 5866 Macedonian 5957 Malagasy 5953 Malay 5965 Malayalam 5958 Maltese 5966 Maori 5955 Marathi 5964 Moldavian 5961 Mongolian 5960 Nauru 6047 Nepali 6051 Norwegian 6061 Occitan 6149 Oriya 6164 Oromo Afan 6159 Panjabi 6247 Pashto Pushto 6265 Persian 5247 Polish 6258 Portuguese 6266 Quechua 6367 Rhaeto Rom...

Страница 113: ...ound on CD and DAT Excellent quality but requires a lot of data compared to formats such as Dolby Digital and MPEG audio For compatibility with digital audio recorders CD MD and DAT and AV amplifiers with digital inputs this unit can convert Dolby Digital and MPEG audio to PCM See also Digital Audio Progressive Scan 480p A type of display that does not split each frame into fields and instead scan...

Страница 114: ...ut Input level Jacks Input 1 rear 2 front 1 Vp p 75Ω RCA jack Video output Output level Jack Output 1 rear 1 Vp p 75Ω RCA jack S video input Y luminance Input level C color Input level Jacks Input 1 rear 2 front 1 Vp p 75Ω 286 mVp p 75Ω 4 pin mini DIN S video output Y luminance Output level C color Output level Jack Output 1 rear 1 Vp p 75Ω 286 mVp p 75Ω 4 pin mini DIN Component video output Outpu...

Страница 115: ...warranty Reception problems caused by inadequate antenna systems are your responsibility 5 Warranties extend only to defects in materials or workmanship as limited above and do not extend to any DAV Product or parts that have been lost or discarded by you or to damage to the DAV Product or parts caused by fires misuse accident Acts of God such as lightning or fluctuations in electric power imprope...

Страница 116: ...H QHFHVVDU E DFFLGHQW PLVXVH DEXVH PRLVWXUH OLTXLGV GXVW GLUW QHJOHFW DFFLGHQW GDPDJH DSSOLFDWLRQV LPSURSHU LQVWDOODWLRQ LPSURSHU RSHUDWLRQ LPSURSHU FOHDQLQJ LPSURSHU PDLQWHQDQFH QRUPDO ZHDU DQG WHDU RU DQ RWKHU H WHUQDO FDXVH RU HYHQW DFW RU RPLVVLRQ RXWVLGH WKH FRQWURO RI 7 LQFOXGLQJ ILUH WKHIW DFWV RI RG DOWHUDWLRQ SRZHU IDLOXUHV SRZHU VXUJHV RU SRZHU VKRUWDJHV OLJKWQLQJ RWKHU HOHFWULFDO IDXOWV...

Страница 117: ...WHQW QRW SUHFOXGHG E ODZ QR FODLP GLVSXWH FRQWURYHUV RU GLVDJUHHPHQW RI DQ RWKHU SHUVRQ PD EH MRLQHG RU FRPELQHG ZLWK DQ LVSXWH E RX ZLWKRXW WKH SULRU ZULWWHQ FRQVHQW RI 7 ULWLFDO SSOLFDWLRQV 7KH 9 3URGXFW RX KDYH SXUFKDVHG LV QRW GHVLJQHG IRU DQ FULWLFDO DSSOLFDWLRQV µ ULWLFDO DSSOLFDWLRQVµ PHDQV OLIH VXSSRUW V VWHPV PHGLFDO DSSOLFDWLRQV FRQQHFWLRQV WR LPSODQWHG PHGLFDO GHYLFHV FRPPHUFLDO WUDQVSR...

Отзывы: