g028279
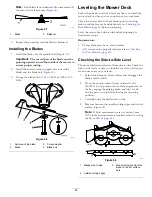
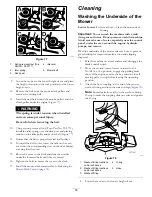
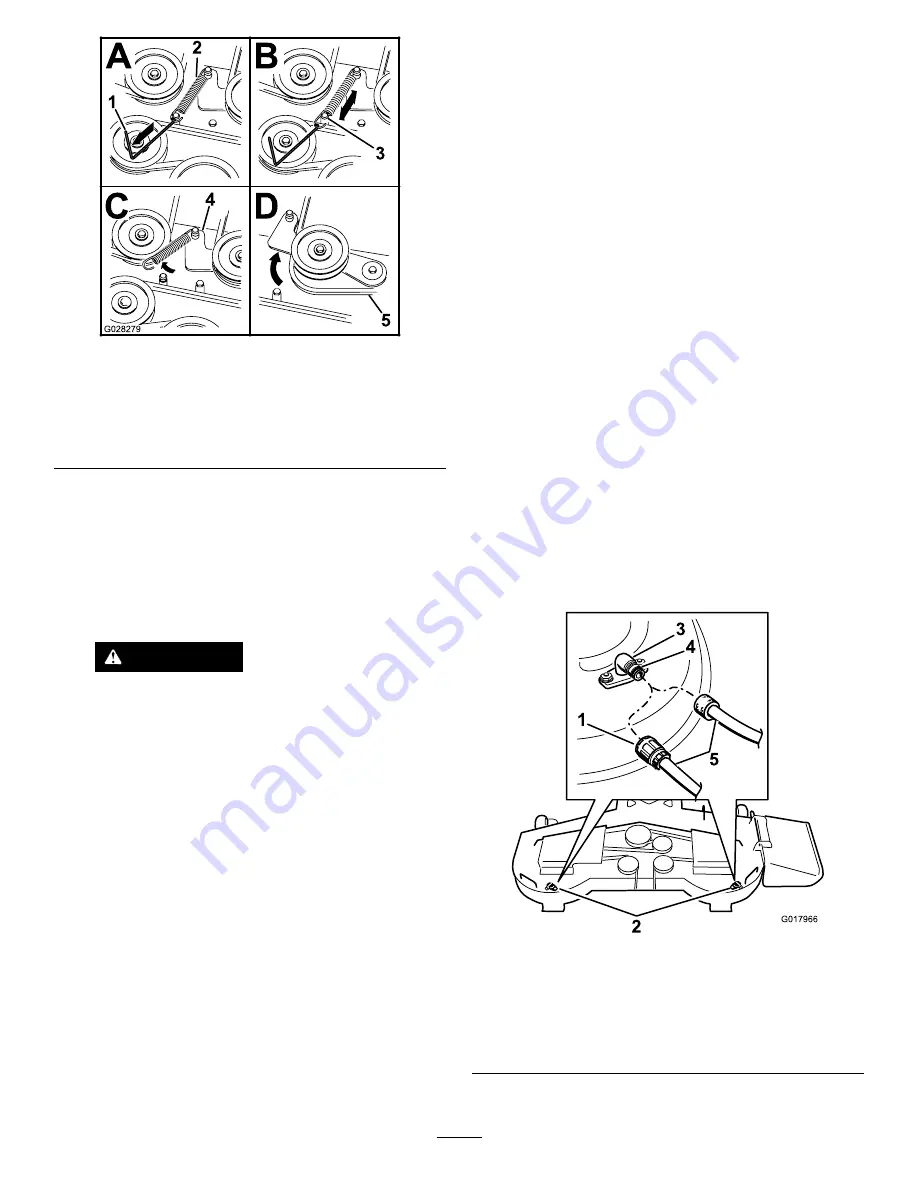
Figure 77
1.
Spring-removal tool (Toro
Part No. 92-5771)
4.
Idler arm
2.
Idler spring
5.
Mower belt
3.
Deck post
9.
Lower the mower to the lowest height of cut and place
the height-of-cut pin in the lock position for the lowest
height-of-cut.
10.
Remove the belt from the mower-deck pulleys and
remove the existing belt.
11.
Install the new belt around the mower pulleys and the
clutch pulley under the engine (
).
WARNING
The spring is under tension when installed
and can cause personal injury.
Be careful when removing the belt.
12.
Using a spring-removal tool, (Toro Part No. 92-5771),
install the idler spring over the deck post and placing
tension on the idler pulley and mower belt (
13.
Ensure that the belt is properly seated in all pulleys.
14.
To install the belt covers, insert the tabs on the each
cover into the corresponding slots on the deck bracket,
ensuring that they seat.
15.
Rotate the cover to the deck and slide the notches
under the loosened bolts until they are seated.
16.
Tighten the bolts to secure the cover to the deck.
17.
Install the mower-deck curtain; refer to
Mower-Deck Curtain (page 33)
.
Cleaning
Washing the Underside of the
Mower
Service Interval:
After each use—Clean the mower-deck
housing.
Important:
You can wash the machine with a mild
detergent and water. Do not pressure wash the machine.
Avoid excessive use of water, especially near the control
panel, under the seat, around the engine, hydraulic
pumps, and motors.
Wash the underside of the mower after each use to prevent
grass buildup for improved mulch action and clipping
dispersal.
1.
Park the machine on a level surface and disengage the
blade-control switch.
2.
Move the motion-control levers outward to the
N
EUTRAL
-
LOCK
position, engage the parking brake,
shut off the engine, remove the key, and wait for all
moving parts to stop before leaving the operating
position.
3.
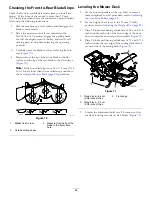
Attach the hose coupling to the end of the mower
washout fitting, and turn the water on high (
Note:
Spread petroleum jelly on the washout fitting
O-ring to make the coupling slide on easier and protect
the O-ring.
G017966
2
3
4
5
1
g017966
Figure 78
1.
Washout fitting locations
on 54-inch decks
4.
O-ring
2.
Washout fitting locations
on 48-inch decks
5.
Hose
3.
Washout fitting
4.
Lower the mower to the lowest height of cut.
50
Содержание TimeCutter HD X5450
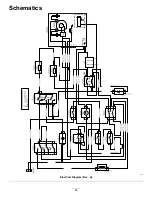
Страница 55: ...Schematics g203461 Electrical Diagram Rev A 55 ...
Страница 56: ...Notes ...
Страница 57: ...Notes ...
Страница 58: ...Notes ...

