


remove dirt, but do not twist it, as the foam
may tear.
B.
Dry the foam element by wrapping it in
a clean rag. Squeeze the rag and foam
element to dry it, but do not twist it, as the
foam may tear.
C.
Saturate the foam element with clean
engine oil. Squeeze the element to remove
excess oil and to distribute the oil.
Note:
A foam element that is damp with
oil is desirable.
g016985
Figure 32
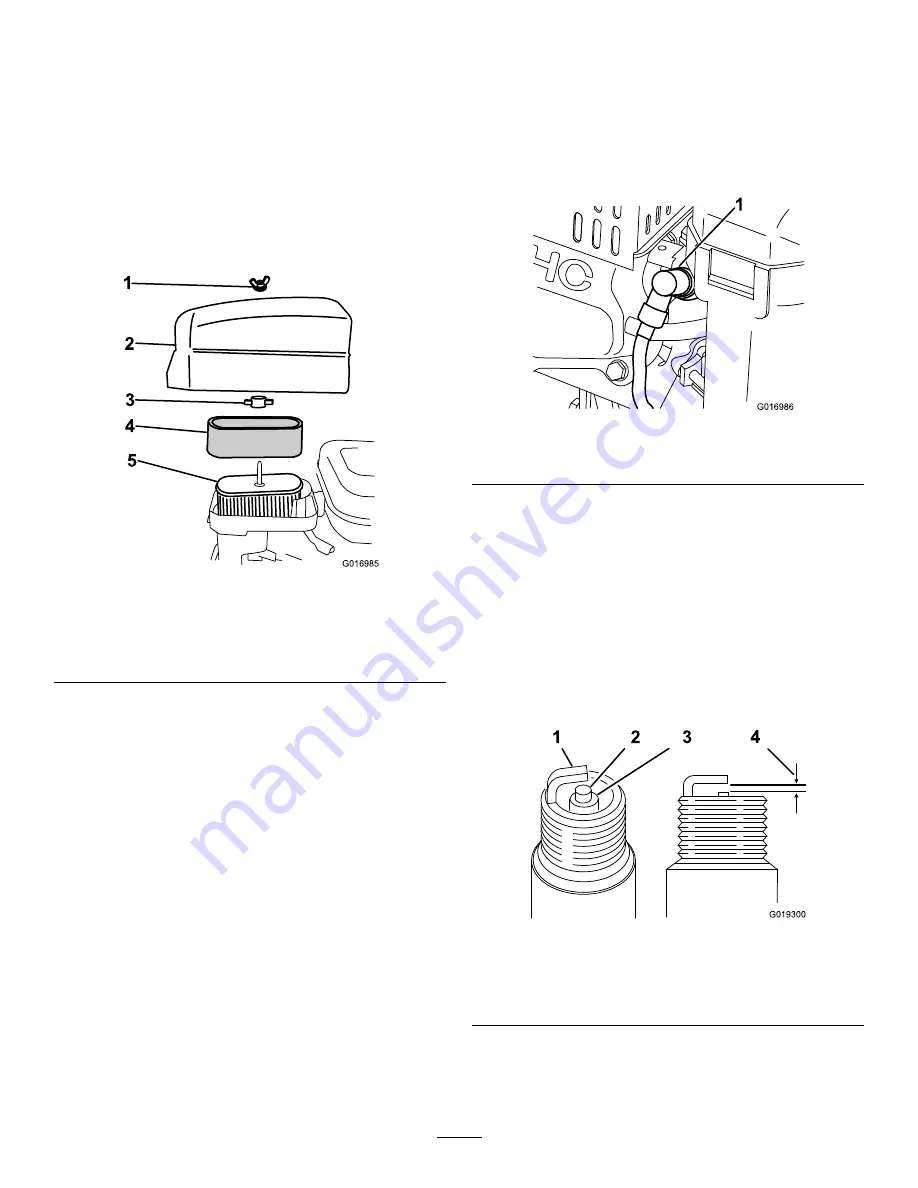
1.
Wing nut
4.
Foam element
2.
Air-cleaner cover
5.
Paper element
3.
Plastic wing nut
5.
Check the condition of the paper element. Clean
it by gently tapping or replace it as necessary.
Important:
Do not use compressed air to
clean the paper element.
6.
Install the foam element, paper element, and
air-cleaner cover.
Important:
Do not operate the engine
without the air-cleaner element, as extreme
engine wear and damage can result.
Servicing the Spark Plug
Service Interval:
Every 100 hours
Use an NGK BR6HS spark plug or equivalent. The
correct air gap is 0.6 to 0.7 mm (0.024 to 0.028 inch).
1.
Pull the molded wire off the spark plug (
g016986
Figure 33
1.
Spark-plug wire
2.
Clean around the spark plug and remove the
plug from the cylinder head.
Important:
Replace a cracked, fouled, or
dirty spark plug. Do not sand blast, scrape,
or clean the electrodes because engine
damage could result from grit entering the
cylinder.
3.
Set the air gap at 0.6 to 0.7 mm (0.024 to 0.028
inch) as shown in
. Install the correctly
gapped spark plug and tighten it firmly to 23
N∙m (17 ft-lb).
g019300
Figure 34
1.
Center-electrode insulator
3.
Air gap—0.6 to 0.7 mm
(0.024 to 0.028 inch)
2.
Side electrode
29


