89
15. SETTING-OUT MEASUREMENT
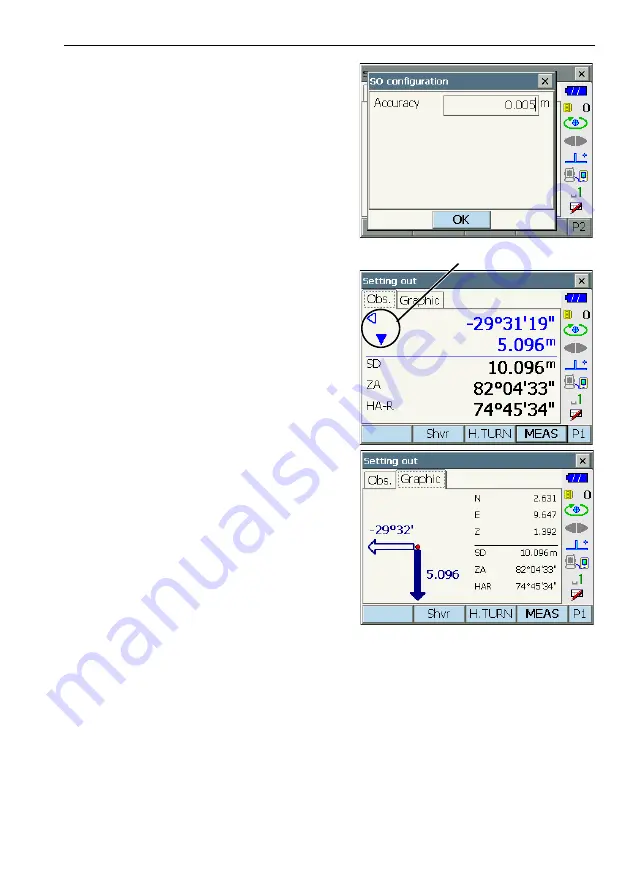
• Press
[CNFG]
in the second page to set setting
out accuracy. When the position of the target is
within this range both arrows will be displayed to
indicate that the target position is correct.
6. Position the target on the line of sight and press
[MEAS]
to begin distance measurement.
The distance and direction to move the target until
the setting out point is located is displayed on the
instrument. The sighting point measurement
results (currently installed position of the target)
are displayed.
• Movement indicator (Red indicates that target
position is correct)
Y
: (Viewed from instrument) Move target to
the left
Z
: (Viewed from instrument) Move target to
the right
YZ
: Target position is correct
G
: (Viewed from instrument) Move target
closer
O
: (Viewed from instrument) Move target
away
OG
: (Viewed from instrument) Target position
is correct
Q
: Move target upward
H
: Move target downward
QH
: Target position is correct
• Each time
[Shvr]
is pressed, the distance mode
changes from "SD" (slope distance), "HD"
(horizontal distance), "VD" (height difference),
and "Ht." (REM).
• Press
[CNFG]
in the second page to set setting
out accuracy. When the position of the target is
within this range both arrows will be displayed to
indicate that the target position is correct.
Arrows indicate direction to move


