


11
c
9
c
8
c
7
c
6
c
5
c
4
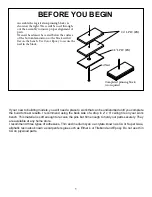
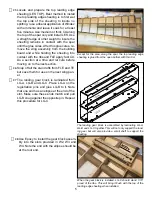
Remove any burrs from the inside of the
part from the drilling operation. It must be
smooth. Locate the screw plate for the half
you are working on and use a couple pins
through the screw holes to line it up. When
satisfied with the lineup, glue it with thin CA.
The holes in the screw plate must be aligned with the holes
in the wheel pant side. The screw plate must seat snugly to
the wheel pant.
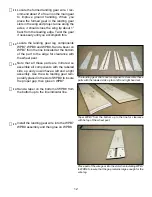
Locate and prepare the Wheel Pant Joiner
(WPJ). Sand a taper in the last half inch on
both sides down to about 1/16” to allow for
the taper at the aft end of the wheel pant.
Use several pins to locate the center of
WPJ, this will allow the joiner to set only half
way into the wheel pant side.
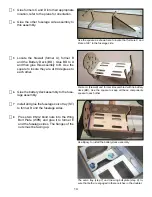
Apply a liberal bead of Formula 560 Can-
opy Glue along the entire periphery on the
inside of the part and then install the joiner.
Use clothes pins or clamps to insure good
contact with the joiner. Remove any glue
that squeezes out so as not to inter fear
with the installation of the second half. Let
this cure throughly.
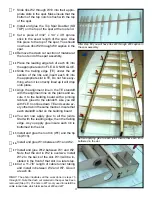
After taper sanding he trailing edge, pines are used to limit
the depth that WPJ can seat into the wheel pant half, it must
be half way.
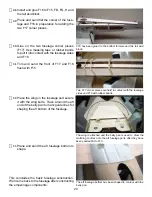
Leave the pins in place on WPJ and apply
a liberal bead of Formula 560 Canopy glue
to the inner edge of the mating wheel pant
half and install it. Use rubber bands or tape
to pull the halves together.
When cured, remove the pins and apply
some Elmer’s wood filler to the center line
joint where necessary. When cured, sand
the joint smooth.
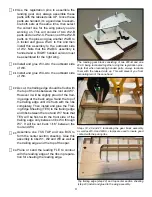
WPJ has been glued to the inboard wheel pant shells with
Pacer 560 Canopy glue.
Glue the outboard half of the wheel well shell to the inboard
assembly.
c
10
Open up the wheel opening and test fit that
the wheel has plenty of clearance.
Содержание MINI SUPREME
Страница 2: ......
Страница 38: ...Top Notch Products Company PO Box 1051 Goodlettsville TN 37072 Phone 615 866 4327...


