27
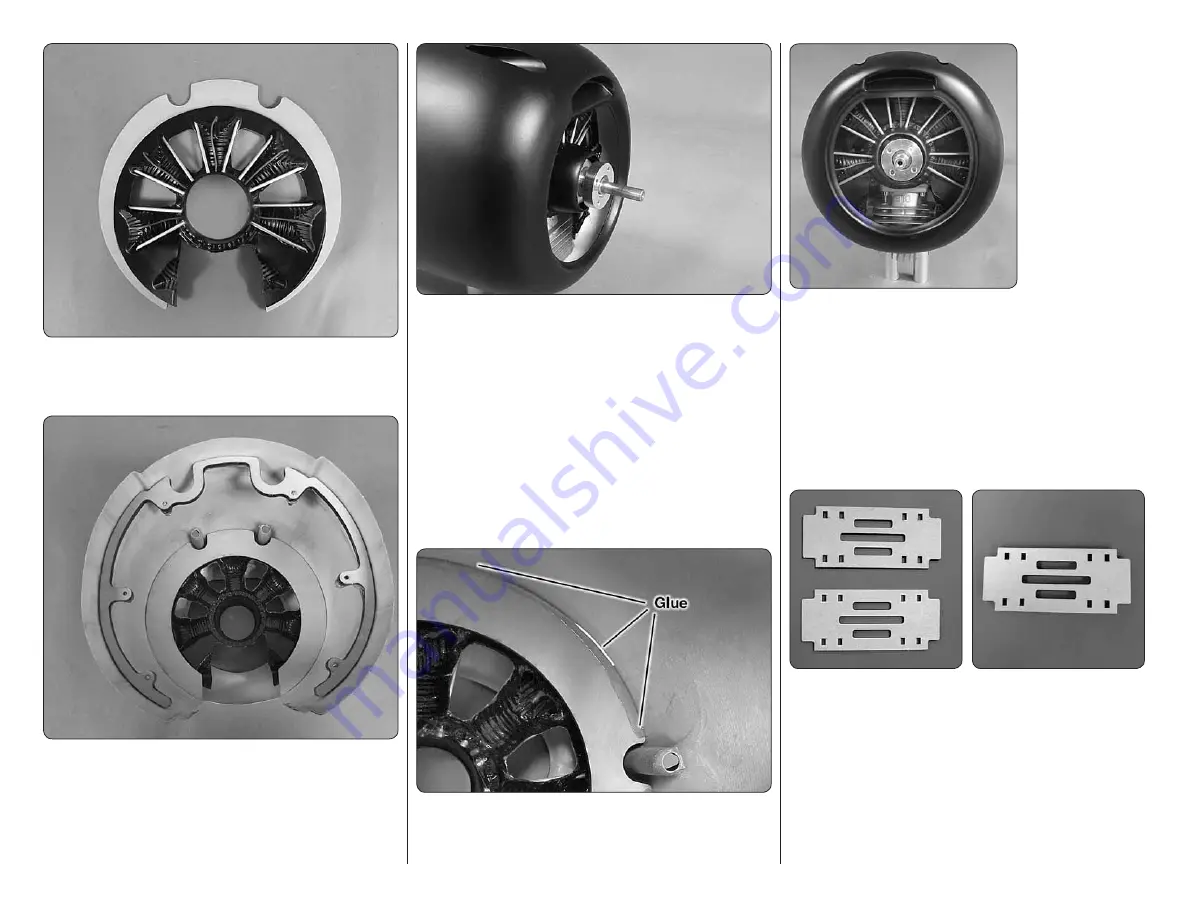
The line laser etched into the front of the plywood plate
is a reference mark for gluing the dummy engine to
the baffl e
❏
19. Place the dummy engine inside of the cowl
followed by the plywood baffl e. Press the baffl e in place
until it fi ts snug in the front of the cowl. Attach the cowl
to the fi rewall, center the dummy engine with the prop
shaft and position the dummy engine against the baffl e.
Check to make sure the dummy engine is located just
behind the drive washer and does not extend in front
of the engine drive washer. In order to get a proper fi t
you may need to sand the edge of the baffl e slightly to
get it far enough into the cowl.
❏
20. When you are satisfi ed with the position of the
baffl e, tack glue it in place in the cowl. Re-install the cowl
to the fuselage. Once again, hold the dummy engine in
place against the plywood baffl e, centered on the prop
shaft and be sure the dummy engine is behind the drive
washer of the engine. If everything still appears to be
properly positioned, remove the cowl from the fuselage.
❏
21. Apply a bead of Shoe Goo or silicone glue to
the back of the plywood baffl e, securing it to the cowl.
Once the glue has cured remove the cowl.
❏
22. Re-install
the cowl to the
fuselage. Center
the dummy engine
with the engine,
positioning the
dummy engine
as shown. Check
to be sure you will
have access to all
of the mounting
bolts when the
dummy engine
is in its proper
location. If needed use a high speed rotary tool to cut
any additional access holes for the mounting bolts. When
you are satisfi ed, tack glue the dummy engine to the
plywood baffl e with a few drops of CA glue to keep it
in place on the baffl e.
❏
23. Remove the cowl. Permanently secure the dummy
engine to the plywood disk by applying Shoe Goo or
silicone glue in the cavity on the backside of the dummy
engine and the plywood baffl e. Allow the glue to cure.
❏
24. Locate two 1/16" [1.6 mm] plywood ignition module
trays. Glue the two trays together.
Содержание GIANT SCALE GOLD EDITION ZERO
Страница 39: ...OS GT60 Mounting Pattern Top of Firewall 78 44 mm 66 48 mm...
Страница 40: ......


