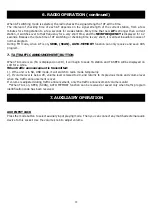
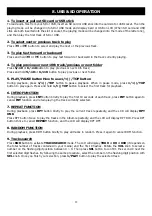
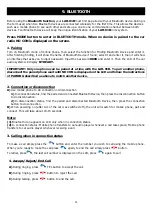
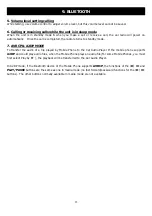
background image

24 


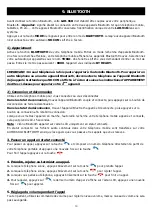
9. BLUETOOTH 


Before using the 

Bluetooth function

, your 

LAR-91B

 must first be paired with your Bluetooth device

.

Pairing is 

the term used when two Bluetooth devices are connected wirelessly for the first time. This allows the devices 

such as a mobile phone to see each other and sets up a one to one communication channel between both 

devices. Your Bluetooth device will keep the unique identification of your 

LAR-91B

 in its system. 

 
Press MODE button to enter in  BLUETOOTH  mode.  When  no  device  is  paired  to  the  car 

radio NO CON is displayed on the screen. 
 

1. Pairing 

Turn on Bluetooth mode of mobile phone, then select the function for Finding Bluetooth Device and enter it. 
After finishing finding, it will show the name of Bluetooth Device if found, select it and enter it, then it will show 
an interface that asks you to input password. Input the password 

0000

 and enter it. Then the LCD of the car 

audio system will display 

BT READY. 

 
IMPORTANT: Only one phone can be paired at a time with the LAR-91B. To pair another phone, 
disconnect the paired phone wait until NO CON is displayed on the LCD and follow the instructions 
of PAIRING described as above to match another device. 


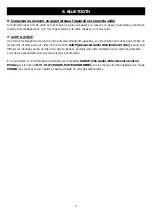
2. Connection or disconnection 

A)

 Use mobile phone to do connection or disconnection 

1)

 In connection status, find the paired and connected Bluetooth Device, then press the disconnection button 

to do disconnection. 

2)

 In disconnection status, find the paired and disconnected Bluetooth Device, then press the connection 

button to do connection. 

B)

 When powering on (after Acc of the car was switched off), the unit will search for mobile phone, pair and 

connect. This will take about 10-15 seconds. 


Note: 

(1)

 Bluetooth icon appears on LCD only when in connection status. 

(2)

 In connection status: Mobile phone transfers to car audio player whenever a call takes place; Mobile phone 

transfers to car audio player whenever receiving a call. 


3. Calling when in connection status   


To make a call simply press the 


button and enter the number you wish to call using the mobile phone. 

When you’re ready to make the call press 


again, to end the call simply press 

 button

To redial, press

, the last call number is displayed on the LCD, press 

  again to call. 


4. Accept/ Reject/ End Call   

 A)

 During ringing, press 


TEL button to accept the call. 


B)

 During ringing, press 


button to reject the call. 


C)

 During talking, press 


button to end the call. 


Содержание LAR-91B

Страница 1: ......

Страница 2: ...dot de nombreuses fonctions qui facilitent son utilisation et assurent une bonne r ception Cependant elles ne sont pas toutes videntes Ce guide d utilisation est con u pour vous aider profiter pleine...

Страница 3: ...a illustr ci dessous BARRETTE METALLIQUE Pour optimiser la protection antichoc veuillez fixe la barrette m tallique sur le support m tallique de la voiture TABLEAU DE BORD CHASSIS DE MONTAGE METALLIQU...

Страница 4: ...DE L ARRIERE DE L APPAREIL CABLAGE HAUT PARLEUR CONNECTEUR ISO FIXE Note LES CONNECTEURS ISO PEUVENT ETRE ACHETES DANS TOUT MAGASIN D ACCESSOIRES Important SI LE CONNECTEUR ISO FIXE EST COUPE LA GARAN...

Страница 5: ...uche POWER SOURDINE 4 ECRAN LCD 5 Touche 6 Touche 7 Touche BAND APS 8 Touche MODE PROGRAMMES TYPES 9 Touche Pr s lection 1 TOP X 10 Touche Pr s lection 2 INTRO 11 Touche Pr s lection 3 REPETITION 12 T...

Страница 6: ...DER quilibre avant arri re Pour chaque mode le temps d attente est de 5 secondes et lorsque le temps d attente est pass l affichage repasse au mode pr c dent Apr s avoir s lectionn un mode sonore util...

Страница 7: ...e seconde Mode PI MUTE dans la m me situation que d crite ci dessus le son est coup pendant moins de 1 seconde c RETUNE L RETUNE S Recherche de fr quence longue 90 secondes Recherche de fr quence cour...

Страница 8: ...r la fiche AUX Ajuster le volume gr ce au bouton de volume 7 FONCTIONNEMENT DE LA RADIO 1 SELECTION DE LA BANDE DE FREQUENCE Appuyez bri vement et plusieurs reprises sur ce bouton pour s lectionner la...

Страница 9: ...v rification des fr quences alternatives d pend de la force du signal de la station en cours cela varie de quelques minutes pour une station dont la r ception est bonne quelques secondes pour une sta...

Страница 10: ...PLAY PAUSE pour red marrer la lecture Appuyez longuement sur cette touche pour mettre en lecture de la 1 re piste 5 FONCTION LECTURE ALEATOIRE Pendant la lecture appuyez sur le bouton INT bri vement p...

Страница 11: ...d connectez Dans le statut de connexion trouvez l appareil Bluetooth coupl et connect puis appuyez sur le bouton de d connexion de faire la d connexion Dans le statut de d connexion trouver l apparei...

Страница 12: ...votre t l phone mobile peut mettre en lecture des fichiers audio et vid o et a la fonction A2DP Advanced Audio Distribution Profile il peut ainsi diffuser les donn es audio et vid o de votre t l phon...

Страница 13: ...fectu Verifier le branchement Les boutons ne fonctionnent pas 1 Le microprocesseur ne fonctionne pas correctement cause du bruit 2 La fa ade n est pas correctement mise en place 1 Appuyer sur la touch...

Страница 14: ...t e de fr quence 87 5MHz 108MHz Sensibilit effective 3uV Fr quence I F 10 7MHz SECTION AM Port e de fr quence 522KHz 1620KHz Sensibilit effective 40dB Fr quence I F 450KHz SORTIE DE LIGNE RCA Sortie 1...

Страница 15: ...ses dans les quipements lectriques et lectroniques peut avoir des effets potentiels sur l environnement et la sant humaine dans le cycle de retraitement de ce produit Ainsi lors de la fin de vie de ce...

Страница 16: ...sophisticated functions ensuring superior reception and operation All are designed for the easiest possible use but many are not self explanatory This operation manual is intended to help you benefit...

Страница 17: ...16 2 UNIT INSTALLATION...

Страница 18: ...ESCRIPTION OF THE BACK OF THE UNIT SPEAKER WIRING FIXED ISO CONNECTOR Note IF YOUR CAR DOES NOT HAVE ISO CONNECTOR YOU CAN PROCURE IT FROM ANY ACCESSORY SHOP Important IF FIXED ISO CONNECTOR IS CUT TH...

Страница 19: ...RELEASE button 2 SELECTION VOLUME knob 3 POWER MUTE button 4 LCD DISPLAY 5 6 buttons 7 BAND APS button 8 MODE PTY button 9 PRESET 1 TOP button 10 PRESET 2 INTRO button 11 PRESET 3 REPEAT button 12 PRE...

Страница 20: ...E S MASK DPI MASK ALL BEEP ON BEEP OFF USER SET FLAT CLASSIC ROCK POP EUROPE AMERICA VOL LAST VOL DEFA STEREO MONO in FM mode LOUD OFF LOUD ON DX LOCAL in FM mode CLK ON CLK OFF CLK 12 24 mode After s...

Страница 21: ...ff will be restored with power ON VOL DEFA The volume level of the main unit after power on is a constant value When selecting VOL DEFA item press SEL button to display AVOL then you can pre set the c...

Страница 22: ...earch for the strongest stations When pressing and holding BND button for more than 1 second the radio searches from the current frequency and checks the signal strength level until the 6 strongest st...

Страница 23: ...program 7 TA TRAFFIC ANNOUNCEMENT BUTTON When TA mode is on TA is displayed on LCD it will begin to seek TA station and TA SEEK will be displayed on LCD for a while When traffic announcement is transm...

Страница 24: ...hold 1 TOP button to select the first track for playback 6 INTRO FUNCTION During playback press INT button briefly to play the first 10 seconds of each track press INT button again to cancel INT funct...

Страница 25: ...he LCD and follow the instructions of PAIRING described as above to match another device 2 Connection or disconnection A Use mobile phone to do connection or disconnection 1 In connection status find...

Страница 26: ...VRCP A2DP MODE To transfer the audio of a file played by Mobile Phone to the Car Audio Player If the mobile phone supports A2DP and could play audio files when the Mobile Phone plays an audio file For...

Страница 27: ...here is no sound The volume control is set too low Turn up the Volume properly The device has not been correctly connected Check the power and earth connection according to the wiring diagram The oper...

Страница 28: ...7 5MHz 108MHz Effective Sensitivity 3uV Signal to noise 50dB AM SECTION Frequency Range 522KHz 1620KHz Effective Sensitivity 40dB Signal to noise 40dB RCA LINE OUT Output 1000mV MAX MMC SD or USB PLAY...

Страница 29: ...ereby states that the unit unit type complies with the essential requirements and other relevant provisions of the Council Directive R TTE 1999 05 CE The Declaration of Conformity is available on requ...

Страница 30: ......

Отзывы: