


TM 9-1829A, April 1944
83/100
2021-07-07
50. Description
a.
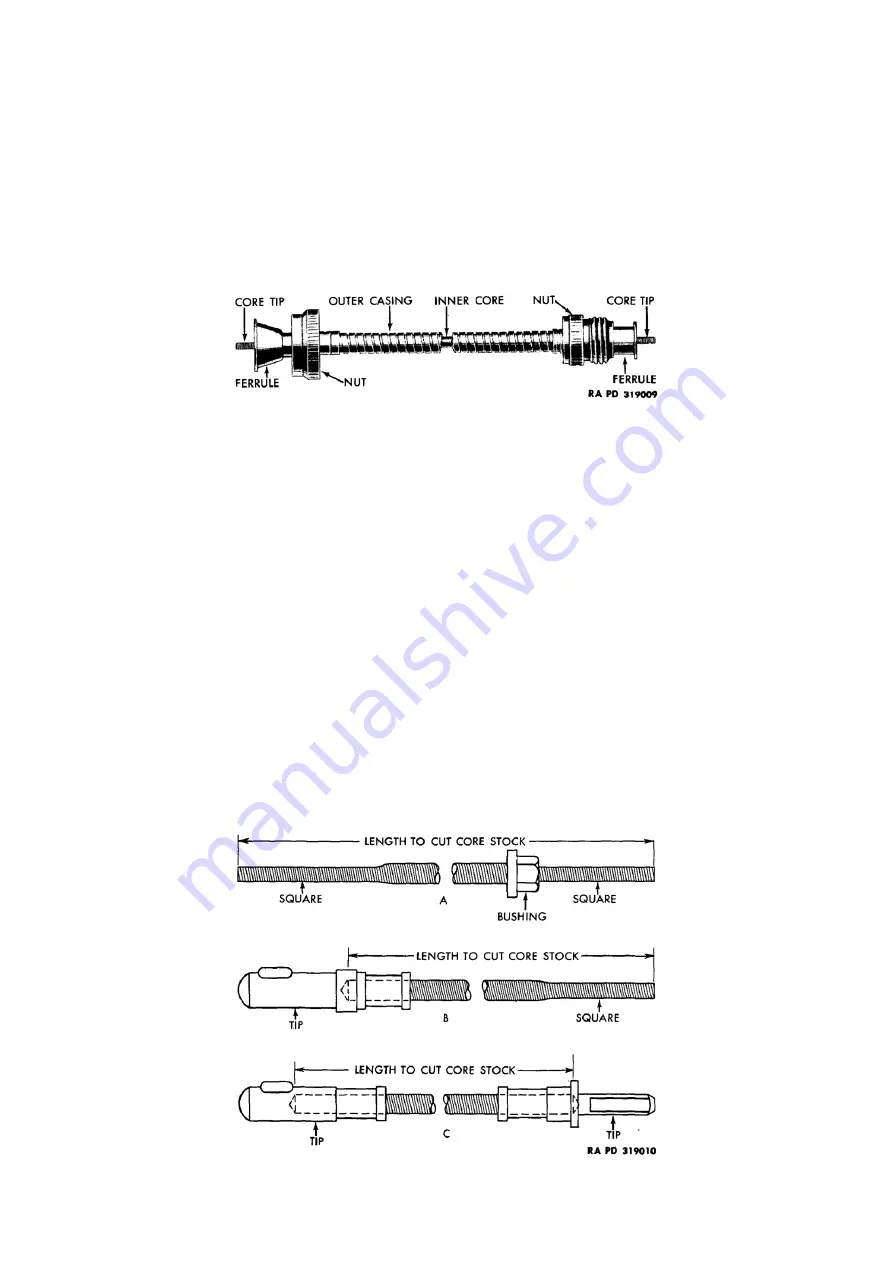
A complete flexible shaft (fig. 124) consists of two major assemblies:
(1)
A flexible outer casing with nuts and ferrules at both ends. The casing diameter and the connecting nuts
vary for different applications and instruments.
(2)
A wire-wound flexible inner core assembly with squared ends or crimped-on tips. The core diameter and
end connections vary for different applications. There are only two diameters of flexible inner cores used
in army vehicles. Passenger cars and light trucks use 0.130 inch diameter. Heavy trucks, gun carriers,
and tanks use 0.150 inch diameter. Small cores (0.130 in. diameter) are supplied with self-contained tips
which are formed by squaring the ends in suitable dies. Large cores (0.150 in. diameter) have keyed
metal tips crimped on the lower end, and a squared tip crimped on the upper end.
Figure 124: Flexible shaft
51. Operation
a.
One end of the flexible shaft is attached to the instrument (speedometer, tachometer, or other recorder) and
other end is attached to the transmission or other power take-off point. The flexible inner core transmits the
power from the take-off, while the outer casing is held rigidly in place at each end by the ferrules and nuts.
52. Repair of flexible shafts
a)
Inner core:
Pull old core out of casing. Check removed unbroken core for kinks by rolling on a flat surface.
If a flat surface is not available, take an end in each hand and roll core between fingers. In either case a core
kink will show up as a “hop” at the kinked point. Do not reuse a kinked core, because it will cause fluctuation
of the speedometer or tachometer pointer. Check removed core for frayed spots by running it loosely through
your fingers. Do not reuse a frayed cable. Kinks and frayed spots in a core usually indicate a casing with very
sharp bends. Any casing with less than 6-inch radius bends should have the clips removed and the bends
relieved. Also check for crushed casing due to retaining clamps being assembled too tight.
(1)
Measure old core:
Straighten out bends (if old core is broken straighten out bends in both sections). Lay
old core on flat surface and measure as follows:
a)
Core with both ends squared
(A, fig. 125): Measure over-all length.
b)
Core with one end squared and tip on other end
(B, fig. 125): Secure new tip similar to old one,
and measure depth of hole. Measure visible length of old core and add depth of hole.
c)
Core with tip on both ends
(C, fig. 125): Secure new tips like those on old core. Measure depth of
hole in each tip, measure visible length of old core and add depths of holes.
Figure 125: Drawing showing length to cut core stock