16
19 Body/Canopy Assembly
Cut off the bubble from the body leaving the lip all the way
around. Neatness counts, so take your time. Next trim the
flange from the canopy leaving a clean edge. You can lightly
sand the edges to get it smooth and even. On the lip of the
opening in the body, mark six points for drilling holes to secure
canopy: 1-in front, 1-in rear and 2 on each side.
Using double stick tape secure canopy to body. Take a very
sharp awl and make pilot holes through the canopy and body
lip. Make sure all holes line up. Remove double stick tape
and put in the self tapping screws. Install the body clip, decals,
and rubber grommets.
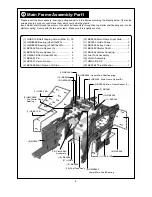
(1) HMJ2-6B Self Tapping Screw(M2x4).. 6
(2) HSE3-12B Self Tapping Screw(M3x12).... 2
(3) BK0611 Body...................................... 1
(4) BK0102 Rubber Grommet ................. 2
(5) BK0098 Body Clip-A........................... 1
(6) BK0099 Body Clip-B........................... 1
(7) BK0612 Canopy.................................. 1
(8) JV0093 Decal......................................1
(4) BK0102
(4) BK0611
(2) HSE3-12B
(6) BK0099
(5) BK0098
(4) BK0102
(7) BK0612
(1) HMJ2-6B
(1) HMJ2-6B
(1) HMJ2-6B
(1) HMJ2-6B
20 Main Rotor Assembly
Important-While Thunder Tiger takes great care to manufacture the most balanced blades available, no two rotor
blades are exactly the same. It is highly recommended that you purchase a blade balancer from your hobby dealer.
Follow the manufacturers instructions for balancing the blades and install on helicopter .
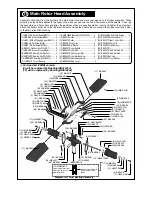
(1) BK0072 Main Rotor Blade................
(2) HMD2612B Self Tapping Screw (M2.6x12)....... 2
(3) BK0073 Upper Blade Grip... ............. 2
(4) BK0074 Lower Blade Grip................ 2
(5) HMM4Z Lock Nut(M4)...................... 2
(6) HMC4-27B Socket Screw.................. 2
(1) BK0072
(6) HMC4-27B
(5) HMM4Z
(2) HMD2612B
(3) BK0073
(4) BK0074
2
Содержание RAPTOR 30
Страница 1: ......
Страница 24: ...22 FLIGHT TRAINING SECTION...
Страница 32: ...30 MAINTENANCE SECTION...
Страница 38: ...36 PARTS LIST SECTION...


