background image

Not every picture or sound problem is caused by a defect in your DTR. Leads having been
accidentally pulled out or worn out batteries in the remote control can also cause impairment. If
your unit does something unexpected while you are using it, please unplug it, wait a few seconds
then plug it in again. If this fails to solve the problem or the following measures do not bring about
satisfactory results, please consult an authorised dealer.

Recorder does not
respond to remote
control.

Press the DTR button on the handset.
Point the remote control at directly at the recorder.
Remove all obstacles in the path of the remote control signal.
Check or replace the remote control batteries.
Re-boot the DTR by briefly interrupting the mains power.

No Picture.
Disrupted Picture.

Check all connections at the rear of the unit.
Check the RF IN connection. Ensure cables to TV are inserted correctly.
Select AV channel on TV set.
Refer to reception problems on page 

35

.

No Sound.

Check all connections at rear of unit.

No sound from VCR. VCR sound is not available at the Digital audio output socket. Connect

VCR to your amplifier directly.

No Power or
indicators not lit.

Check mains plug is inserted correctly and the power is switched on.
Check that the mains socket is operational. (Use a lamp to test it.)

Picture shape looks
wrong.

Set your DTR to match your type of TV.

4:3

= conventional

See page 

28

for instructions.

16:9

= widescreen

DTR won’t  record
any more.

The hard disk is full. Clear some space to allow the DTR to record.
An archiving event is occurring, wait for it to finish.

Live Pause won’t
work.

Two record events are happening at the same time. Wait for the
recordings to stop.
The hard disk is full. Clear some space to allow the DTR to record.

There is a humming
noise in the DTR.

This is the noise from the fan and the hard disk and is normal. It will not
generally be noticeable and is unavoidable.

DTR won’t  change
channels.

Two record events are happening at once. Wait for the recordings to
stop.

Programme Guide is
empty.

You must leave the DTR plugged in overnight to allow it to receive the 
programme information. This takes place at about 3am every day.

No or less than 20
services tuned.

Insufficient signal is getting to the recorder.
Refer to reception Problems on page 

35

.

Subtitles not
appearing.

Not all programmes have subtitles. Check with your broadcaster for
details on subtitled programmes.

FAULT

CAUSE/REMEDY

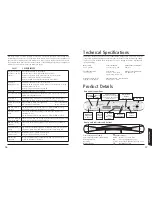
Technical Specifications

This product fulfils the European directives 

2006/95/EC, 89/336/EEC

. This device conforms

to the safety regulation EN 

60065

and therefore the international safety regulation IEC 

60065

.

You may not open the DTR. The manufacturer accepts no liability for damage resulting from
improper handling.

Mains voltage:

Power consumption:

Standby Power consumption:

230

V~, 

50/60

Hz

Operating approx. 

24

W.

24

W max

Operating temperature:

Audio Format:

Remote Control battery Type:

+

10

°C to 

35

°C

Analogue : Stereo Sound

R

6

P SIZE AA 

1.5

V

Digital : SPDIF Stereo Sound

Hard disk: 

DTI

6300-16/25

Dimensions:

WxHxD - 

368

x

62

x

221

mm

Capacity:

160

GB/

250

GB

Weight: Approx. 

1.8

kg

Product Details

Front Panel indicators (LED’s)

Power status, Green On / Red Standby
Remote Command

Recording
Message Waiting

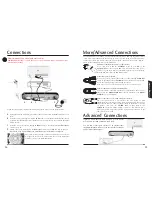
Rear panel connections

Front panel indicators and buttons 

Front Panel buttons

MENU - Displays on screen menu
OK

- Chooses highlighted option

Arrows - Moves the highlight around the screen

- On/Standby button     

Tuner 

2

output

to VCR

Tuner 

2

Input

Digital audio

Output

PCM (stereo)  only

VCR scart  output

VCR pin 

8

record control RGB

loop through for DVD players &

Digital recorders

Analogue

audio output

Mains Input

Main Aerial

Connection

to Tuner 

1

Tuner 

1

Output

S-video

output

TV scart

output

RGB or CVBS

output

36

37

Information

Содержание DTI6300

Страница 1: ...3633633D DTI 6300 COMMON USER MANUAL ...

Страница 2: ...memory to live TV Rewind and 24Hr in the TV listings Stop recording or playback Current programme information Skip back in recordings Controls the Audio Video signals sent to the TV Used to select the corresponding colour option shown on the screen Turns the DTR or TV on or off Sets the remote control to TV mode Display the recorded programmes screen Displays the DTR main menu Up down channel or p...

Страница 3: ...to receive the best digital signal you may need an aerial upgrade For more information go to http www digitaluk co uk how_do_i_switch your_aerial 4 Six quick and easy steps to get you up and running Step 1 Unpack your Digital TV Recorder DTR and check you have all the following accessories Remote Control SCART lead Aerial lead Mains lead Remote control TV set up codes 2 x AA batteries to place in ...

Страница 4: ...but it is likely that the TV remote button will be labelled AV or have this symbol Once you can see the image on screen displayed here and have ensured all connections are correct press on your remote 7 Step 4 Channel Scan You will see this screen showing that your DTR is now searching for all available channels In the event that your DTR does not find any channels or has missed some see the secti...

Страница 5: ...Y whenever it is not in use Note that turning the power off at the mains will prevent your DTR from receiving Top Up TV programmes If the installation fails check the points below and try to rescan for channels again Check that all the connections have been made as shown in the diagram on page 6 and the power is switched on to all of the equipment Check that the batteries in the remote control are...

Страница 6: ...points when installing and operating your recorder Note In order to disconnect this equipment completely from the mains it is necessary to withdraw the plug from the wall socket Please ensure that the plug remains accessible at all times As soon as the mains plug is inserted into the wall socket it will become powered and commence its initialisation sequence When complete the unit will remain in i...

Страница 7: ...ries from the remote control if you are not going to use it for several weeks Immediately remove any leaking batteries Take care in doing this as leaking batteries may cause burns to the skin or other physical injury Inserting the batteries Please respect the environment and prevailing regulations Before you dispose of batteries ask your dealer whether they are subject to special recycling and if ...

Страница 8: ...IGITAL AUDIO OUT socket on your DTR to the DIGITAL AUDIO IN on your AV amplifier S Video connection to a TV Plasma Display or Projector The scart connection to a TV provides the best picture as RGB Red Green Blue separately but some types of display device don t have a scart socket In this case either an adaptor should be purchased or connect an S Video lead from the S VIDEO OUT on your DTR to the...

Страница 9: ...35 To turn on your DTR press the DTR button or the button The red standby indicator light will go green To turn off your DTR press the button The standby light will turn red again An amber light indicates the box is updating and that you should wait before pressing any further buttons The DTR must be on or left in standby if you want to keep the Programme Guide and Top Up TV programmes updated Tur...

Страница 10: ...psis of the programme It also shows the start and end times for that programme in the top right hand corner To set up and work the other facilities of your DTR you will need to get used to operating the menus Throughout this manual we will use BOLD text when referring to remote control button presses and ITALIC text when referring to a particular menu level You will be using the remote control but...

Страница 11: ...ecord Pressing the button will take you to the PLANNED RECORDINGS screen Press the button again to add the recording to the planned recordings list When you go back to the TV Guide you will see next to the planned recording For more information on planned recordings please refer to Using Planned Recordings on page 24 TV Favourites In addition to the standard Freeview channels your DTR can also giv...

Страница 12: ...ng in the small preview window on the right hand side of the screen If you wish to watch the programme press the OK button If you had previously not finished watching a programme press the GREEN button to resume the playback from the last watched point You can always access the Top Up TV programmes by pressing the Top Up TV button Folders Programmes on your recorder are automatically placed in fol...

Страница 13: ...r and save space on your DTR for future recordings Your DTR is also capable of automatically adding time to a recording to guard against programme over run Please refer to Page 31 for more information on Guard Times Space for recordings When you add a recording to the Planned Recordings your DTR will check to see if there is enough space to complete all the scheduled recordings If there is a risk ...

Страница 14: ...gh the recording to your desired point Trick modes These are functions that enable you to move forward or rewind through a recording There are nine incremental speeds for both forward and rewind these are fi x1 x2 x4 x8 x16 x32 x64 Press the forward or rewind button on your remote control to enter the trick mode Repeated presses of that button will increase the speed To reduce the speed press the o...

Страница 15: ... RF modulator advanced Your DTR is equipped with an RF aerial modulator This feature allows you to watch pictures on a TV set when only connected via the aerial lead This can be useful if you wish to send the pictures from your DTR to more than one TV in your house Using the example method below you can also view the VCR on other TV s in your home Check your VCR manual for details on its RF modula...

Страница 16: ...a new channel you may not have enough space on your disk drive for planned recordings The warning will advise you to review your Planned Recordings as soon as possible Please refer to page 25 on how to make space by deleting unwanted recordings Recording Preferences There are two options available to change the Guard time and the rewind buffer size Use the UP and DOWN arrow buttons to move between...

Страница 17: ...a certificate higher than the maximum certificate allowed the recorder will blank the screen mute the audio and pop up the PIN entry window Unless a valid PIN is entered the content cannot be viewed The available settings are U PG 12 15 or 18 Note that the default is 18 which means that there is no automatic block of any content from being viewed You should lower this to a level suitable for the p...

Страница 18: ...y you may be experiencing problems Your current aerial and cabling may not be able to receive all the digital channels due to its age and condition Now is the time to renew them We recommend the use of CAI Benchmarked aerials Look for the logo Always use good quality double screened aerial cable e g CT100 coaxial cable In your location the digital channels may be transmitted on different frequenci...

Страница 19: ...noise in the DTR This is the noise from the fan and the hard disk and is normal It will not generally be noticeable and is unavoidable DTR won t change channels Two record events are happening at once Wait for the recordings to stop Programme Guide is empty You must leave the DTR plugged in overnight to allow it to receive the programme information This takes place at about 3am every day No or les...

Страница 20: ... for any reason 7 0 VIEWING CARD 7 1 What is a Viewing Card A Viewing Card is an electronic device that when activated acts like a key to enable you to view those parts of the Top Up TV Service to which you are entitled We or a third party we appoint may provide you with a single Viewing Card An additional charge will apply to further Viewing Cards that you request and to replacement Viewing Cards...

Страница 21: ...o obtain a replacement fuse contact your retailer If the mains sockets in your home differ or are not suitable for the type of plug supplied then remove the fuse from the plug for safety cut the plug from the mains lead and refit a suitable type following Brown Live Blue Neutral You must use a 13 AMP plug BS1363 and fit a 3 AMP BS1362 fuse If any other type of plug is used a 3 AMP BS1362 fuse must...

Страница 22: ...Notes Notes ...
Отзывы: