S e c u r e C o n s o l e S e r v e r M a n u a l , R e v . K , J u l y , 2 0 1 3
Page 28
With Edit mode enabled, use the arrow buttons on the front panel to access the front panel
edit subroutine and change the default network settings (showing the IP address Netmask
and Gateway) for your SCS system. The front panel controls are self-prompting for the
appropriate entries.
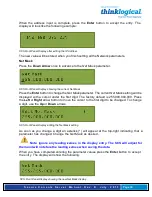
SCS Front Panel Display showing the Network Edit Mode
!
Note: Use the Enter button to ‘continue’ or to ‘accept’ the current setting. Your
front panel entries must be
NO LONGER THAN 30 SECONDS APART
or the front
panel entry program will time out and discard your entries.
An asterisk at the far right indicates there is a parameter that has changed from the
currently-stored value. These entries will be accepted and held. As you exit this
programming mode you are given the opportunity to Save or Cancel your new
changes. If you do not Save your settings at this time, your new changes will be
discarded.
!
Note: Front panel changes are not written to the Compact Flash memory
until the sysadmin uses the command-line ‘save’ command.
Do NOT turn the system
power off or these changes will be lost.
4.3.1.1 Start Front Panel Edit Mode
To start the Edit mode, press the Up or Down Arrow button on the front panel. The display
will change from the default Domain Name / Date & Time to the Edit Mode. You can
scroll through the available Edit functions by pressing the Up or Down arrows: Program
Network Settings or View SCS Settings
!
Note: If you do not press a button within 30 seconds the display will revert to
the normal display and no changes will be made.
Scroll to the Program Network Settings display.
4.3.1.2 Program Network
When the Program Network Settings mode is selected, you will step through the parameter
entry for Network IP Address, Net Mask and Gateway, then Exit to the previous menu. The
Up and Down arrows are used to scroll through the available options.

