


Photo Registration for
Product Rejects
This function allows you to select which part
of the product triggers your reject device.
This function is usually used for products that
exceed six inches in length. Rejects are
triggered in three different ways, as follows.
Thermo Scientific APEX Quick-Start Guide
Page 4
REC-F-58E—Part #085555
•
By the leading-edge of the product.
•
By the center of the product.
•
By the entire length of the product.
1)
Make sure the Main Menu is displayed.
2)
Highlight the rejects menu.
3)
Press the Go button.
4)
Navigate to page 2 of the menu.
5)
Press the right-navigation button to select
the photo-registration menu.
Leading Photo Registration
6)
To change this setting, press the Go
button repeatedly until a check mark
appears beside the part of the product
that will trigger your reject device.
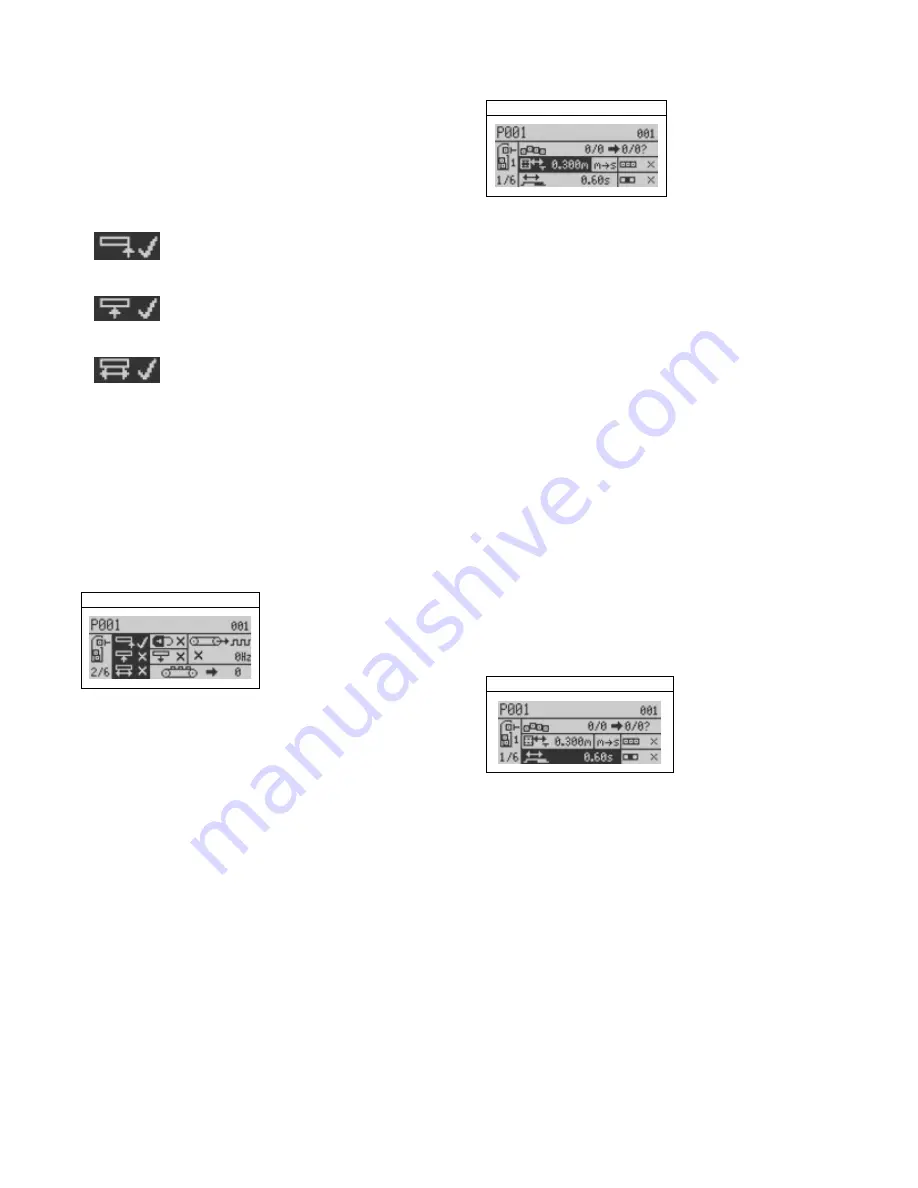
Distance to the Reject Device
This function allows you to input the distance
(mm or inches) from the
downstream edge of
the search head to the
center of your main
(Reject 1) device.
1)
Make sure the Main Menu is displayed.
2)
Highlight the rejects menu.
3)
Press the Go button.
(continued…)
4)
On page 1 of the rejects menu, highlight
the “Reject 1 Distance/Delay” function.
Reject 1 Distance/Delay
5)
Press the Go button an input-screen
appears.
6)
Key in the appropriate distance (mm or
inches). If you want to set a delay
time,
first highlight the “m
→
s” (or “ft
→
s”)
function, and press the Go button to
select “delay” (a time parameter), which
you will set in minutes and seconds in
step 5 above.
Signal Duration for the
Reject Device
This function allows you to set the duration of
the signal needed (expressed in seconds and
hundredths of a second) to activate your
Reject-1 device.
1)
Make sure the screen shown in the
“Distance to the Reject Device” section
above is displayed.
2)
Highlight the “Reject 1 Duration” function.
Reject 1 Duration
3)
Press the Go button and an input screen
appears.
4)
Key in the appropriate duration time
(minutes and seconds). If you want to set
the duration parameter as a
distance,
highlight the “s
→
m” (or “s
→
ft”) function,
press the Go button to select a distance
parameter, then go to step 3 above and
key in a distance (mm or inches).
Содержание APEX 100
Страница 1: ...Thermo Scientific APEX Metal Detector User s Guide REC 4248 Rev K Part number 085381 English ...
Страница 10: ...Page 10 Thermo Scientific APEX User s Guide ...
Страница 78: ...Page 78 Thermo Scientific APEX User s Guide ...
Страница 110: ...Page 110 Thermo Scientific APEX User s Guide ...
Страница 258: ...Page 258 Thermo Scientific APEX User s Guide ...
Страница 270: ...Page 270 Thermo Scientific APEX User s Guide ...
Страница 282: ...Page 282 Thermo Scientific APEX User s Guide ...
Страница 310: ...Page 310 Thermo Scientific APEX User s Guide ...
Страница 319: ...Thermo Scientific APEX User s Guide Page 319 Appendix A Modbus Communications Card ...
Страница 320: ...Page 320 Thermo Scientific APEX User s Guide ...
Страница 324: ...Page 324 Thermo Scientific APEX User s Guide ...
Страница 340: ...Page 340 Thermo Scientific APEX User s Guide ...
Страница 367: ...Thermo Scientific APEX User s Guide Page 367 Appendix B IntelliTrack XR ...
Страница 368: ...Page 368 Thermo Scientific APEX User s Guide ...
Страница 402: ...Page 402 Thermo Scientific APEX User s Guide ...
Страница 404: ...This page intentionally left blank ...
Страница 414: ...This page intentionally left blank ...
Страница 430: ......
Страница 431: ......
Страница 432: ......
Страница 433: ......
Страница 434: ......
Страница 435: ......
Страница 436: ......
Страница 437: ......
Страница 438: ......
Страница 439: ......
Страница 440: ......
Страница 441: ......
Страница 442: ......