en-86
9
ADJUSTMENTS
9.14 BEDKNIFE ADJUSTMENT CLASSIC XP™ REELS ___________________________
Any adjustment to the clearance between the reel blades
and the bedknife should be done at the leading end of the
reel first (the end at which each individual blade first
crosses the bedknife). Then at the opposite end of the reel.
1.
Loosen the lower adjustment screws at each end by
turning them approximately
1/4 turn counterclockwise.
2.
While rotating the reel backwards, turn the upper
adjustment screws (leading end first) until there is
approximately .001, (.025mm) clearance. After
adjusting both ends, recheck the leading end.
NOTE:Too much clearance between the bedknife and the
blades will result in poor cutting quality. Too little clearance
will cause excessive wear to the cutting edges and may
cause damage to the bedknife, reel blades or other compo
-
nents.
3.
Using a wrench rotate the reel forward. The reel must
turn freely and you should just be able to hear the
reel blades making slight contact with the bedknife.
4.
After the bedknife is properly adjusted, tighten the
lower adjustment screw at each end.
5.
Test the cutting head by holding two strips of
newsprint perpendicular to the bedknife. Rotate
the reel with a wrench. The reel must turn freely
and each blade on the reel should cut one of the
two strips of paper.
WARNING
To avoid the possibility of serious injury,
NEVER attempt any cutting head
adjustments while the engine is running.
WARNING
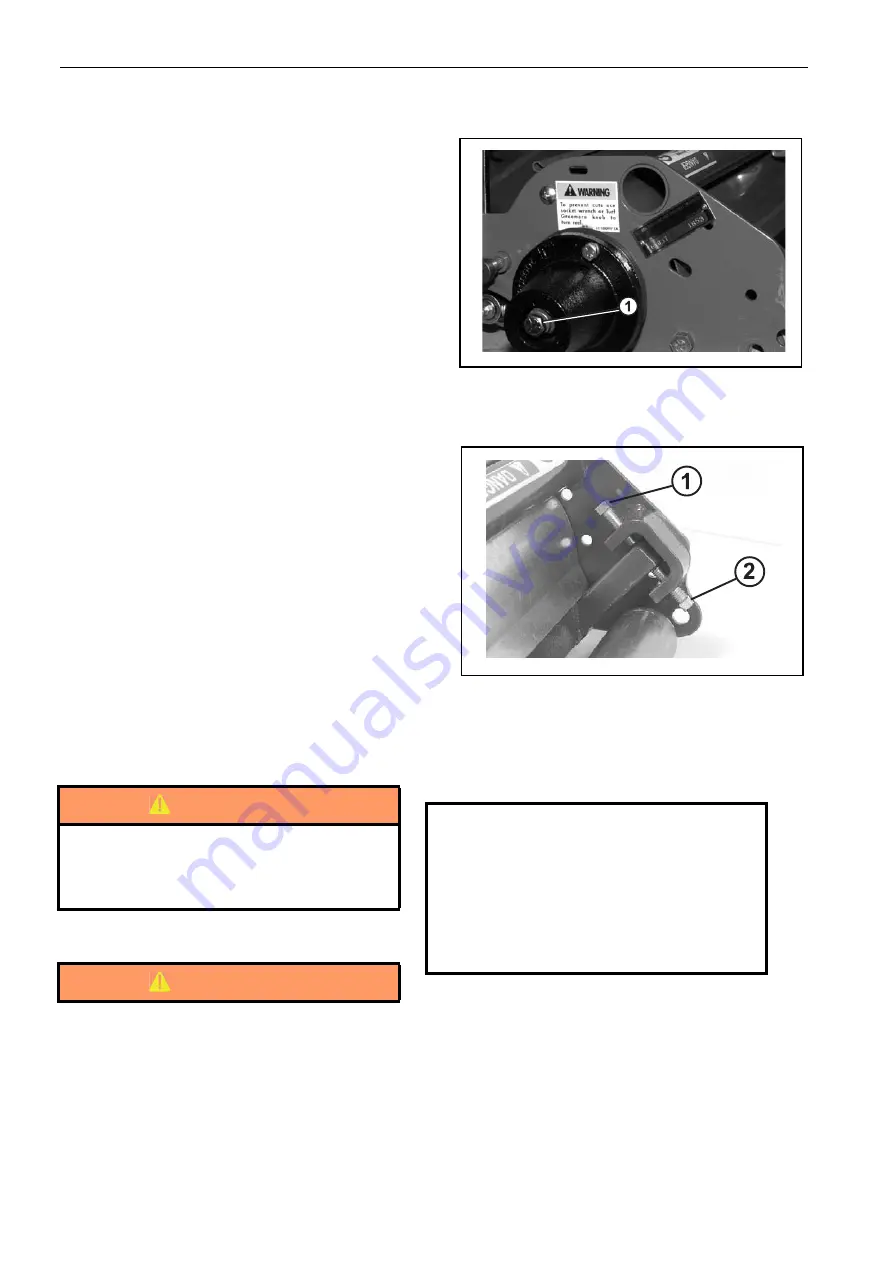
1. Rotate Cutting Reel with this Screw Head
1. Upper Adjustment Screw
2. Lower Adjustment Screw
NEVER rotate the cutting reel by pushing
it with your hands or fingers. Fingers can
become caught between the reel and the
frame resulting in serious injury. Use a
ratchet with a 9/16" socket on the end of
the reel shaft to rotate it during
adjustments and testing.
Содержание 62706
Страница 27: ...en 27 SPECIFICATIONS 4 NOTES...
Страница 31: ...en 31 5 DECALS NOTES...
Страница 32: ...en 32 6 CONTROLS 6 1 OPERATOR WORKSTATION____________________________________________ 6 2 6 2 6 3 6 5 6 4...
Страница 71: ...8 MAINTENANCE LUBRICATION en 71 NOTES...
Страница 90: ...10 ACCESSORIES en 90 NOTES...
Страница 100: ...en 100 13 FUSES AND RELAYS 1 2 3 4 5 6 7 R4 R3 R2 R1 A B...
Страница 102: ...en 102 13 FUSES AND RELAYS NOTES...
Страница 107: ......


