


© 2000, 2003 T
EXAS
I
NSTRUMENTS
I
NCORPORATED
G
ETTING
S
TARTED WITH THE
CBL 2™ S
YSTEM
25
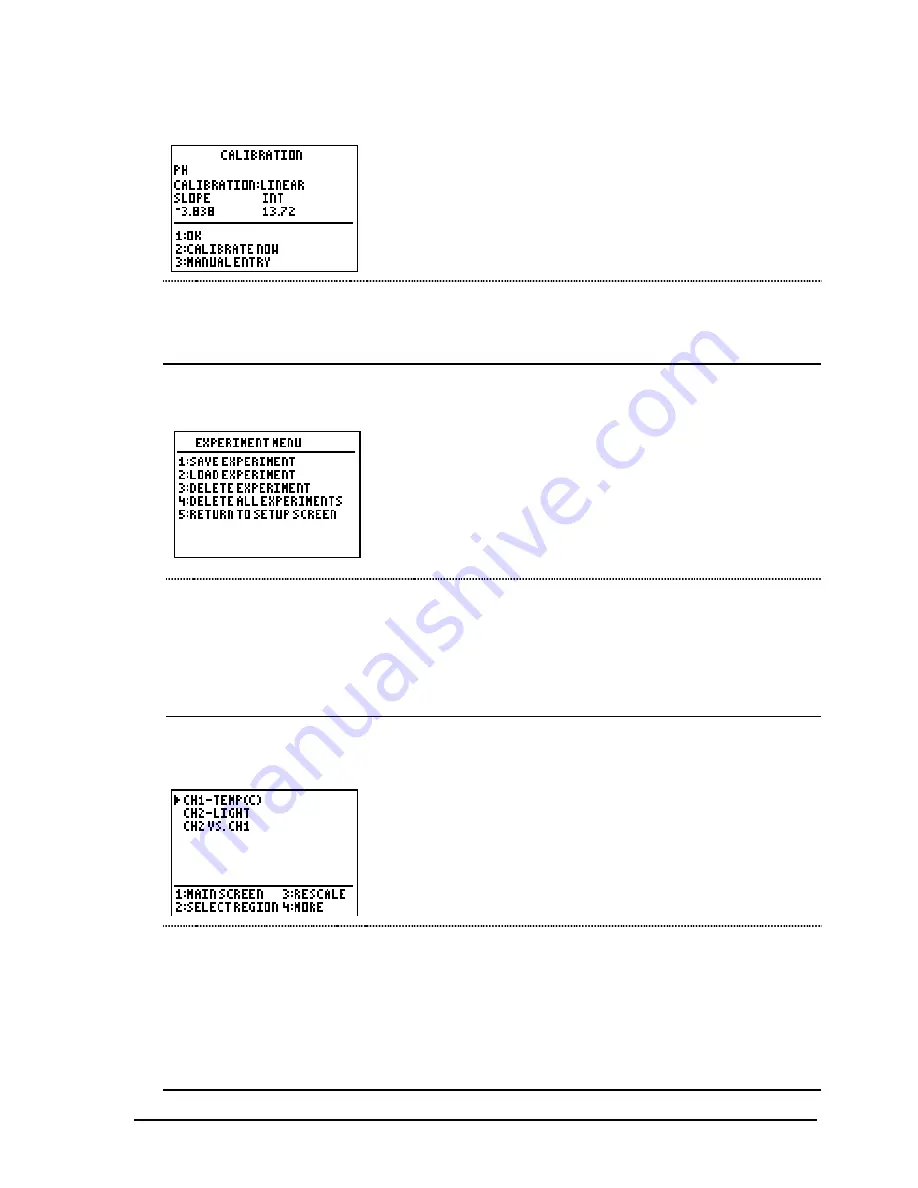
Calibration (option 2 on the Setup screen)
From this screen you calibrate a sensor in either of two
ways. The first way is a two-point calibration; the
second way is to manually enter slope and intercept
values.
Note: Not all sensors can be calibrated. If you select a sensor that
cannot be calibrated, DataMate does not display this screen.
1:
OK
Saves the changes and returns to the setup screen.
2:
CALIBRATE NOW
Allows you to select a two-point calibration method.
3:
MANUAL ENTRY
Allows you to key in known calibration values.
Experiment Menu (option 4 SAVE/LOAD on the Setup screen)
Note: If you have set up your experiment but have not
collected data, this option saves the settings. If you have
both settings and data, it saves both. However, only the
current run of data is saved; previous runs of data that you
may have stored will not be saved.
This screen is available in DataMate for TI-83 Plus, TI-83 Plus
Silver Edition, TI-86, TI-89, TI-92, TI-92 Plus, and
Voyage™ 200 PLT.
1: SAVE EXPERIMENT
Saves the experiment to CBL 2™
FLASH
memory.
2: LOAD EXPERIMENT
Reloads an experiment from CBL 2
FLASH
memory.
3: DELETE EXPERIMENT
Deletes an experiment from CBL 2
FLASH
memory.
4: DELETE ALL EXPERIMENTS
Deletes all experiments from CBL 2
FLASH
memory.
5: RETURN TO SETUP SCREEN Returns to the Setup screen.
Graph Menu (option 3 on the Main Screen)
From this screen you can select the data you want to
graph, select a region of the graph to view or analyze,
and change the scale of the graph.
The top part of the screen shows the graphs that you
can display on the screen. The bottom part lists the
menu options.
1:
MAIN SCREEN
Returns to the Main Screen.
2:
SELECT REGION
Allows you to select a region of the graph. (Data outside
the selected region is cleared from the graph and from the
calculator lists in which the data is stored.)
3:
RESCALE
Allows you to change the graph by choosing autoscale or
entering values for x-scale or y-scale.
4:
MORE
Displays additional graphing options.
Содержание CBL 2
Страница 8: ...VIII GETTING STARTED WITH THE CBL 2 SYSTEM 2000 2003 TEXAS INSTRUMENTS INCORPORATED ...
Страница 38: ...30 GETTING STARTED WITH THE CBL 2 SYSTEM 2000 2003 TEXAS INSTRUMENTS INCORPORATED ...
Страница 86: ...78 GETTING STARTED WITH THE CBL 2 SYSTEM 2000 2003 TEXAS INSTRUMENTS INCORPORATED ...


