4.
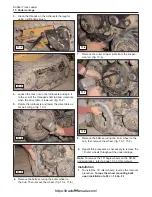
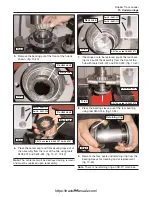
Remove the tension springs that secure the middle
pipe section to the head (upper) pipe and muffler
inlet (lower) pipe. (fig. 12-8)
5.
Remove the upper and middle pipe sections from
the machine. (fig. 12-9)
6.
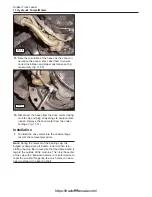
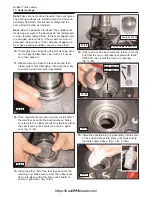
Remove the clamps that secure the inlet and outlet
pipes to the muffler. (fig. 12-10)
Note:
Thoroughly coat all clamped exhaust pipe joints
with a penetrating lubricant prior to attempting to
remove the pipe sections from the muffler. This will
make removal significantly easier.
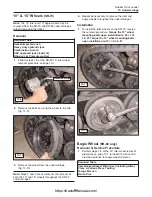
7.
Remove the inlet pipe from the muffler. It may be
necessary to use levers to force the inlet pipe sec-
tion out of the muffler. (fig. 12-11)
Note:
Use caution not to damage the pipe or connec-
tion point during removal.
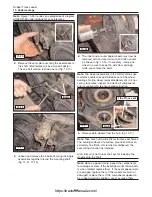
8.
Remove the tail pipes from the muffler. If neces-
sary, tap the pipes lightly with a rubber mallot or
dead blow hammer to loosen the joints. (fig. 12-12)
Note:
Use caution when striking the pipes with a mal-
lot. The pipes are easily damaged and may be disfig-
ured by the blows.
9.
Remove the four bolts (and nuts) securing the muf-
fler to the chassis, then remove the muffler. (fig,
12-13).
12-3
Rubber Track Loader
12. Engine
12-10
12-11
12-8
Spring
12-9
12-12
12-13
https://tractormanualz.com/
Содержание ASV SR70
Страница 5: ...IV https tractormanualz com...
Страница 11: ...1 6 https tractormanualz com...
Страница 41: ...4 20 https tractormanualz com...
Страница 87: ...12 8 https tractormanualz com...
Страница 105: ...14 6 https tractormanualz com...
Страница 109: ...15 4 https tractormanualz com...
Страница 125: ...16 16 https tractormanualz com...
Страница 133: ...17 8 https tractormanualz com...
Страница 137: ...18 4 https tractormanualz com...
Страница 139: ...19 2 https tractormanualz com...

