AALTO CONTROL WMU USER GUIDE
VOT97, Rev 1.1, 1.3.2017
8
6.
To add an Area, tap the menu icon next to the Building name, tap Add area, name the area
(e.g. FLOOR 2), and tap Enter.
7.
If you want to add more Areas, repeat step 6
8.
To remove Buildings or Areas, tap the corresponding menu icon, and tap Remove...
Note that
removing a Building will remove all Areas under that Building!
1. 7. Adding Luminaires
1.
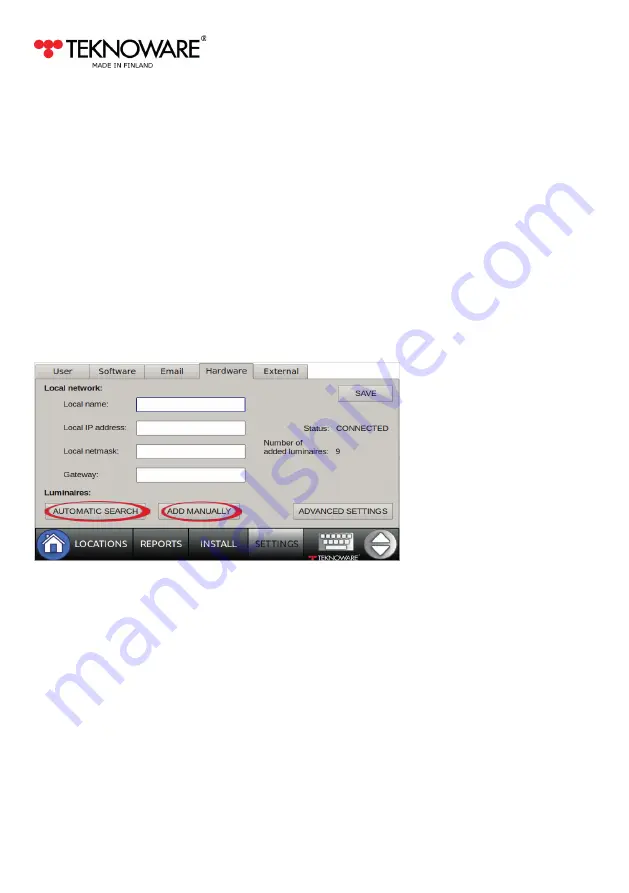
Tap SETTINGS, and open the Hardware tab
2.
To search for luminaires in the wireless range, tap AUTOMATIC SEARCH. Wait for the automatic
search to complete. The amount of added luminaires is displayed.
3.
To install a luminaire manually, click ADD MANUALLY and fill in the data fields (RF ID and Type
are mandatory).
NOTE!
The ADVANCED SETTINGS are for authorized maintenance use only. Do not change these settings!
4.
To import the luminaire data from a CSV file, go to the Software tab, insert the USB drive
containing the CSV file, and tap IMPORT FROM FILE button. Select the file and confirm the
import with the corresponding button.
After adding the luminaires to the system, you can add the luminaires to Locations, and add Note and
Type information to the luminaires. This can be done either manually with the Aalto Control WMU
console, or with a spreadsheet software. See Appendix 1 for instructions on how to use a spreadsheet
/ CSV file to add the information.


