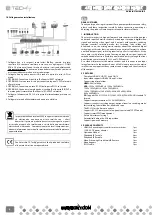
part5: hdMI InpuT
Connect to the HDMI input source devices such as a DVD player or a Set-top
Box with HDMI cable.
part6: dC poWer InpuT
Plug the 12V/2.5A DC power supply into the DC12V power in.
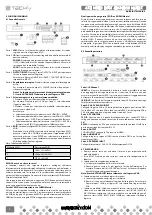
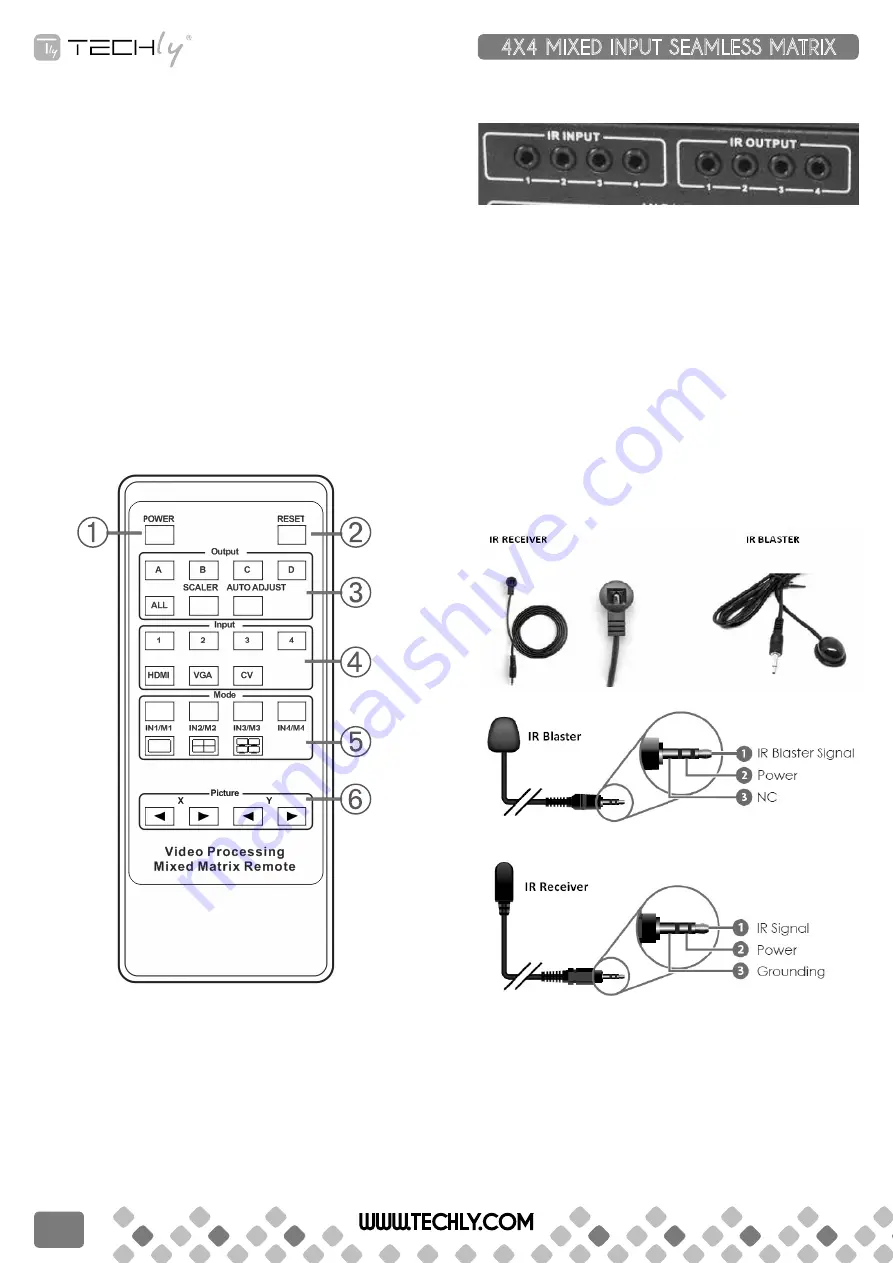
6. reMoTe ConTrol
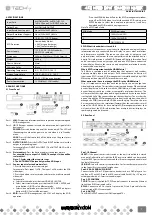
➀
Press this button to power on the matrix or set it to standby mode.
➁
RESET Button: Press this button reset to the factory settings
➂
Output selection and Picture adjust
a. Letters correspond with the outputs on the matrix.
b . Press the button to adjust the output picture. For example: Press output
1>SCALER, the output 1 video will be scaler adjusts.
note: The auTo adJusT button only work on VGa input.
➃
Input selection and Sources input selection:
a. Numbers correspond with the inputs on the matrix.
b. Press the button to select source input. For example: Press input 1>VGA,
The input 1 will be selecting the VGA video input.
➄
Mode selection: Select switch mode; matrix, multi-viewer and video wall,
and in multi-viewer mode, press buttons IN/M1, IN/M2, IN/M3, IN/M4
select different mode; and in video wall mode, press buttons IN/M1, IN/
M2, IN/M3, IN/M4 select different input.
➅
Picture adjust: In video wall mode, users can set the bezel size of the
adjacent images in zoom-in model, to make the whole image looks
coherently
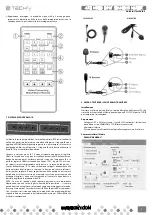
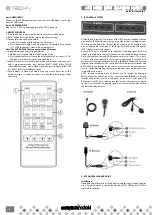
7. Ir ConTrol sysTeM
At Matrix end: Insert the 3.5mm jacks of the IR TX Emitters included with the
unit into the IR TX Emitter ports at the rear of the matrix according to input.
The IR signal is added to the HDMI of the input device so, for example, if the
user is watching Blu-ray on input 1, the IR signal will be directed through the
IR TX1 socket to control the device.
As each IR TX port is allocated to an individual HDMI input port, if the user
is unable to establish IR control of the device, care should be taken to check
firstly, that the IR emitter and HDMI input ports match (Input 1-TX1, Input2-
TX2 etc.) with plugs secured in correct ports, and secondly, that the IR TX
emitter sensors are firmly attached directly to the front of inputs and covering
infrared sensor windows of the source devices. Some later adjustment may
be needed to the location of the sensor to achieve the best performance
results - sometimes moving the sensor to different areas on the source can
improve IR performance.
NOTE: Infrared receiving areas of devices can be located by shining a
flashlight onto the front of the device – the sensor should be able to be seen
through the plastic as a small, round object inside. Insert 3.5mm jacks of IR
RX receivers into RX ports, making sure the receivers themselves are placed
in clear view to receive an infrared signal from the remote handset used to
control the display outputs.
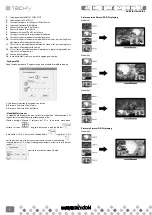
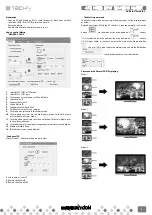
9. pC ConTroller user GuIde
Installation
Download the software from Techly website and just copy MatrixController.
exe to PC which is used to control the Matrix by RS232 COM port or TCP/IP to
complete installation.
WWW.TECHLY.COM
4X4 MIXED INPUT SEAMLESS MATRIX
QUICK INSTALL GUIDE
8
Содержание IDATA HDMI-MX944
Страница 12: ...12 WWW TECHLY COM ...


