See Video-Player Mode
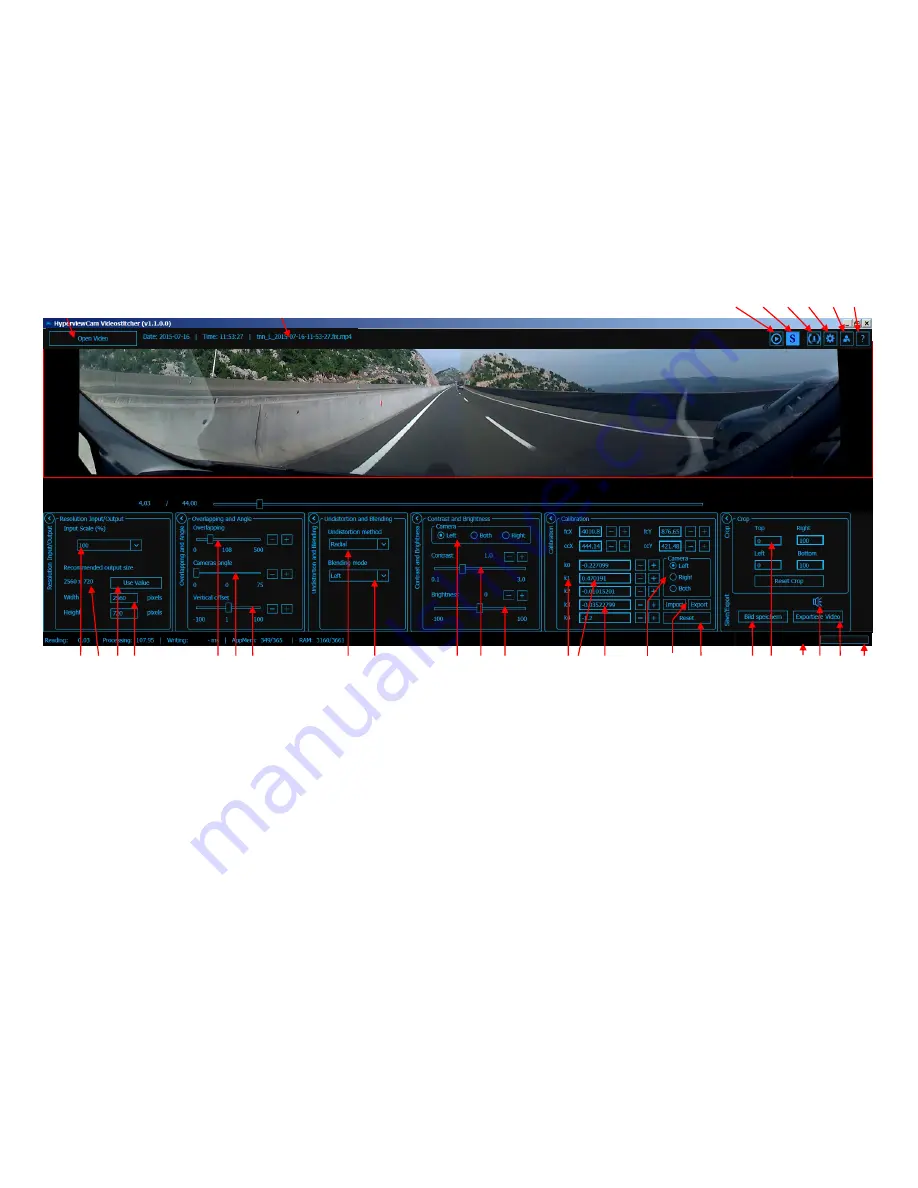
1 Open video
2 File name
3 Select size 100, 75, 50 or 25% of the recorded video as an input video size
for video editing (100% recommended)
4 For size selected under 3, recommended output video size in pixels while
maintaining the side ratio (fewer pixels cause loss of quality in the video)
5 Confirm to use recommended video output size in pixels
6 It is also possible to enter other pixel size for width/vertical
7 Adjust optimal overlapping of videos
8 Adjust the angle "L" and "R" cameras (0 is recommended)
9 Vertical adjustment of right video
10 “Radial” corrects fish-exe distortion, “None” means no correction.
11 Select type of overlapping of videos (“Left” is recommended)
12 Select to which video (L or R) contrast and brightness apply
13 Adjust contrast
14 Adjust brightness
15 Left click on the "K1" or other to set +/- changing step
16 Enter parameters numerically or adjust with "+" and “-”
17 Select which video affect calibration settings
18 Import/Export calibration parameters as Zip file
19 Left-click: Reset current parameter values to initial values.
Right-click at 100% scale (3): Calculate and propagate current calib.
parameters at 100% also for 75%, 50% and 25% scaling.
20 Export current video scene as PNG image
21 Cut current video format from 4 sides
22 Stop exporting stitched video
23 Disable/enable sound in exported video
24 Export stitched video
25 Shows the progress of the video export to
1
2
16 VideoStitcher: Stitcher Mode
7 8 9
11
12 13 14
15
16
6
5
4
3
18 19
20 21
24 25
22
Stop
23
10
17
Содержание HC-200 Hyperview
Страница 26: ...www hyperviewcam com...


