background image

Extinguishing Burner Flame

Procedure

1. Depress and rotate Burner Output Knob to OFF.
2. Close the Valve on the gas supply cylinder.
3. Disconnect the regulator assembly using the “Quick

Disconnect Instructions” on Page 9.  Place the
protective cover on the appliance connection.

Burner Flame

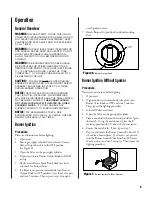
The Burner Flame should be approximately 1/2” tall
when the burner is in operation.  The burner flame may
not be visual in bright light.  The ceramic surface and the
burner screen will heat up to red hot after 3-5 minutes
on HIGH.  The ceramic surface will lose its color and a
blue flame will be visual when the burner is turned down
to LOW.

Burner Low Heat Adjustment

NOTICE: THE LOW HEAT POSITION OF THE FLAME
MUST BE STABLE AND SHOULD NOT WAIVER ON
THE BURNER SURFACE. NEVER ADJUST THE
BURNER SO LOW THAT IT MAY GO OUT DURING
USE.

The burner’s Low Heat Output is preset at the factory. If
it should be necessary to adjust this setting due to a
particular cooking style or different environmental
conditions, follow the instructions below.

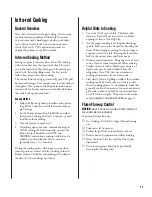
The Low Heat Adjustment Screw only affects burner
operation at the Burner LOW setting. Any efforts to
make adjustments at another setting will have no effect
until the burner is turned to Burner LOW, where the
burner may involuntarily extinguish while gas is still
flowing. This condition is unsafe, therefore adjustments

should ONLY be made with the Burner Output Knob at
the Burner LOW setting while visually monitoring
changes (See Figure 9).

Procedure

1. Follow Burner Ignition procedures and operate

Cherokee for approximately 5 minutes.

2. Turn the Burner Output Knob to the Burner LOW

position and wait until the flame stabilizes.

3. Remove Burner Output Knob from valve stem.
4. Insert small blade type screwdriver into valve stem to

engage recessed Low Heat Adjustment Screw. Turn
clockwise to reduce low heat intensity, or turn
counter-clockwise to increase.  This adjustment
affects the flame at the LOW setting ONLY.

Hazardous Locations and Conditions

Do not use your Cherokee closer than 8” to any
combustible surface (wood wall or wooden fences,
etc.).  Do not use your Cherokee under any
overhead unprotected combustible construction
(i.e., wood, canvas, plastic, etc.).

Do not obstruct the flow of combustion and
ventilation air.

This appliance should only be used outdoors in a
well-ventilated space and must not be used in a
building, garage, or any other enclosed area.

Keep all flammable substances away from this
appliance. These include aerosols and aerosol
containers, gasoline and similar liquids, paper and
paper products, and containers of grease, paint, etc.

Avoid wearing flammable and/or loose clothing such
as neckties, scarves, etc., while using the Cherokee.

Operation 

continued

10

Revised 11/04 -- Z21.89b-2004/CSA 1.18b-2004

Figure 9. 

Low Heat Adjustment

Figure 8.

Burner Flame

Содержание Cherokee CH-10SS

Страница 1: ...oration P O Box 868 Columbia South Carolina 29202 0868 2741 The Boulevard Columbia South Carolina 29209 Telephone 803 783 0750 Toll free 800 331 0097 Fax 803 783 0756 Toll free fax 888 581 0286 Websit...

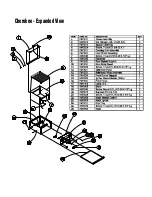
Страница 2: ...Cherokee Expanded View...

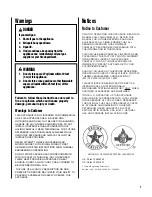
Страница 3: ...Z21 89b 2004 CSA 1 18b 2004 DANGER If you smell gas 1 Shut off gas to the appliance 2 Extinguish any open flame 3 Open lid 4 If odor continues keep away from the appliance and immediately call your g...

Страница 4: ...llow the instructions in your Owner s Manual or alteration of the Cherokee s structure or components or from operator abuse negligence or accident DISCLAIMER OF IMPLIED WARRANTIES This warranty exclud...

Страница 5: ...to give you an overview of your TEC CherokeeTM and to help you get the most from it We ve included vital information about how to set up operate and maintain the grill safely and correctly so I urge...

Страница 6: ...Handling of Liquefied Petroleum Gases ANSI NFPA 58 or CSA B149 1 Natural Gas and Propane Installation Code Location of Cherokee WARNING THIS APPLIANCE SHOULD NOT BE LOCATED CLOSER THAN 8 INCHES TO ANY...

Страница 7: ...IS STORED INDOORS REMOVE AND STORE THE LP GAS CYLINDER OUTDOORS IN A PROTECTED COOL AND DRY LOCATION OUT OF REACH OF CHILDREN THE CYLINDER SHOULD NOT BE STORED IN A BUILDING GARAGE OR ANY OTHER ENCLO...

Страница 8: ...AT ALL TIMES NOTICE THE GAS MUST BE TURNED OFF AT THE SUPPLY CYLINDER AND THE GAS CYLINDER MUST BE DISCONNECTED FROM THE REGULATOR WHEN THE GRILL IS NOT IN USE Be sure to set the gas cylinder upright...

Страница 9: ...BE DISCONNECTED FROM THE REGULATOR WHEN THIS OUTDOOR COOKING GAS APPLIANCE IS NOT IN USE CAUTION WHEN ATTACHED THE TOP OF THE 16 4 OZ DISPOSABLE CYLINDER MUST BE ATTACHED TO THE REGULATOR AND THE BOTT...

Страница 10: ...Disconnect Instructions Procedure 1 To connect push sleeve of socket toward the regulator See Figure A 2 Insert plug See Figure B release sleeve 3 Push plug until sleeve snaps forward locking plug in...

Страница 11: ...ions before lighting 1 Open cover 2 Ensure gas supply cylinder Valve is closed Ensure Burner Output Knob is in the OFF position see Figure 6 3 Open the Valve on the gas supply cylinder 4 Depress and r...

Страница 12: ...his condition is unsafe therefore adjustments should ONLY be made with the Burner Output Knob at the Burner LOW setting while visually monitoring changes See Figure 9 Procedure 1 Follow Burner Ignitio...

Страница 13: ...shing may occur when juices vaporize on contact with the Cooking Grid and Burner surface The flashes and smoke greatly enhance the flavor by char cooking your food Helpful Hints In Cooking 1 Cover the...

Страница 14: ...Thick High fire 21 2 min each side 5 min Medium High fire 3 min each side 6 min Well Done Chicken Parts High fire 2 min each side 20 25 min Balance medium low to low fire Chicken Breast 3 4 Thick Fil...

Страница 15: ...en space at the cooking surface the Cooking Grid provide sufficient open space Also never cover the ventilation louvers with foil or other materials that prevent air flow Specifically Do not cover the...

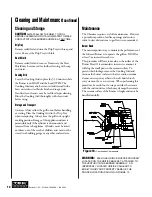
Страница 16: ...d outdoors out of the reach of children and must not be stored in a building garage or any other enclosed area Maintenance The Cherokee requires very little maintenance However a periodic inspection o...

Страница 17: ...M1520 Ceramic Burner Clamp 2 5 FM1521 Screen Retainer Clamp 2 6 HW0555 Screw Hex HD 1 4 20 X 1 1 2 Lg S S 1 7 HW2505 Screw Slotted Hex HD 10 24 X 1 1 2 Lg S S 2 8 FM1519 Burner Head Clamp 2 9 HW0609 N...

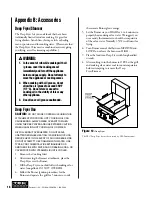
Страница 18: ...p Fryer one third full with cooking oil or water one gallon DO NOT OVERFILL 4 Follow the Burner Ignition procedures for the Burner and operate the grill for 5 minutes or until the ceramic Burner glows...

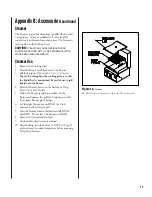
Страница 19: ...tained Be careful not to spill liquid onto the Burner 4 Place the Steamer Screen in the bottom of Deep Fryer Cover with the lid 5 Follow the Burner Ignition procedures for the Burner and operate the g...

Страница 20: ...o storing Griddle Use 1 Remove the Cooking Grid 2 Place the Griddle over the Burner 3 Follow the Burner Ignition procedures for the Burner and operate the grill for 5 minutes or until the ceramic burn...

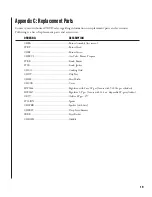
Страница 21: ...ator with hose LP gas for use with 5 20 lbs gas cylinders HW0267 Regulator LP gas for use with 16 4 oz disposable LP gas cylinders ORI57 Orifice LP gas 57 ST30IGN Igniter CHSPKR Sparker with wire CHFR...

Страница 22: ...sition and let it cool for at least 2 minutes a Overloaded with grease drippings or build up clogging ports b Burner overheated due to inadequate ventilation too much cooking surface covered c Cracked...

Отзывы: