manualshive.com logo in svg
background image


INSTRUCTION MANUAL


MANUEL D'INSTRUCTION


MANUAL DE INSTRUCCIONES


IMPORTANT: 

Read Before Using. 

IMPORTANT: 

Lire avant usage. 

IMPORTANTE: 

Leer antes de usar. 

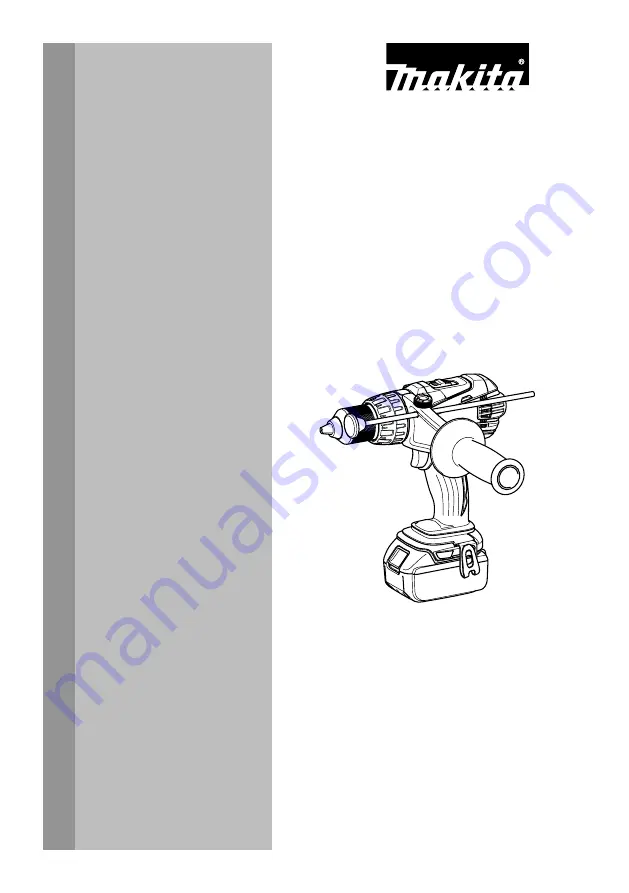
Cordless Hammer Driver Drill

Perceuse Percussion-Visseuse sans

Fil 

Rotomartillo Atornillador 

Inalámbrico 

XPH03 
   

012713 

Содержание XT263M

Страница 1: ...RUCTION MANUAL DE INSTRUCCIONES IMPORTANT Read Before Using IMPORTANT Lire avant usage IMPORTANTE Leer antes de usar Cordless Hammer Driver Drill Perceuse Percussion Visseuse sans Fil Rotomartillo Ato...

Страница 2: ...a power tool Distractions can cause you to lose control Electrical Safety 4 Power tool plugs must match the outlet Never modify the plug in any way Do not use any adapter plugs with earthed grounded...

Страница 3: ...and clean Properly maintained cutting tools with sharp cutting edges are less likely to bind and are easier to control 23 Use the power tool accessories and tool bits etc in accordance with these inst...

Страница 4: ...ately It may result in a risk of overheating possible burns and even an explosion 4 If electrolyte gets into your eyes rinse them out with clear water and seek medical attention right away It may resu...

Страница 5: ...ibly If the cartridge does not slide in easily it is not being inserted correctly Battery protection system Lithium ion battery with star marking 1 012128 Lithium ion batteries with a star marking are...

Страница 6: ...1 012702 To change the speed first switch off the tool and then slide the speed change lever to the 2 side for high speed or 1 side for low speed Be sure that the speed change lever is set to the cor...

Страница 7: ...with the tool stopped press the button on the switch panel and the remaining battery capacity will be signaled on the panel The status displayed on the switch panel and the remaining battery capacity...

Страница 8: ...riking reinforcing rods embedded in the concrete Always use the side grip auxiliary handle and firmly hold the tool by both side grip and switch handle during operations Failure to do so may result in...

Страница 9: ...ow the tool to rest for 15 minutes before proceeding with a fresh battery First slide the action mode change lever so that it points to the marking The adjusting ring can be aligned in any torque leve...

Страница 10: ...ughly inspected and tested before leaving the factory It is warranted to be free of defects from workmanship and materials for the period of ONE YEAR from the date of original purchase Should any trou...

Страница 11: ...nts 2 N utilisez pas les outils lectriques dans les atmosph res explosives par exemple en pr sence de liquides gaz ou poussi res inflammables Les outils lectriques produisent des tincelles au contact...

Страница 12: ...s outils lectriques 17 Ne forcez pas l outil lectrique Utilisez l outil lectrique ad quat suivant le type de travail effectuer Si vous utilisez l outil lectrique ad quat et respectez le r gime pour le...

Страница 13: ...transmettre une d charge lectrique l utilisateur 4 Tenez l outil par ses surfaces de prise isol es pendant toute op ration o l accessoire de fixation pourrait venir en contact avec un c blage dissimu...

Страница 14: ...duit la dur e de service de la batterie 3 Rechargez la batterie une temp rature ambiante comprise entre 10 C et 40 C 50 F 104 F Si la batterie est chaude laissez la refroidir avant de la recharger 4 R...

Страница 15: ...uyez simplement sur la g chette La vitesse de l outil augmente mesure que l on accro t la pression exerc e sur la g chette Pour l arr ter rel chez la g chette Allumage de la lampe avant 1 012700 ATTEN...

Страница 16: ...la fl che pointe vers l indication de l anneau ATTENTION R glez toujours l anneau parfaitement sur le symbole du mode d sir Si vous faites fonctionner l outil alors que l anneau se trouve mi course e...

Страница 17: ...retirez la poign e puis tournez la et ins rez la de nouveau Installation ou retrait de l embout ou du foret 1 012697 Tournez le manchon dans le sens inverse des aiguilles d une montre pour ouvrir les...

Страница 18: ...tourner l outil au ralenti puis retirez partiellement le foret du trou En r p tant cette op ration quelques fois le trou se d bouchera et vous pourrez poursuivre le per age normalement Poire soufflant...

Страница 19: ...toujours que l outil est hors tension et que la batterie est retir e avant d y effectuer tout travail d inspection ou d entretien N utilisez jamais d essence de benzine de solvant d alcool ou d autre...

Страница 20: ...initial Si un probl me quelconque devait survenir au cours de cette p riode d un an veuillez retourner l outil COMPLET port pay une usine ou un centre de service apr s vente Makita Makita r parera l o...

Страница 21: ...ica Seguridad en el rea de trabajo 1 Mantenga el rea de trabajo limpia y bien iluminada Las reas oscuras o desordenadas son propensas a accidentes 2 No utilice las herramientas el ctricas en atm sfera...

Страница 22: ...arlos debidamente La utilizaci n de estos dispositivos reduce los riesgos relacionados con el polvo Mantenimiento y uso de la herramienta el ctrica 17 No fuerce la herramienta el ctrica Utilice la her...

Страница 23: ...ca por las superficies de agarre aisladas al realizar una operaci n en la que el porta til pueda entrar en contacto con cables ocultos Si el porta til entra en contacto con un cable con corriente las...

Страница 24: ...rtucho de bater a a temperatura ambiente de 10 C 40 C 50 F 104 F Si un cartucho de bater a est caliente d jelo enfriar antes de cargarlo 4 Recargue el cartucho de la bater a una vez cada seis meses si...

Страница 25: ...ue el gatillo interruptor se acciona debidamente y que vuelve a la posici n OFF apagado cuando lo suelta Para poner en marcha la herramienta simplemente apriete el gatillo interruptor La velocidad de...

Страница 26: ...e la flecha apunte hacia la marca del anillo PRECAUCI N Ponga siempre el anillo correctamente en la marca del modo que desee Si utiliza la herramienta con el anillo puesto a medias entre las marcas de...

Страница 27: ...a las agujas del reloj Al girar la empu adura lateral afl jela y ret rela para as voltearla y reinsertarla de nuevo Instalaci n o desmontaje de la punta de atornillar o la broca 1 012697 Gire el mand...

Страница 28: ...cuando el agujero se atore con virutas y part culas En su lugar haga funcionar la herramienta sin presi n despu s saque parcialmente la broca del agujero Repitiendo esto varias veces se limpiar el ag...

Страница 29: ...adrar Coloque la punta de la broca en la mella y comience a taladrar Emplee un lubricante para operaciones de corte cuando taladre metales Las excepciones son hierro y lat n que deber n ser taladrados...

Страница 30: ...austivamente antes de salir de f brica Se garantiza que va a estar libre de defectos de mano de obra y materiales por el periodo de UN A O a partir de la fecha de adquisici n original Si durante este...

Страница 31: ...31...

Страница 32: ...polvos creados por el lijado aserrado esmerilado taladrado y otras actividades de la construcci n contienen sustancias qu micas reconocidas por el Estado de California como causantes de c ncer defecto...

Страница 33: ...MANUEL D INSTRUCTION MANUAL DE INSTRUCCIONES Cordless Impact Driver Tournevis Chocs sans Fil Atornillador de Impacto Inal mbrico XDT11 IMPORTANT Read Before Using IMPORTANT Lire avant usage IMPORTANTE...

Страница 34: ...or wet con ditions Water entering a power tool will increase the risk of electric shock 4 Do not abuse the cord Never use the cord for carrying pulling or unplugging the power tool Keep cord away fro...

Страница 35: ...Shorting the battery termi nals together may cause burns or a fire 4 Under abusive conditions liquid may be ejected from the battery avoid contact If con tact accidentally occurs flush with water If l...

Страница 36: ...y when installing or removing battery cartridge Failure to hold the tool and the battery cartridge firmly may cause them to slip off your hands and result in damage to the tool and battery cartridge a...

Страница 37: ...erature the indication may differ slightly from the actual capacity Switch action 1 1 Switch trigger CAUTION Before inserting the battery car tridge into the tool always check to see that the switch t...

Страница 38: ...cartridge is removed before carrying out any work on the tool Installing or removing driver bit socket bit 12 mm 15 32 9 mm 3 8 Use only the driver bit socket bit shown in the figure Do not use any o...

Страница 39: ...adjust pressure on the switch trigger so that the screw is not damaged NOTE Hold the tool pointed straight at the screw NOTE If the impact force is too strong you tighten the screw for a time longer...

Страница 40: ...ake out the worn carbon brushes insert the new ones and replace the carbon brush caps in reverse 1 1 Carbon brush cap 4 Make sure to place the lead wire in opposite side of the arm 1 2 1 Lead wire 2 C...

Страница 41: ...riod return the COMPLETE tool freight prepaid to one of Makita s Factory or Authorized Service Centers If inspection shows the trouble is caused by defective workmanship or material Makita will repair...

Страница 42: ...ctrique sont con ues pour s adapter parfaitement aux prises de courant Ne modifiez jamais la fiche de quelque fa on que ce soit N utilisez aucun adaptateur de fiche sur les outils lectriques avec mise...

Страница 43: ...rique n a subi aucun dommage affectant son bon fonction nement Le cas ch ant faites r parer l outil lectrique avant de l utiliser De nombreux accidents sont caus s par des outils lectriques mal entret...

Страница 44: ...rovo quer un fort courant une surchauffe parfois des br lures et m me une panne 6 Ne rangez pas l outil ou la batterie dans des emplacements o la temp rature peut atteindre ou d passer 50 C 122 F 7 Ne...

Страница 45: ...automatiquement pendant l utilisation lorsque l outil et ou la batterie sont dans l une des situa tions suivantes En surcharge L outil est utilis d une mani re entra nant une consom mation anormale de...

Страница 46: ...cela peut affecter son intensit d clairage Fonctionnement de l inverseur 1 A B 1 Levier inverseur ATTENTION V rifiez toujours le sens de rotation avant de mettre l outil en marche ATTENTION N actionn...

Страница 47: ...E S il est difficile d ins rer l embout tournevis tirez sur le manchon et ins rez l embout fond dans le manchon NOTE Apr s avoir ins r l embout tournevis assu rez vous qu il est bien verrouill S il so...

Страница 48: ...de serrage d pend d un certain nombre de facteurs dont les suivants Une fois le serrage termin v rifiez toujours le couple avec une cl dynamom trique 1 Lorsque la batterie est presque compl tement d...

Страница 49: ...dans l outil et rodez les char bons en faisant tourner l outil vide pendant environ 1 minute 8 V rifiez l outil pendant qu il tourne et assurez vous que le frein lectrique fonctionne lorsque vous lib...

Страница 50: ...tuitement Cette garantie ne s applique pas dans les cas o des r parations ont t effectu es ou tent es par un tiers des r parations sont n cessaires en raison de l usure normale l outil a t malmen mal...

Страница 51: ...s de conexi n de las herramientas el ctricas deber n encajar perfectamente en la toma de corriente No modifique nunca la cla vija de conexi n de ninguna forma No utilice ninguna clavija adaptadora con...

Страница 52: ...i n que pueda afectar al funcionamiento de la herramienta el ctrica Si la herramienta el ctrica est da ada haga que se la reparen antes de utilizarla Muchos accidentes son ocasionados por herramientas...

Страница 53: ...enta miento posibles quemaduras e incluso una descompostura 6 No guarde la herramienta ni el cartucho de bater a en lugares donde la temperatura pueda alcanzar o exceder los 50 C 122 F 7 Nunca inciner...

Страница 54: ...herramienta para prolongar la vida til de la bater a La herramienta se detendr autom ticamente durante el funcionamiento si la herramienta y o la bater a se someten a una de las siguientes condicione...

Страница 55: ...Tenga cuidado de no rayar la lente de la l mpara ya que la iluminaci n podr a disminuir Accionamiento del interruptor de inversi n 1 A B 1 Palanca del interruptor de inversi n PRECAUCI N Confirme siem...

Страница 56: ...e caso procure inser tar la broca de nuevo siguiendo las instrucciones de arriba NOTA Si tiene dificultades para insertar la punta de destornillador jale el mandril e inserte la broca tanto como sea p...

Страница 57: ...una operaci n de prueba para determinar el tiempo adecuado de fijaci n para sus tornillos La torsi n de apriete se ve afectada por una amplia variedad de factores incluyendo los siguientes Despu s de...

Страница 58: ...obillas de carb n hayan encajado en forma segura en los orificios de los portaescobillas 1 2 1 Orificio 2 Tapa de las escobillas de carb n 6 Vuelva a instalar la cubierta posterior y apriete los dos t...

Страница 59: ...do a un centro de servicio autorizado o de f brica Makita Si la inspecci n muestra que el problema ha sido a causa de un defecto de mano de obra o material Makita har la reparaci n o a su discreci n e...

Страница 60: ...SA only ADVERTENCIA Algunos polvos creados por el lijado aserrado esmerilado taladrado y otras actividades de la construcci n contienen sustancias qu micas reconocidas por el Estado de California como...

Отзывы: