background image


IMPORTANT SAFETY INSTRUCTIONS

 1)  Read these instructions.

 2)  Keep these instructions.

 3)  Heed all warnings.

 4)  Follow all instructions.

 5)  Do not use this apparatus near water.

 6)  Clean only with dry cloth.

 7)  Do  not  block  any  ventilation  openings.  Install  in  accordance 

with the manufacturer’s instructions.

 8)  Do  not  install  near  any  heat  sources  such  as  radiators,  heat 

registers, stoves, or other apparatus (including amplifiers) that 
produce heat.

 9)  Do  not  defeat  the  safety  purpose  of  the  polarized  or 

grounding-type  plug.  A  polarized  plug  has  two  blades  with 
one  wider  than  the  other.  A  grounding  type  plug  has  two 
blades  and  a  third  grounding  prong.  The  wide  blade  or  the 
third  prong  are  provided  for  your  safety.  If  the  provided 
plug  does  not  fit  into  your  outlet,  consult  an  electrician  for 
replacement of the obsolete outlet.

10) Protect  the  power  cord  from  being  walked  on  or  pinched 

particularly  at  plugs,  convenience  receptacles,  and  the  point 
where they exit from the apparatus.

11) Only  use  attachments / accessories  specified  by  the 

manufacturer.

12) Use  only  with  the  cart,  stand,  tripod,


b r a c k e t ,  o r  t a b l e  s p e c i f i e d  b y  t h e 
manufacturer, or sold with the apparatus. 
When  a  cart  is  used,  use  caution  when 
moving the cart / apparatus combination to 
avoid injury from tip-over.

13) Unplug  this  apparatus  during  lightning  storms  or  when 

unused for long periods of time.

14) Refer  all  servicing  to  qualified  service  personnel.  Servicing  is 

required when the apparatus has been damaged in any way, 
such  as  power-supply  cord  or  plug  is  damaged,  liquid  has 
been  spilled  or  objects  have  fallen  into  the  apparatus,  the 
apparatus  has  been  exposed  to  rain  or  moisture,  does  not 
operate normally, or has been dropped.

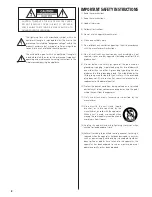
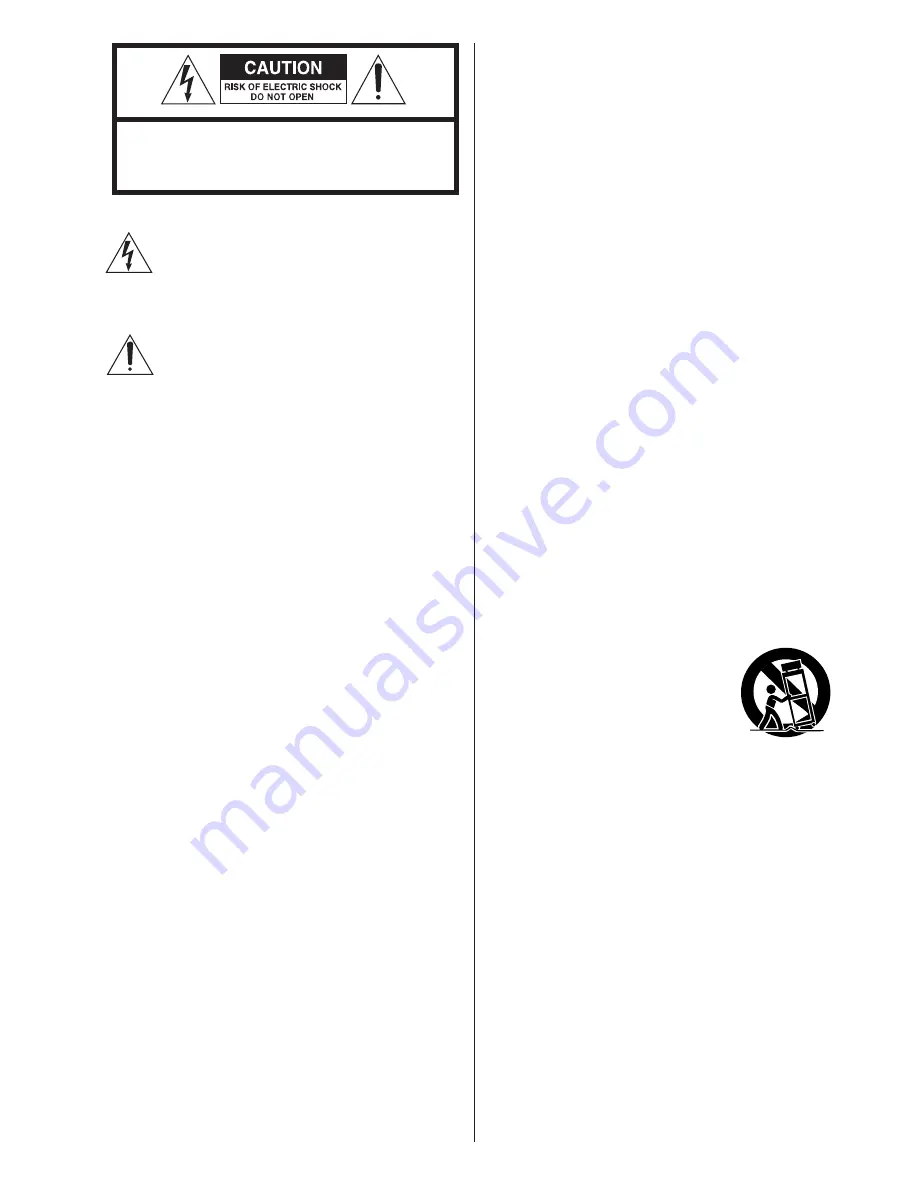
CAUTION:  TO  REDUCE  THE  RISK  OF  ELECTRIC  SHOCK, 
DO  NOT  REMOVE  COVER  (OR  BACK).  NO  USER-
SERVICEABLE  PARTS  INSIDE.  REFER  SERVICING  TO 
QUALIFIED SERVICE PERSONNEL.

The  lightning  flash  with  arrowhead  symbol,  within  an 
equilateral  triangle,  is  intended  to  alert  the  user  to  the 
presence of uninsulated “dangerous voltage” within the 
product’s enclosure that may be of sufficient magnitude 
to constitute a risk of electric shock to persons.

The  exclamation  point  within  an  equilateral  triangle  is 
intended to alert the user to the presence of important 
operating and maintenance (servicing) instructions in the 
literature accompanying the appliance.

Содержание SR-3DAB

Страница 1: ...SR 3DAB Hi Fi Table Radio CD for iPod iPhone OWNER S MANUAL 77 20SR00300020...

Страница 2: ...he cart stand tripod bracket or table specified by the manufacturer or sold with the apparatus When a cart is used use caution when moving the cart apparatus combination to avoid injury from tip over...

Страница 3: ...e shall remain readily operable Products with Class construction are equipped with a power supply cord that has a 3 prong grounding plug The cord of such a product must be plugged into an AC outlet th...

Страница 4: ...d soap Be sure to remove any excess liquid completely Do not use thinner benzine or alcohol as they might damage the surface of the unit Allow the surface of the unit to dry completely before using it...

Страница 5: ...se replace the battery with a new one For information about the collection of batteries please contact your local municipality your waste disposal service or the place where you purchased them Battery...

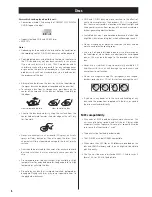
Страница 6: ...Do not play any disc that is warped scratched deformed or damaged Playing such discs may cause irreparable harm to the playback mechanism CD R and CD RW discs are more sensitive to the effects of hea...

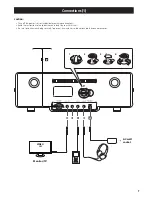
Страница 7: ...ket Connections 1 CAUTION Turn off the power set to standby before making connections Read the instructions of each device you intend to use with this unit Be sure to connect each plug securely To pre...

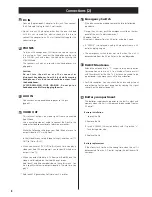
Страница 8: ...e AC adapter s plug to the AC wall socket Do not use any AC adapters other than the one included with this unit to avoid fire electric shock etc Be sure to connect the adapter to an AC wall socket tha...

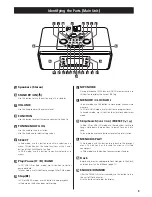
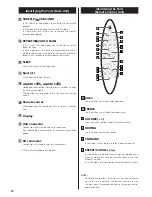
Страница 9: ...rking I MP3 MODE During playback of MP3 disc or USB SD memory card use this button to display the current ID3 Tag J MEMORY CLOCK ADJ In tuner mode use this button to store preset channels into memory...

Страница 10: ...s button to start shuffle playback In FM mode use this button to select an RDS mode In DAB mode use this button to choose the type of information displayed P REPEAT AUTO SCAN In CD USB SD or iPod mode...

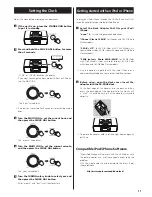
Страница 11: ...e adapter hold its left and right sides and gently pull it up Compatible iPod iPhone Software If your iPod iPhone will not work with the SR 3DAB or with the remote control unit a software update might...

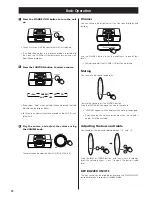
Страница 12: ...econds press the volume buttons or to adjust the bass or treble level KEY BUZZER ON OFF The key sound can be disabled by pressing the MENU DISPLAY button more than 3 seconds in standby mode 1 Press th...

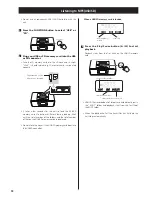
Страница 13: ...yed When the disc is inserted with playable face forward ERR DISC is displayed few seconds and the disc will be ejected Do not insert a CD disc obliquely but horizontally When a CD is loaded When a MP...

Страница 14: ...otal number of files on the USB SD memory card are displayed Do not close the cover if the USB SD memory card does into the USB SD connector When a USB SD memory card is loaded 3 Press the Play Pause...

Страница 15: ...on is pressed during playback the track file being played will be played from the beginning To return to the beginning of the previous track file press the button twice During programmed playback the...

Страница 16: ...B SD memory card then press the MEMORY button The track is programmed and P 02 is displayed Repeat steps 3 and 4 to program more tracks or files of MP3 You can program up to 32 tracks 5 When the selec...

Страница 17: ...ck file is added to the end of the programme To overwrite the program In the stop mode press the MEMORY button repeatedly until the program number to be changed appears on the display Select a new tra...

Страница 18: ...tracks will be played repeatedly Press the REPEAT button twice Rep all lights During programmed playback programmed tracks will be played repeatedly Repeat all the tracks in the folder MP3 USB SD All...

Страница 19: ...od or iPhone 1 To select iPod mode Select iPod using the FUNCTION button If an iPod iPhone is already docked playback will start If no iPod iPhone is docked the iPod indicator on the display blinks To...

Страница 20: ...ed from the beginning If the button is pressed once during playback the song currently being played will be played from the beginning To return to the beginning of the previous song press the button t...

Страница 21: ...t icon appears on the iPod iPhone s display Activating the shuffle mode During playback press the SHUFFLE button to change the shuffle mode Each time the SHUFFLE button is pressed the iPod SHUFFLE set...

Страница 22: ...hin 7 seconds the display will return to the currently tuned station If you move the unit to a new area or you want to check to see if there are new channels available in your area you can scan to fin...

Страница 23: ...f music broadcast by the radio station such as Pop Rock or Classical music Ensemble name This displays the name of the enesemble that is broadcasting the programme Date and time This displays the curr...

Страница 24: ...el The lower the figure the better the quality of the received broadcast In addition if the unit is put into information mode by pushing the STANDBY ON button the information display will reappear the...

Страница 25: ...nd listen to them the unit will memorize the top ten stations you listen to and list them at the top of the service list Alphanumeric This is the default order Stations are listed by name with numbers...

Страница 26: ...ELECT button to cancel Manual tune and resume normal reception Local scan Auto scan The unit will scan the DAB bands between 10A to 13F and add the channels found to the channel list 1 In DAB menu mod...

Страница 27: ...dcasts might have no DRC applied to allow the listener to hear the full dynamic range of the source volume 1 In DAB menu mode select DRC value page 25 2 Press the SELECT button The current option is d...

Страница 28: ...ons You can also use the PRESET buttons on the main unit 3 Press and hold the MEMORY button for more than 2 seconds Hold down more than 2sec The station is stored To store more stations repeat steps 1...

Страница 29: ...stop automatically Repeat this step until you find the station that you want to hear After you tune in a station using the automatic tuning it is received in Mono mode To switch to Stereo mode press t...

Страница 30: ...han 2 seconds Hold down more than 2sec To store more stations repeat steps 1 to 3 Saving presets automatically Hold down more than 2sec Press and hold the AUTO SCAN button for more than 2 seconds Up t...

Страница 31: ...T the news of stations composed of up to 64 symbols will be displayed If there is no RT data NO RT will be displayed PTY Programme Type When you select PTY the programme type will be displayed If ther...

Страница 32: ...using the FUNCTION button 3 Play the source and adjust the volume of both the SR 3DAB and the connected audio device When using the headphones jack of a device if you do not adjust its volume you migh...

Страница 33: ...on The clock minutes value blinks You can also use the Skip buttons on the remote control unit instead of the MULTI JOG Timer 1 Sleep timer You can set the sleep timer so that the unit turns itself of...

Страница 34: ...gradually increase to the set volume when the unit is turned on by the wake up timer But the BUZZER sound keeps in the same volume If the source is set to iPod but no iPod iPhone is set the tuner will...

Страница 35: ...number light on the display When the timer is turned off the wake up timer indicator or disappears from the display Press the ALARM 1 or ALARM 2 button again to turn it on Note for use with an iPod To...

Страница 36: ...eive a station clearly DAB tuner No sound Ensure that the unit has been able to locate a DAB station NO STATIONS AVAILABLE appears on the display Confirm that a DAB broadcast is available in your area...

Страница 37: ...t 230V 50Hz Power Consumption 27W Dimension W x H x D 355 125 233mm Weight Net 2 7kg Standard Accessories Remote Control Unit RC 1236 1 Battery CR2025 for Remote Control Unit 1 Battery CR2032 for memo...

Страница 38: ...ontebello California 90640 Phone 323 726 0303 TEAC CANADA LTD 5939 Wallace Street Mississauga Ontario L4Z 1Z8 Canada Phone 905 890 8008 TEAC MEXICO S A De C V TEAC UK LIMITED Unit 19 20 The Courtyards...

Отзывы: