SECTION 17: Getting Label Print Job Started
49
ATTENTION
1. Please be aware that what the P-55 offers for color correction is the function of minimizing differences
that can be observed in printed results across units and not the function of eliminating all such
differences.
2. You must specify color correction settings for each ink ribbon type. There are two types of ink ribbons
available: PHOTO and COLOR.
3. Make sure that you perform color corrections every time you replace the printer head.
Follow the steps below.
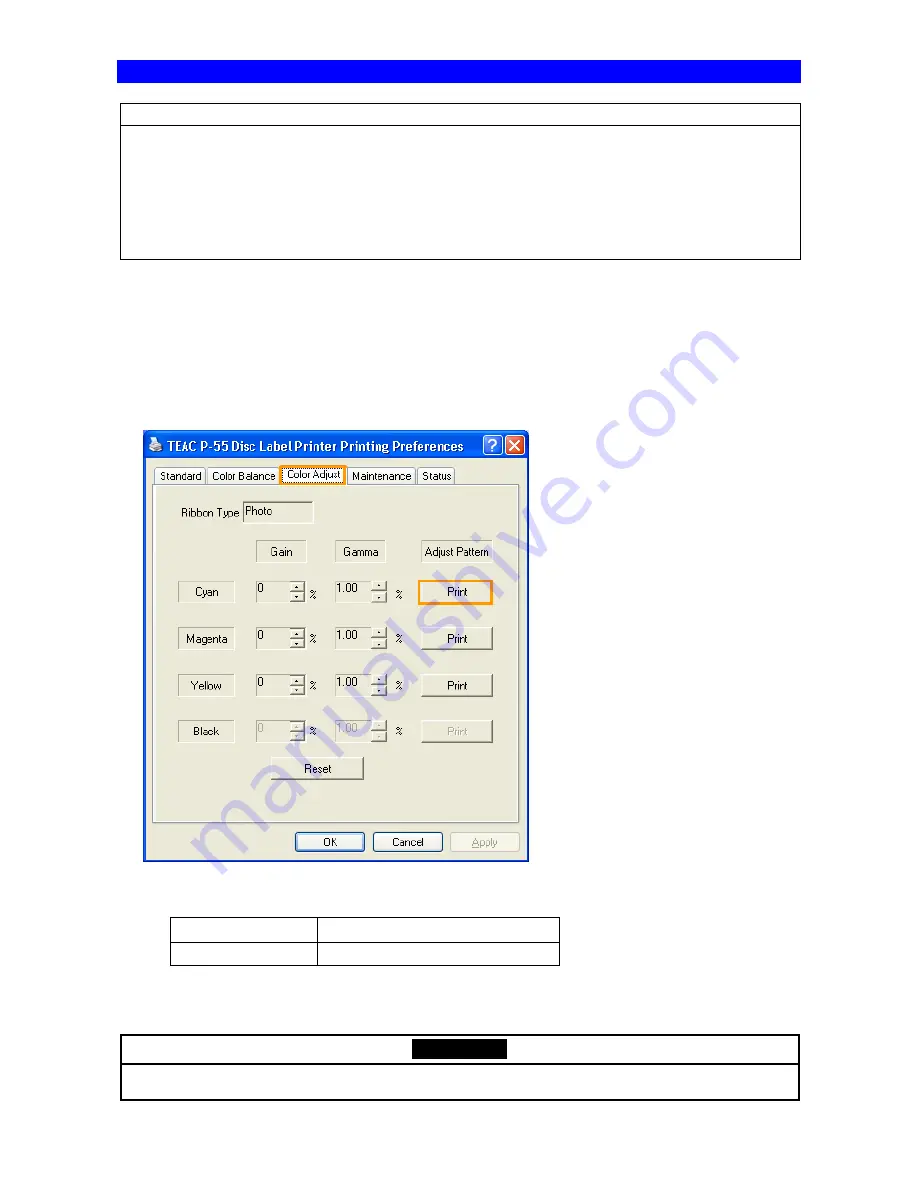
1) To check the current state of the unit first, print cyan, magenta, yellow, and black (*Note) each without
entering correction values.
*Note: You do not need to perform color correction to black if you use a PHOTO or COLOR(+P) ribbon.
You need to perform color correction to black as well if you use a COLOR or black ribbon.
Place a disc in the appropriate stacker, select a color you want to print from the color correction dialog,
and click
right under
Adjust pattern
. (See below)
*Cyan is printed in the following example.
- The following adjustment can be performed using color correction.
Gamma correction
mainly adjust highlights of colors.
Gain correction
mainly adjust shadows of colors.
(The gamma and gain values are preset to 0% and 1.00 respectively at the factory.)
ATTENTION
If more than one P-55 unit is connected to the computer you use, you are unable to make color
corrections for those P-55 units at the same time. Perform color corrections for them one by one.


